Afternoon Tea Tilda
Welcome! Marie here for an Anything goes Friday post for you. It is moving into the Holiday Season and I colored this adorable image of Tilda taking a break from her busy shopping for a warm cup of tea.
Techniques:
- Copic Ink to Paper,
- Copic Tip to Tip Inking
- Creative Background: Copic Marbleized and Whimsical Background
- Masking
- Paper Quilling
Supplies and Tools
Image: Afternoon Tea Tilda (Magnolia), Stone Wall Stamp (You can use a bench or any background stamp to allow Tilda to sit).
Medium: Copic Sketch Markers (.too), Copic Opaque Ink (.too), Grey Prisma Pencil, Copic Blue Multiliner (.too).
Paper: Cryogen (Curious Metallic), Tis the Season designer paper (Echo Park), White and red card stock.
Other: Acrylic Block, Paper Trimmer, Adhesive, Quilling paper and tool, Post-It Note for masking (you can use masking tape if available).

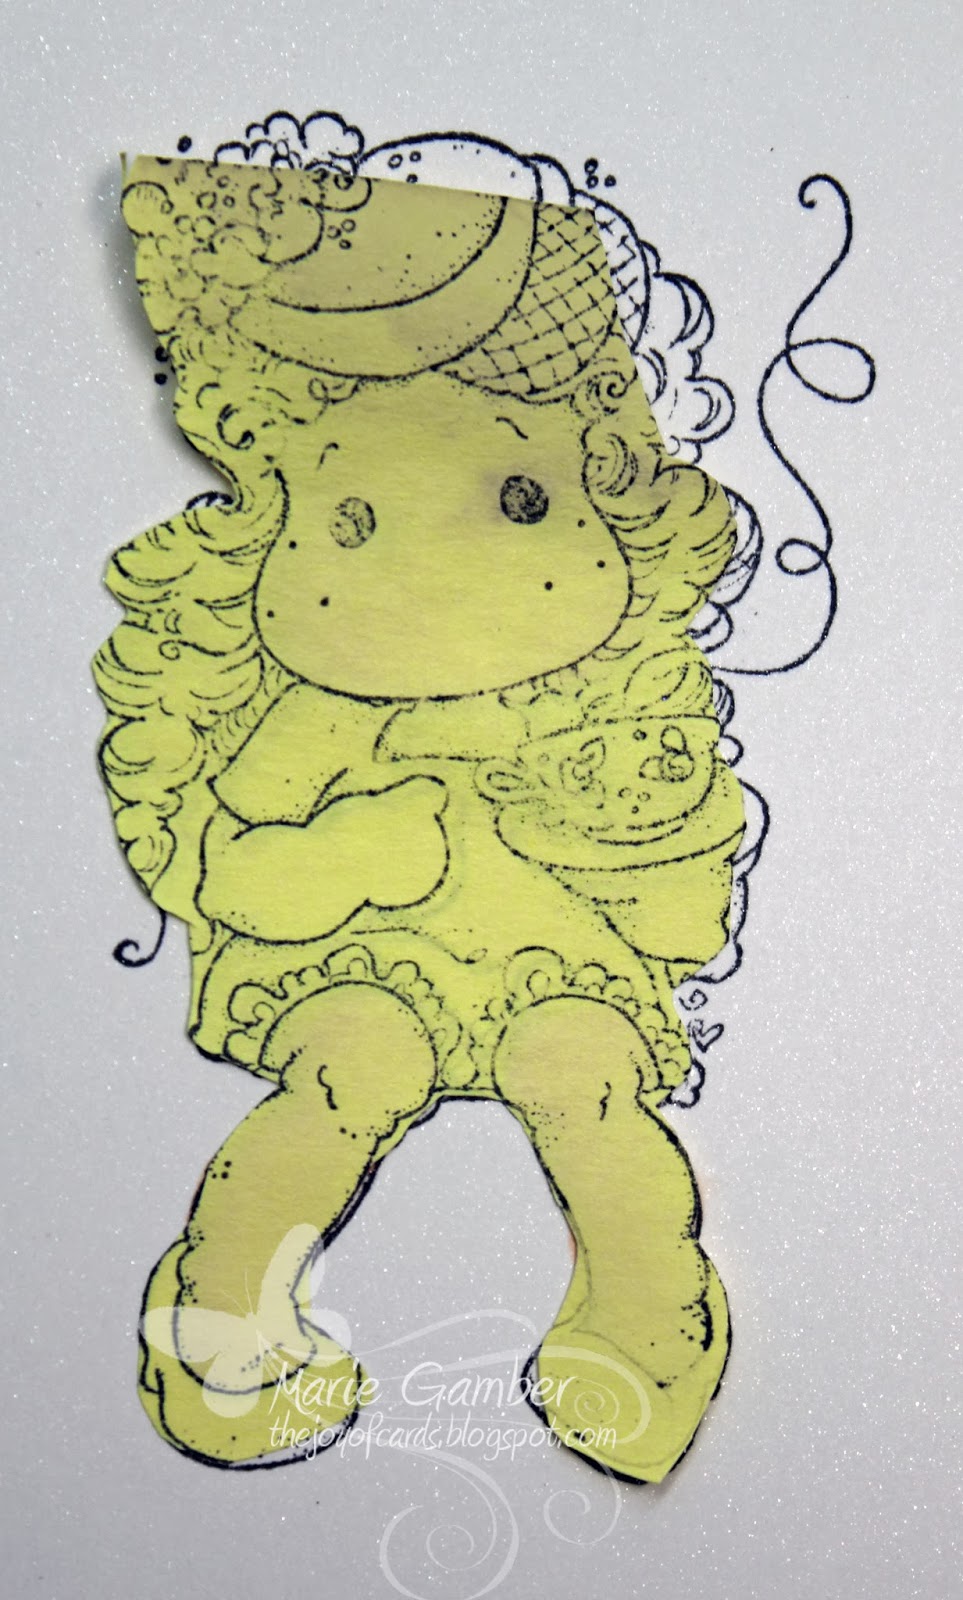
1. The image is stamped on your focal image.
2. Stamp and paper piece the image on a Post-it Note or Masking Tape. I left the top uncovered so you can see the focal image beneath.
3. The paper pieced image is adhered to the top of the focal image.
4. Stamp the background stamp on top of the post-it Note. Apply pressure while stamping in order to produce a clear stamped image.
5. Remember – the image that is in the background is always stamped on top of the Post-It Note or masking tape.
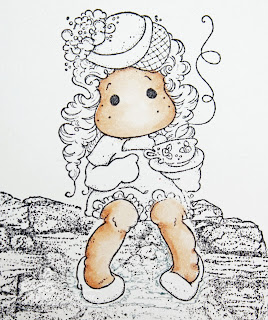
6. Remove the mask. If any area did not stamp close enough to the image, one can fill it in with a black or grey 0.03 or 0.05 Copic Multiliner.
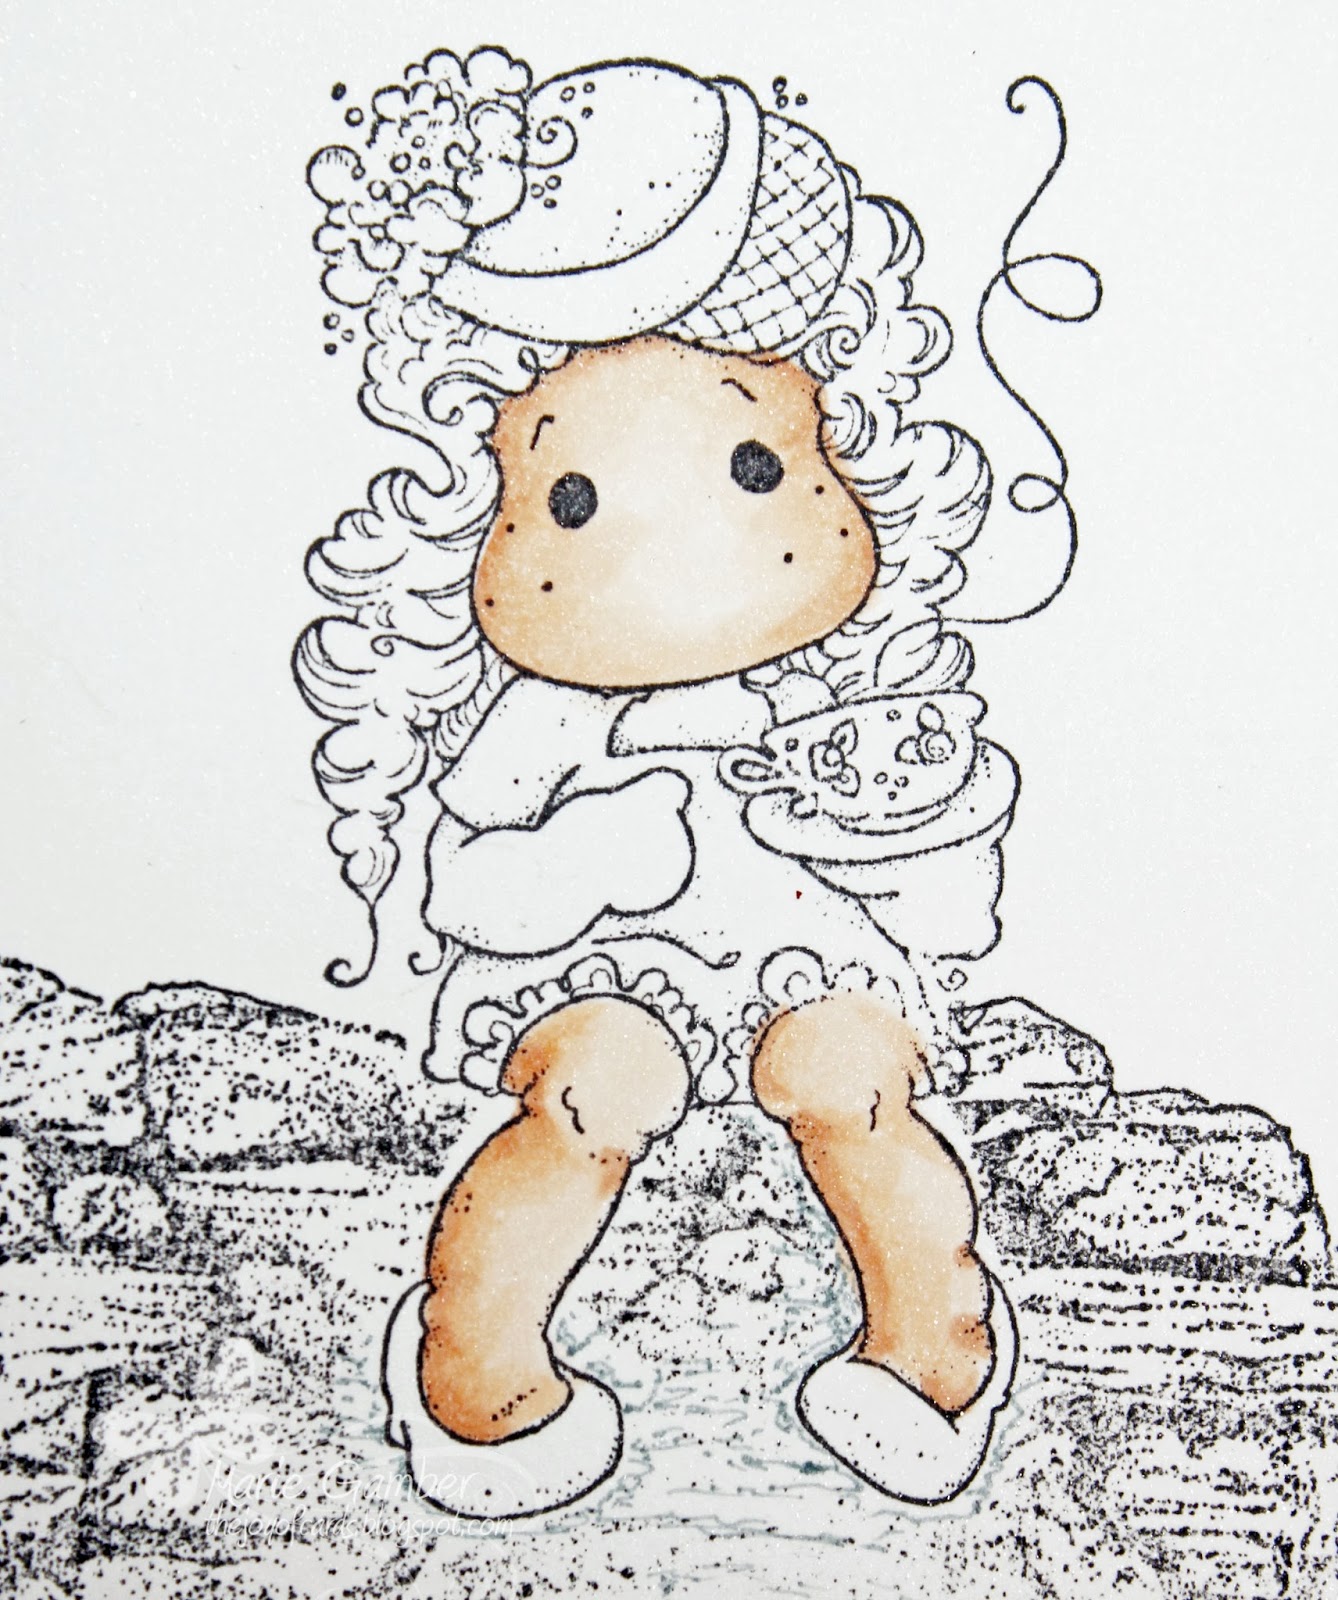
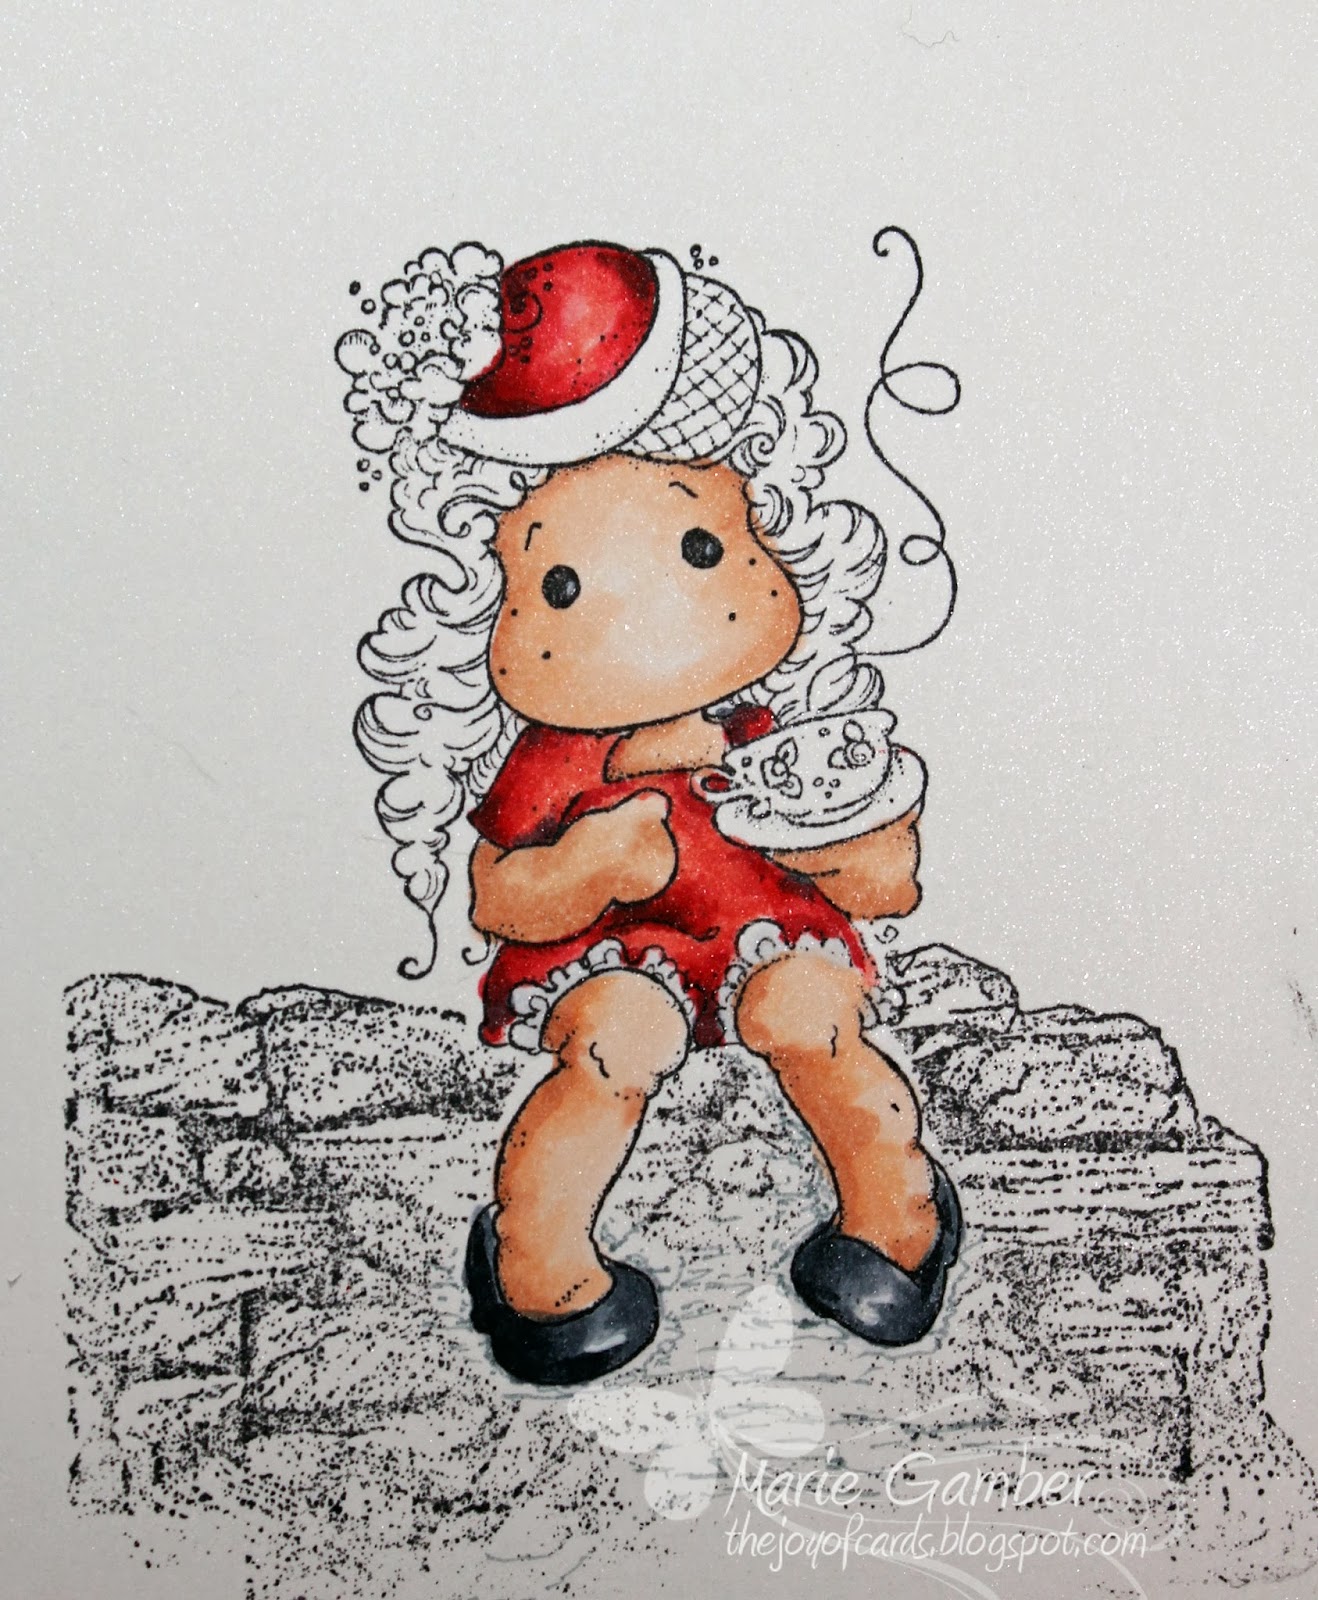
7. The skin tones are E000, E00 and E11

8. The Red Dress and Hat are colored with R29, R27, R24, R22, R20 and a sandwich of R27/C5/R27 at the very darkest of the shadow areas. The brim of the hat and flowers cold be colored with other colors but I will use Red in order to keep it simple and use my shading to add the contrast.

9. The teacup was colored with B0000, B00, Y13 and G43. The hair was colored with C3, C5, C7 and White Copic Ink. The underskirt was colored with C1 and c3. The Brick stones were colored with W1, W3, W5 and W7.
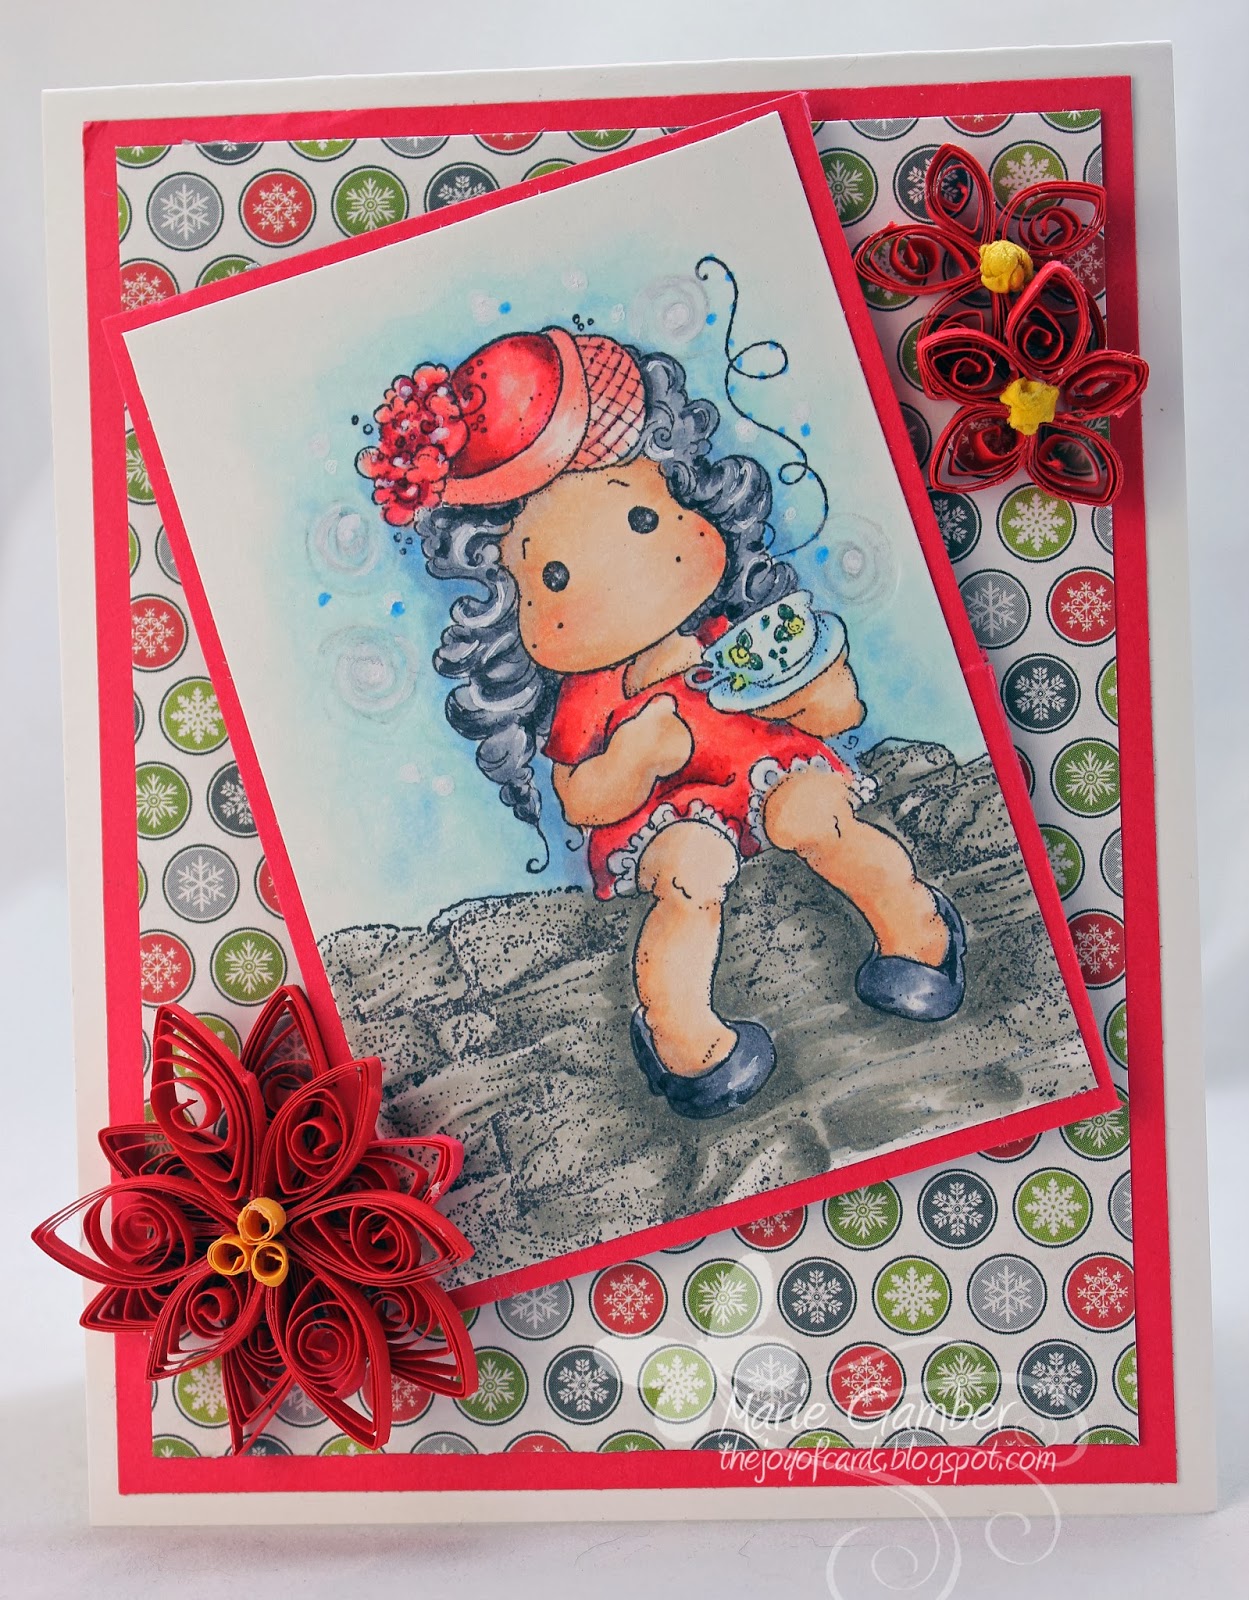
10. I created a whimsical background with a Copic Marbleized technique and added a whimsical swirl with grey Prisma pencils and Copic white ink. The background was dotted with Copic White Ink and Copic Blue Multiliners.

11. The image was layered on white and blue card stock. The designer paper is Tis The Season by (Echo Part).
12. The flowers were hand quilled and applied to the card.
I hope you enjoyed this tutorial. MarkerPOP has a challenge that is Holiday Themed running until December 22.
I hope to see your wonderful creation there! Happy Holidays!