$10 Gift Voucher - Leave a Comment

License Plates Cards!

Written by Valerie Ward. Posted in Eye Candy (Projects)

Hello Fellow Crafters! It’s Valerie here today, and I’m thrilled because it’s my first post (other than my Intro post) for markerPOP!.

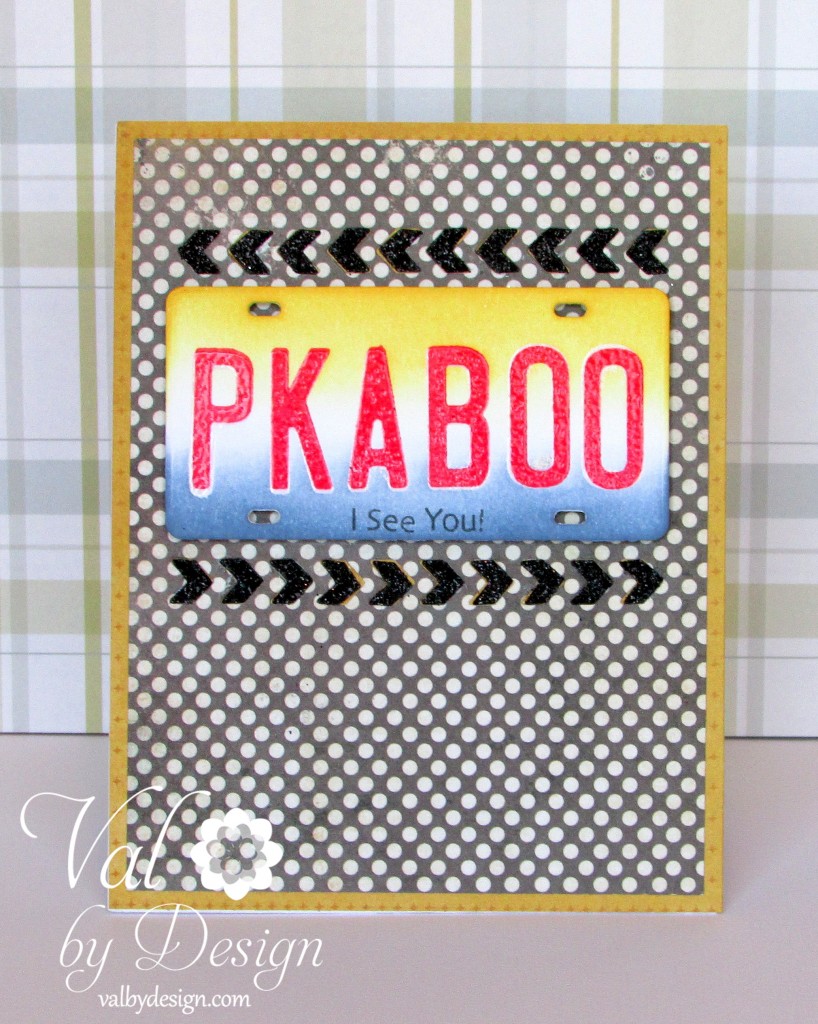
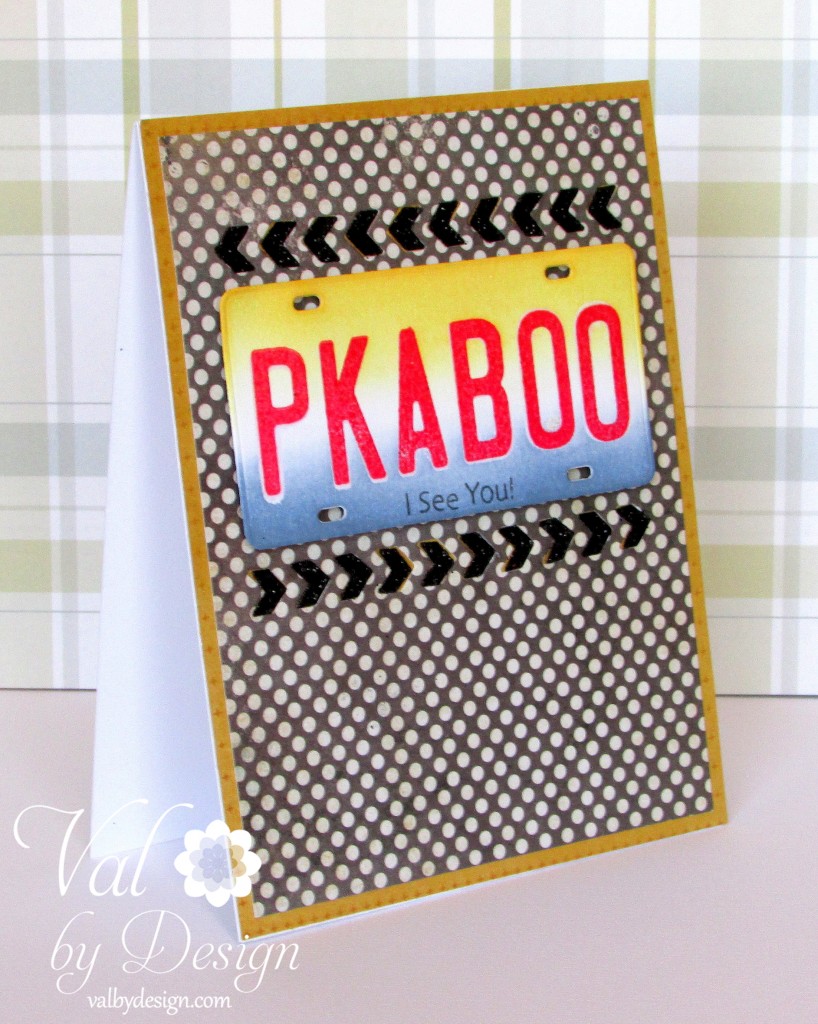
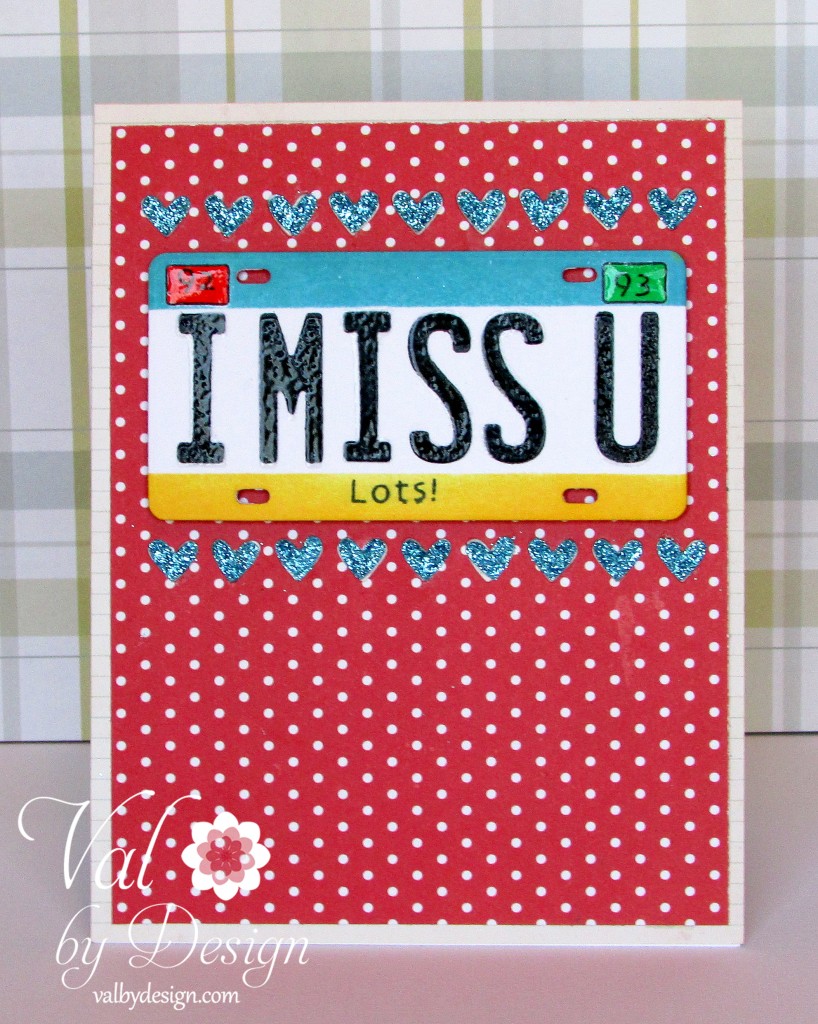
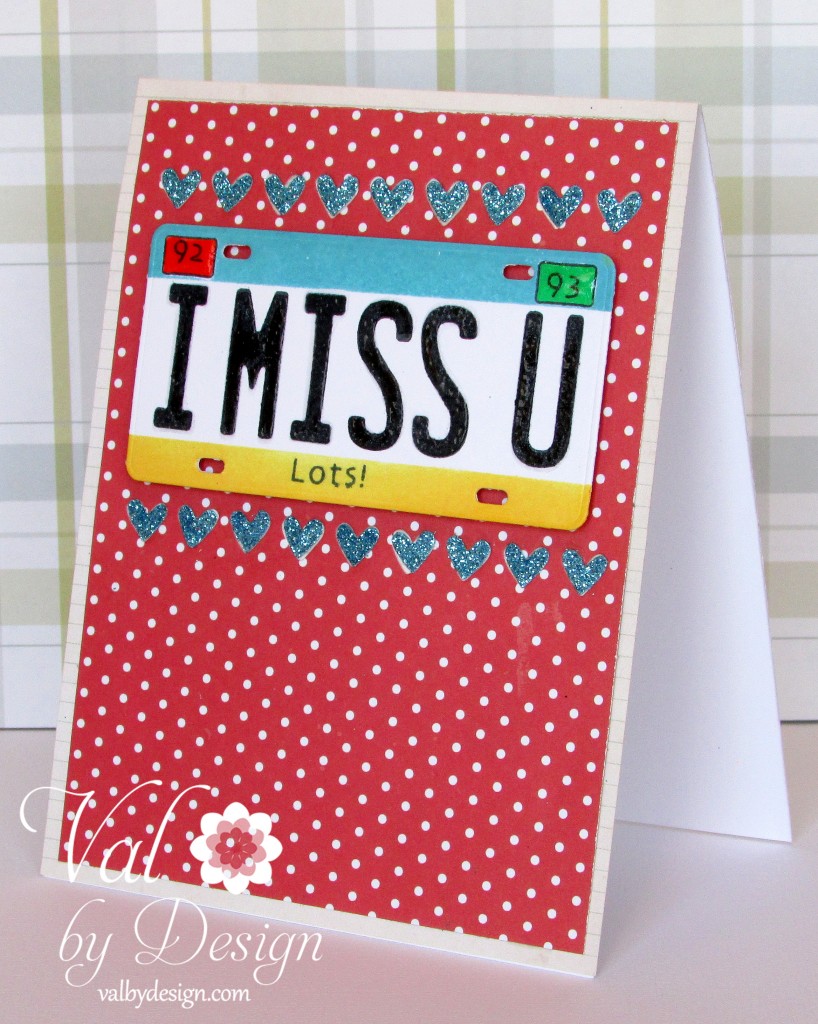
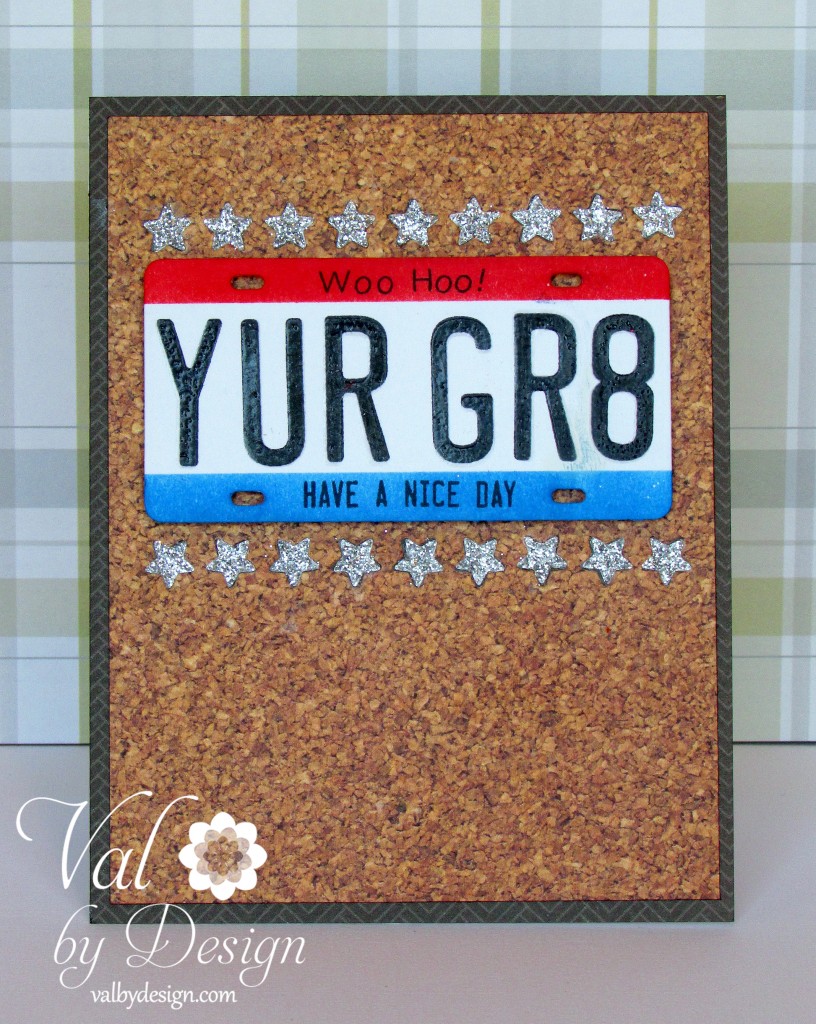
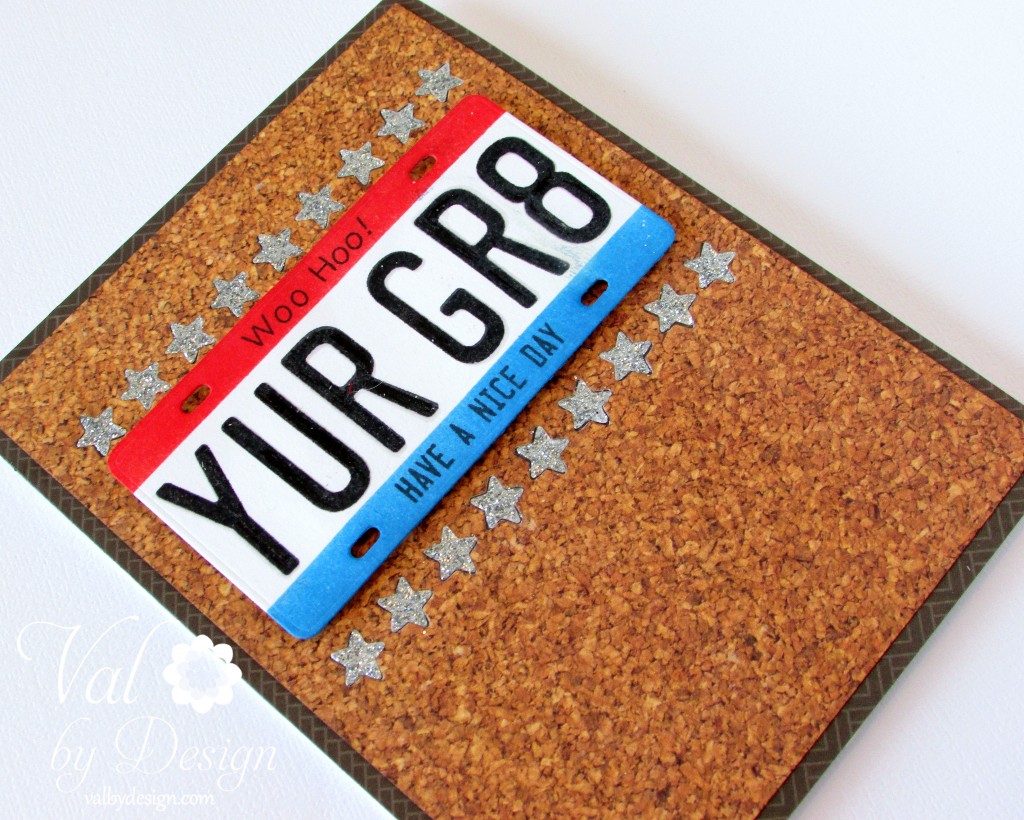
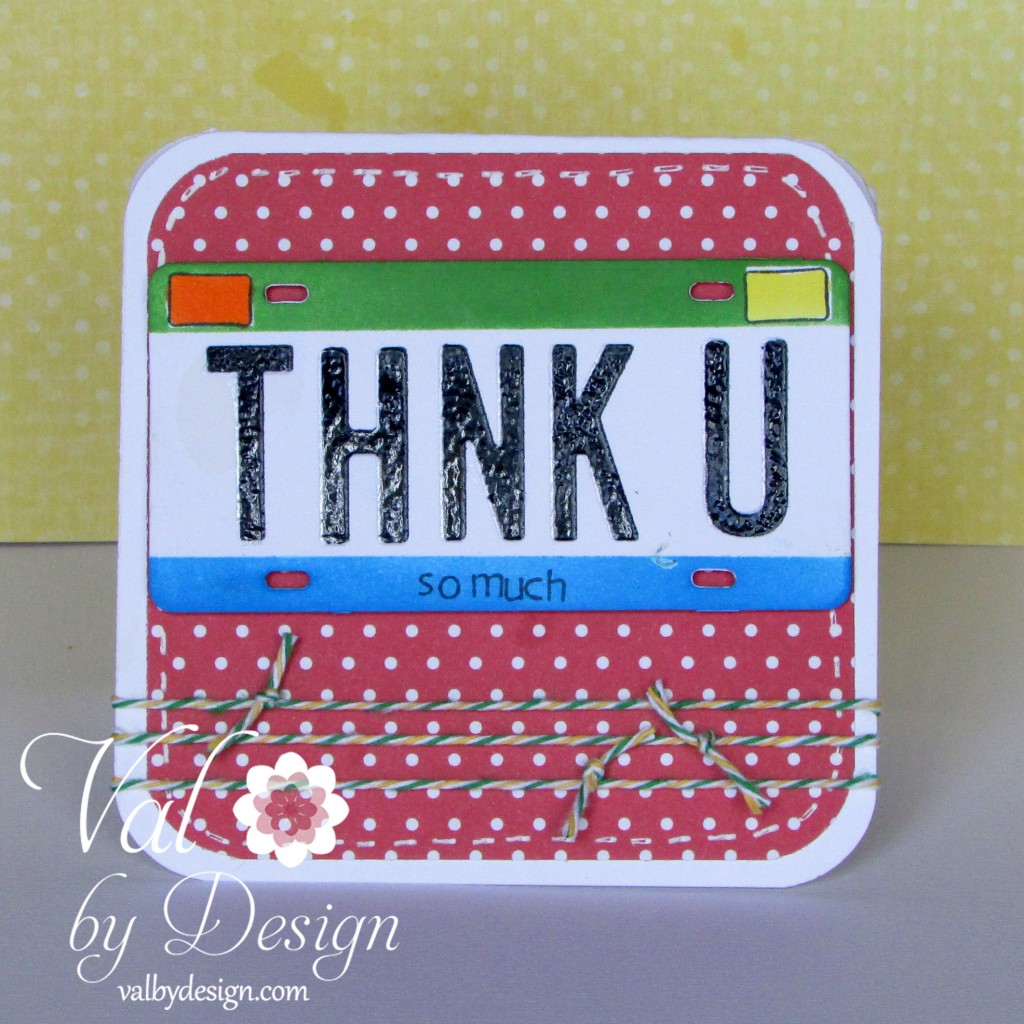
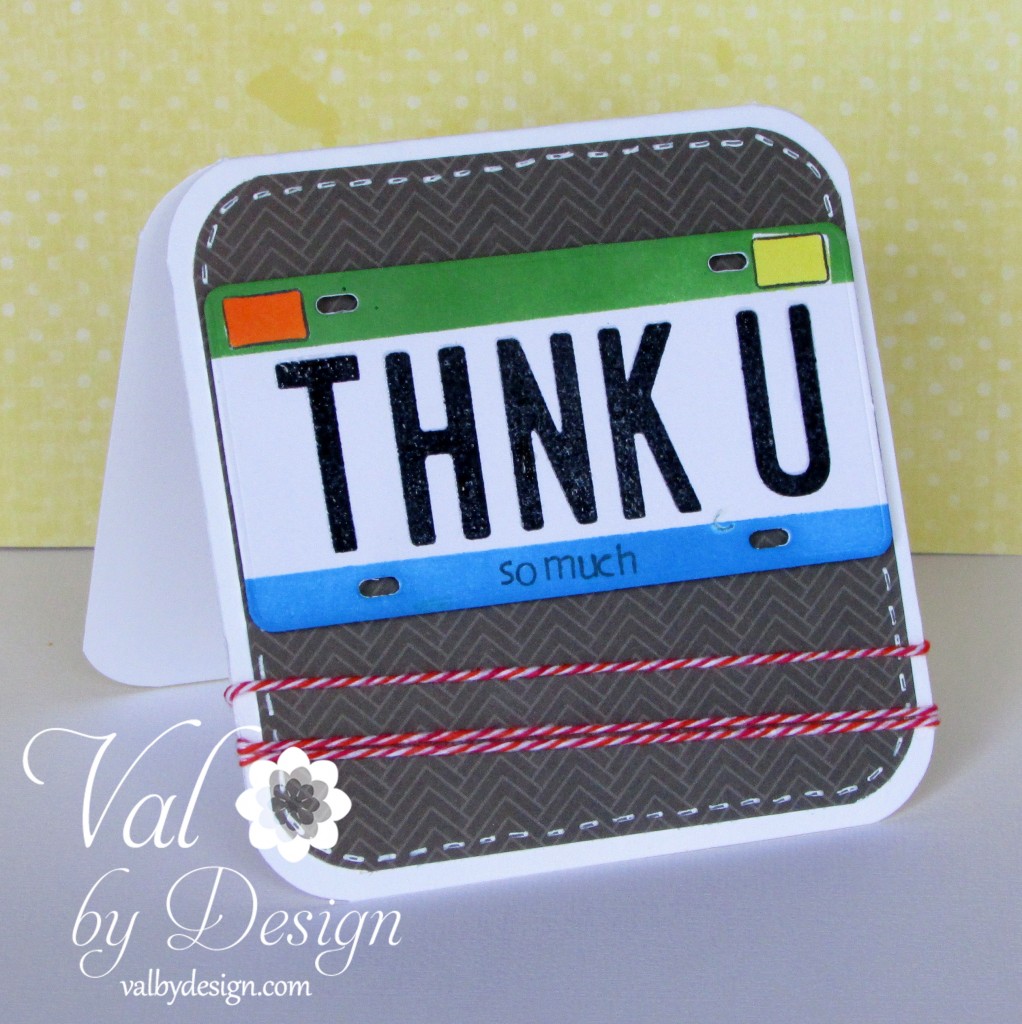
The products I’m designing with for today are a matching stamp & die set from My Favorite Things; they’re called Vanity License Plate. And I’m also using the Lawn Fawn Stitched Journaling Card die set.

I made the first card, and enjoyed it SO much that I continued on to make 2 more! I’ll be showing all 3 here,  with all the instructions that are the same for all 3 cards.

For each card, I stamped the letters I chose with Memento Black Ink (on one I used Memento Red Ink), and then I heat embossed them with clear embossing powder.

MarkerPOP!  - ValByDesign.com

Card #1

MarkerPOP!  - ValByDesign.com

Card #1

I pulled out an older alphabet stamp set from my stash (the letters are 1/8″ tall) to stamp the itty bitty phrases on the license plates. Then I used my Tim Holtz Distress Inks (Salty Ocean, Barn Door, Broken China) and a yellow ink I have, to add the colors to the license plates with a  masking technique.

MarkerPOP! - ValByDesign.com

Card #2

All 3 cards have the cutest rows of different die cut shapes both above and below the license plates; those dies are all from Lawn Fawn’s Stitched Journaling Card die set.

MarkerPOP! - ValByDesign.com

Card #2

Then I took the same Lawn Fawn dies and cut the same shapes from glitter paper, and then nestled & glued the shapes into the pattern paper to create a flush surface.

MarkerPOP! - ValByDesign.com

Card #3

2 of the cards (YURGR8 and IMISSU) are both using papers from the 6×6 Simple Stories 24Seven paper collection; the PKABOO card uses an older collection from My Mind’s Eye, and it’s very similar to their Lost & Found 3 Oliver collection.

MarkerPOP! - ValByDesign.com

Card #3

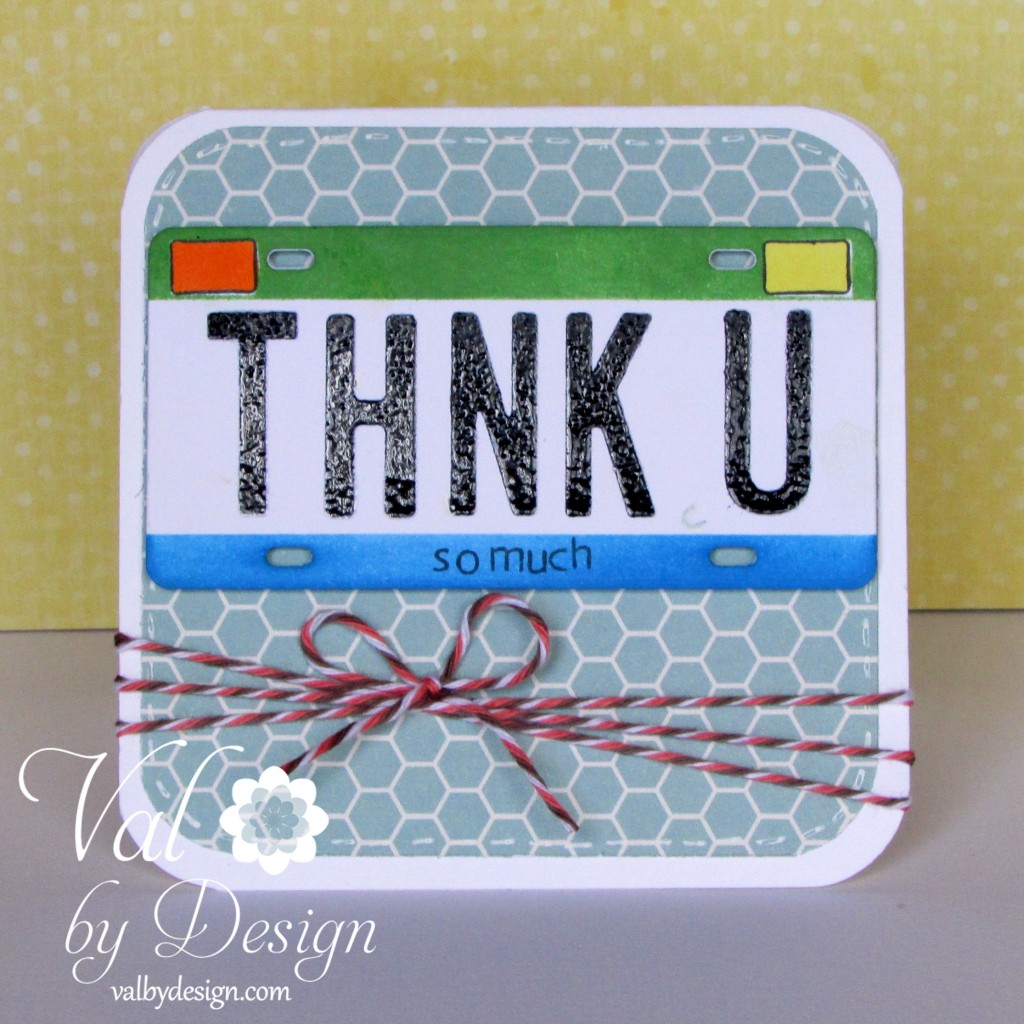
OK, I liked this set so much, that I THEN went on to make 3 Thank You cards that I need to make for some friends and family!

I’m using the same products, PLUS MarkerPOP! Baker’s Twine on these 3 mini’s that are 3.75″ square – Warm Harvest, Red Sunset, & Lemonade.

MarkerPOP! - ValByDesign.com MarkerPOP! - ValByDesign.com MarkerPOP! - ValByDesign.com

Unfortunately, the MFT Vanity Plate stamps and matching die are currently out of stock; but there are some good products that you could substitute instead. This Xcut Rectangle Nesting die set could be used for the vanity plate shape. And for the letter stamps, Lawn Fawn’s alphabet set, Quinn’s Capital ABC’s would work nicely.

I hope you enjoyed my cards and post today, and I’ll”see” you again real soon!

xo
Valerie


Everyday this week we are each going to be giving away one of our favorite items from the store!
You will have until 11:59pm PST on February 27th to enter. Winners will be announced the next day.
Winner will have TWO weeks to claim their prize.

Good luck!
a Rafflecopter giveaway

Coloring with Hikka! Week One

Written by Hikka. Posted in Eye Candy (Projects), Tutorials

Heya there! Hikka here, with some colorin’ for ya! This is kinda my first time actually explaining my process, and I’ll do my best to be as concise as possible. But I do apologize ahead of time if I get rather wordy. So, to start off, my doodle is of some avatars from a little site I hang around on called Syndrone, just a little forum with some dress up avatars.

Lines were done with Copic Multiliner SP pens, the majority done in 0.3 (olive , purple , turquoise and cool gray) and finer detailing done with a 0.05 (black). And my weapon of choice for coloring is my ShinHan Touch Twin Brush markers.

Just a brief explanation about the technique I’m gonna mention a TON because that’s how I do things; tip to tip blending. It is exactly what it sounds, I take two different shades of a color and using their tips, I’ll let the color of one soak upon the other and with that I get a blend of the two. (This can also work for gradients too, don’t think you have to strictly limit yourself to a lighter shade and a darker shade of a single color).

BUT WAIT HIKKA! Doesn’t that ruin your markers?! Doesn’t that stain them forever?! I assure you, it does not hurt them any, your markers are meant to be friends! Let them play together. <3 I recommend keeping scrap paper near by so you can wipe off the mixed color from the marker though. It really is okay though! You’ll get smoother transitions between your shades.


Okay! So starting with the avatar on the right, the skin is actually white, so all we’re gonna worry about is shading. Which I simply use CG0.5 and CG2. A thin line of 0.5 to start off, just to know where my shadows are. Then for some depth, I’ll use tip to tip blending of the 0.5 and two to darken things. Then finish off with a layer of 0.5 to soften stuff up.

I’ve hung onto these two grays for the little stars and baubles on her hair sticks. Same method as above, with a little white left for shine on the stars.

And lastly, the cheek and lips, I use R135 on a colorless blender to start and spread the color for blush, then a layer of R135 and then the blender to soften things. Then another tip to tip layer of R135 and R138 in the middle of the blush, then just to spread things a little, I’ll use my blender one last time. (Being careful not to use too heavy of a hand, since that will take color away). For the lips I use a couple of dabs of R135.

Onto the other one! Now we have some actual coloring, this little guy’s skin is a sort of medium tan. My blend is gonna be YR26, Y36, and BR103. I start off with a layer of Y26 for the base, of course leaving non-skin areas white. Tip to tip again with BR103 and Y36 as the second layer. To help even things out, I’ll use another layer of YR26, then one last layer of just Y36. For shading I do layers in a pattern of BR103 and Y36 twice. Oh, and then for the mouth I simply used my R135 again.

Onto hair! Personally, my favorite. So, my lighting is gonna come down from the right and I’ll leave white accordingly for highlights. The avatar’s hair on the right is gonna have a blend made of YR26, YR29, Y36 and YR32. I begin with YR26 on a colorless blender to figure out where my highlights are. Next a layer of YR26, then a tip to tip blend of Y36 on YR29, then I blend down with YR29. Next a layer of Y36 to start on some shading, which is blended again by YR29. One last tip to tip layer of YR32 on YR26 for some added shade, which I then pull down with a little bit of Y36 and then YR29.

Onto our guy~, he’s gonna have some green hair. So we’re gonna go with G46, G54, and BG52. So, I’ve got G46 on the blender to begin placing highlights. Then a layer of G46, then tip to tip of BG52 on G54, but I only cover half of my G46 layer, which I use G46 to blend things down. Then BG52 for shading, but only part way to blend it down with G46. (The brow is also colored with BG52).

And before I forget, let’s get that eye colored! Using PB75, P82, and P81. I start off with a base of PB75, then a tip to tip layer of PB75 and P82 halfway down the first layer then blend with PB75. Then a layer of P82 halfway down, just like the tip to tip layer. (More or less I keep a little of the first base layer visible). Then a little of P81 at the top of the iris to blend down with P82 again. Oh, and just for a bit of difference between the eye and the lashes I used PB73.

Now onto the clothes! How I usually do this if I’m coloring more than one character, I do look to see if either of them share some colors and start there. Since they both have some black, I’m gonna start with that. My blend for black is going to be CG7, CG9 and then 120.

I do all my black areas with a base layer of CG7, and since I have used color ink for the lines, brush control is vital here. :B Don’t wanna cover up the colored lines after all!

Now that’s all done, I’m gonna start off with a tip to tip layer of CG7 and CG9 to begin my shading. Then a half layer of CG9 which I blend down with CG7. Then lastly I more or less do a line of 120 at the edge of my shading and blend down with CG7.

Back to the character on the right, we’re gonna focus on the rest of her clothes cause they’re gonna be made up of the following blend of B171, B67 and B68. Starting off with a layer of B171 and then I’ll do a tip to tip layer of  B68 on B67. Then for shading I use B67, then blend down with my tip to tip mix, then one last layer of B67.

However, on the bow, hair sticks and collar I do keep some of my initial layer showing for shine, then I do a quick layer of B171 to smooth it down and then repeat my tip to tip layer one more time, then for shading I’ll use B67 by itself.

Back onto our guy! His bandages and tank are white, so we’ll just focus on shading with CG 0.5 and CG1. Then his jeans will be made up a blend of PB144, PB76, and B62.

For his bandages and tank, I start off with CG0.5 for the shading, then a tip to tip layer of 0.5 and 1, then one last layer of CG1 at the edge of the shading. For his jeans, I start off with PB144 as my base then a tip to tip layer of PB144 and PB76. Then one last tip to tip layer of PB144 and B62 for the darkest parts.

At this point, we could call it a day. But there’s one more touch I like to do~. I like adding more sparkle! So I bust out my jar of Copic Opaque White for some highlight boosting, with my smaller sparkles being done with a white gel pen from my stash.

And there you have it! Phew..thanks for sticking around, see ya next time~!


Everyday this week we are each going to be giving away one of our favorite items from the store!
You will have until 11:59pm PST on February 27th to enter. Winners will be announced the next day.
Winner will have TWO weeks to claim their prize.

Good luck!
a Rafflecopter giveaway

Introducing Learning Copics with MarkerPOP & Sami

Written by Samantha Peyton. Posted in Eye Candy (Projects), Tutorials

Hi everyone! My name is Samantha, & you can call me Sam, Samantha, or Sami!

I missed getting my intro up for y’all last week due to some technical difficulties so I wanted to take a second & introduce myself before we get crafty.

sami55_1820099841_n

ABOUT ME:
I’m Sami, a 20-something, totally obsessed papercrafter. My husband and I recently moved to Illinois for his first job after grad school. We are loving life with our 4 beautiful dogs & 1 very loud canary. I am a full-time crafty person -running an active crafty blog & an online store. I’ve been Copic coloring since 2009 & I was MarkerPop’s first ever design team member & then design team leader. I love MarkerPop so much I wanted to come back to the team. Copic coloring is among my most favorite paper crafty things to do. I also very much enjoy scrapbooking, Project Life, card making, making 3d items, using my Silhouette Cameo. I love everything involved in crafting -the color combos, the layout design, sharing my ideas, the new products, learning new techniques, etc. I share projects & tutorials daily on my blog & make videos regularly.

I’m here as a Video Maker! I LOVE making crafty videos and have two dedicated crafty Youtube channels. One just for Copic Tutorials & one for Stamping & Scrapping. I hope that my Copic videos will inspire you to use your Copics even more!

Don’t forget to take a peek at the end of this post for an awesome GIVEAWAY!

NEW VIDEO SERIES:
Today, I am kicking off our new video series: Learning Copics with MarkerPOP! Every other week, I will be sharing a new Learning Copics video with you!! I am really excited to start this new series. We’re going to start out with the very very basics and build up to some more advanced and intricate lessons.

To start things off, today’s video is just a very basic 2 color blending tutorial. If you’ve been Copic-ing (he he, yay for making up words!) for long, you are probably a pro at basic 2 color blending already. If you are newer to Copics, then practice this technique a bunch & make it a go-to technique in your coloring arsenal. This is a very important foundation technique that other coloring techniques will build upon.


Watch on Youtube

In this tutorial, I used the following Copic colors:

  • Y13, Y15, BG02, and BG05

Learning Copics with MarkerPop Tutorial

Learning Copics with MarkerPop Tutorial

Learning Copics with MarkerPop Tutorial

Supplies Used:
X-Press IT Blending Card Paper Bright White
Lawn Fawn Clear Stamp – Love You Tons
Lawn Fawn Die Cuts – Love You Tons
Memento Full Size Dye Ink Pad – Tuxedo Black
Echo Park Paper Pad – That’s My Boy 6 x 6
Ranger Tim Holtz Distress Ink Pad – Summer 2012 – Ocean, Raspberry & Lawn
Crafter’s Companion Double Sided Adhesive Extra Strong Permanent Tape Runner


I hope that you enjoyed today’s lesson. I’ve also got two bonus videos to go along with today’s project.

BONUS VIDEO: Refilling Ink Pad Tutorial


Watch on Youtube

BONUS VIDEO: Today’s project from start to finish


Watch on Youtube

Thanks so much for stopping by & letting me share something crafty with you!

Valerie


Everyday this week we are each going to be giving away one of our favorite items from the store!
You will have until 11:59pm PST on February 27th to enter.  Winners will be announced the next day.
Winner will have TWO weeks to claim their prize.

Good luck!  🙂
a Rafflecopter giveaway

Quick Christmas Set

Written by Kelli Cortes. Posted in Eye Candy (Projects)

Hi everyone, Kelli here today!  Christmas is just two days away!  Last year right around this time I shared a really quick card, tag, and thank you note set so I thought now would be the perfect time to share another set!
Click HERE for the post form last year.

For the main image on all three of these cards I used the My Favorite Things – Starry Christmas stamp set.  I stamped them in VersaMark ink and brushed on different colors of Perfect Pearls.  Basically, it’s a shimmery pigment powder that sticks to the ink.  I absolutely love how shiny and fancy this looks and how little time it takes.  You just set the powder by misting it lightly with water.

The sentiment on the tree card is from the same Starry Christmas stamp set that all the images are from.  The sentiment on the reindeer thank you note is from the SP & Company – Ultimate Sentiments I stamp set and the to and from are individual letter stamps I had in my stash.

The twine on the tag is the Red Sunset by CraftKin.  This twine has white, orange and deep red mixed into one strand.  I only wanted the white and red so I pulled the orange strand out.

To finish everything off I added a colored rhinestone to each of the projects.

Sorry about the first pic where you can see my photo box, it wasn’t big enough for everything!

I hope this quick Christmas set inspires you to get those last minute cards, tags, and thank you notes made!

Thanks so much for stopping by.  Have a great day!  🙂
Quick Christmas Perfect Pearl Set 1 Quick Christmas Perfect Pearl Set 2 Quick Christmas Perfect Pearl Set 3 Quick Christmas Perfect Pearl Set 4 Quick Christmas Perfect Pearl Set 5

markerpopkelli

Grab Our Button

i Luv MarkerPOP
Show some MarkerPOP LUV,

add this button to your blog.

I’m a Winner!

I'm a Winner on MarkerPOP Blog
Copy and paste the code under the badge

to claim your bragging rights!

I’ve Made Top 3!

WoHooooo I made it to the Top 3 on MarkerPOP Blog
Copy and paste the code under the badge

to claim your bragging rights!

Visit Us!

MarkerPOP Free Shipping MarkerPOP Boutique
18299 Mount Baldy Cir
Fountain Valley, CA 92708
Toll Free: 1-855-312-1222
Phone: 1-714-249-1222