


Stamping Bella – Uptown Girls

Good morning everyone! T-G-I-F! Today I am going to share a card with you using The Stamping Bella image, Uptown Girls – The Bench Buddies. This is a card I made for a friend for her birthday. It”ll go with the box I shared with you last week, which also used a Stamping Bella image. I’ve just recently been turned onto these images but I am enjoying working with them.

I used several materials from MarkerPop on my card, including paper from the First Edition Paper pack, Desert Blooms, the Xcut die Parenthesis, and of course copic markers. The markers I used on this image are Shirts: YR07, Yr04, YR01, YR00, YR000, R24, R22, R20, R00, Rooo, Pants and Skirt: C7, C5, C3, C1, Co, B39, B26, B24, B21 and Bench: E29, E25, E31, E30.

Well, that’s it for me today. I hope you have a great one!
![]()
Something Sweet Just for You!

Hello and happy Thursday to our our MarkerPOP friends! Marie here with a 3-D project that I want to share with you today.
I recently got the wonderful clear stamp called “Teacups” illustrated by Lucy Cromwell from DoCrafts Papermaking. I love this stamp! It can be used for so many occssions. The one I selected today is a fun and whimsical theme.

When I think of whimsical – I think of something unique and out of the ordinary. I think of fanciful , cheerful and playful.
That is is how I feel when I look at this stamp and my mind just starts taking off in all sorts of fun and whimsical ways.
Just imagine if someone used this card with an Alice and Wonderland theme and used the Mad Hatter Teaparty as a story behind the image!
I wish I could have thought of that sooner! HUMMMM! Or how about a scrapbook page when you feature you child playing with her tea cup set while plaing hostess. The ideas just go on and on!
I used Copic alcohol ink sketch markers to color my focal image and background.
Teacups: RV0000, RV000, RV00, RV01, RV02, RV81 and RV93
G40, G43, YG69 and G29
V0000, V000, V91, V93 and V95
B0000, B000, B00, B02 and B21, B24
Flower: RV 91, RV93, RV02, RV00 and Copic opaque white ink
Background: BG0000, BG000, BG00, V0000, V000, C3, Colorless Blender and Multiliners.
I hope you are having a wonderful week! Stop back tomorrow and see what treat Marlena has in store for you!
![]()
Distress Markers Winner
The randomly selected winner of the set of 12 brand new Distress Markers is Natasha Poteraj!
Congrats, Natasha!!! Please email info @ markerpop.com with the subject line ‘Blog Distress Markers Winner’ and your mailing info. You have TWO weeks to claim your prize.
These will be shipped out to you when we get our next shipment in August.
A HUGE thank you to everyone that participated and commented on the last three giveaways. You all make it so fun so we will definitely have more giveaways in the near future!

Dot It!
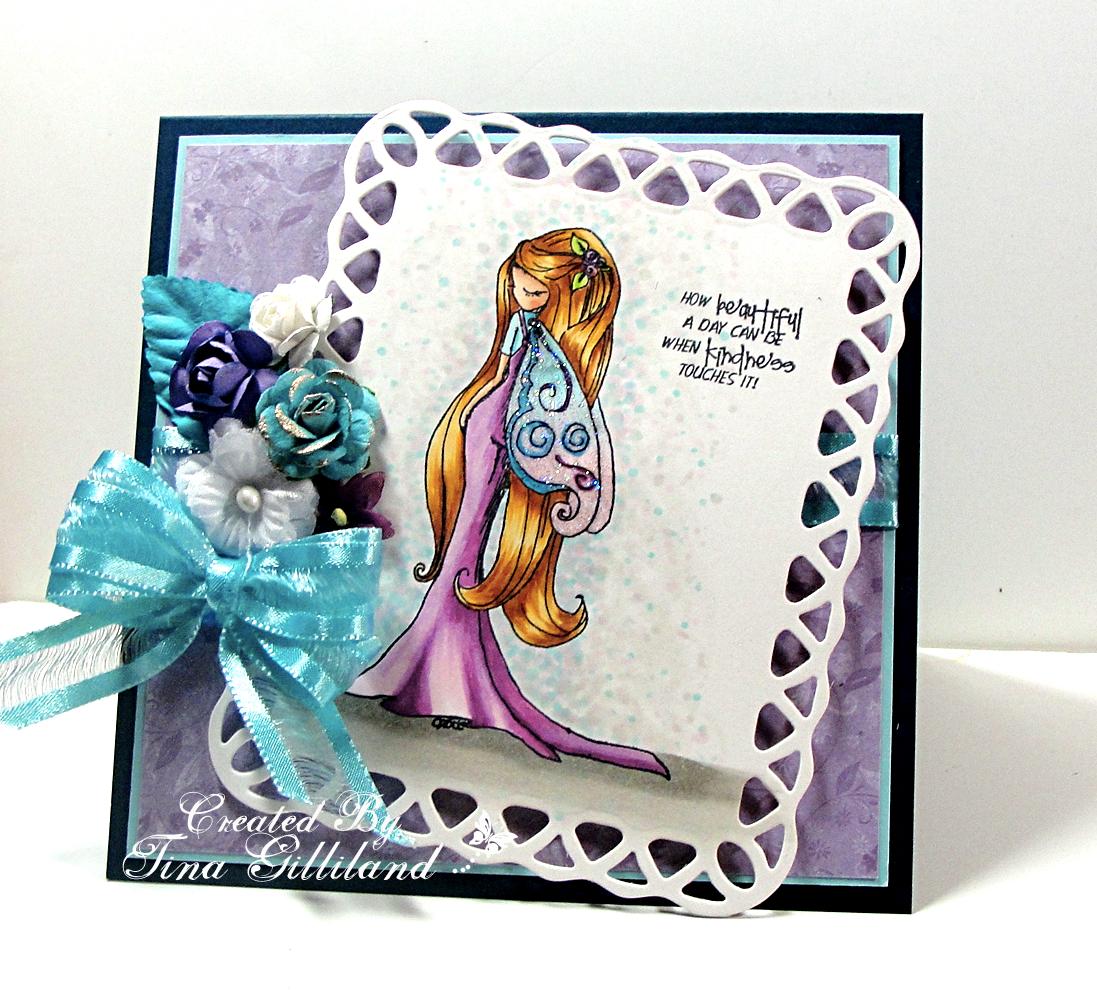
Hi everyone… Tina here, back with a little “tip/trick” for you to try the next time you’re wanting a soft but not to fussy look to your card design. My image used int his technique is the Tiddly Inks, “Everyday Magic”.
I stamped my image onto Cryogen White paper and colored with my Copic Sketch markers.
Now to create my background. I began with one of my main colors in the design and used the lightest of that Copic. I used several dots and placed them all around my image adding EXTRA dots in areas where you would normally have shading. I made sure I used just the tip and made dots of various sizes. The I grabbed my next most used color and again… using the lightest of that set to do the same. Again, making sure I dotted heavier int he shadowed areas. My next color with W1… this will tie your dots all together and blend them out a bit. Same procedure.. heavier in darker areas and spread out around the rest of the image. My last marker.. W0 is blended out from the dots to smooth them and bring them all together as one.
I grounded my image using W3, W1 and W0. Again darker towards her bottom and lighter as you go down and out.
Here’s a closer look so you can see the dots a bit better. You don’t have to use this ONLY for soft, muted colors and I’ve seen it done with dark blues and browns and it adds just the same striking background but not to much.

I hope you give it a try. Like most things with Copics, it takes some doing and honestly, I’ve maybe done it 4 times. Each time I try I think I get better at it but the key is ALWAYS, practice, practice practice and then practice some more. It can be frustrating but I promise the more you try it the better you get at it.
Oh yes… move some of the dots further away from your image to fill in more and to give the darker areas even more definition. Give it a try… something new is always fun and a nice adventure from the norm.
I hope you have a wonderful Tuesday and get a chance for a little crafty time. Come back tomorrow for more inspiration!! *HUGS*
![]()
Copics I used:

