$10 Gift Voucher - Leave a Comment

Author Archive

Shadowing with a “Dotting” Technique

Written by Tina Galvan-Gilliland. Posted in Anything But a Card

Hi Everyone!! Tina here again with another guest post for you.  Today I wanted to share how I use

a little “dotting” technique to add a shadowing and background texture to an image.

First, I stamp my image using Memento Tuxedo Black ink onto why Cryogen paper.  Then go ahead and color the image using my Copic Sketch markers.  The coloring is important to help you decide which colors are best for your “dotting”.  Here is my colored image which I started with.

MP1B


My image is by C.C. Designs, “A Random Fan Birthday Girl”. I not only color my image, but I choose the card stock and designer paper I plan to use with my image to decide on colors for the “dotting”.  With that in mind, I chose these four


colors to begin with.  Notice I use a dark, a light and a neutral color for my technique.

MP2B


I started with the lightest blue first and began dotting around the image… rather close and tight together dots.


MP3B

Next, I add the darker color and fill in even closer to my image.  You want to stay close with the darker because that is going to give you more dimension and like most things that are shadowed, it’s darker towards the object.

MP4B

You’ll notice I also added a change of color around the candle to present it’s “glow”.

MP5B

Next I’ll add the pink and neutral colors spreading out a bit more from the image as I add them.

MP6B


I spread out a bit further with the dots and also still blend in with the other colors closer to the image.  And here you have your finished card.

MP7BMP8B


Now you can certainly add more or less to your image.  It’s really a personal preference thing and I have done this where I spread the dots out even further.  But I wanted to add more dimension with the “raindrop” stickers so I stayed a bit closer to my image.  I think it looks like she’s being sprinkled with confetti to celebrate her fabulous birthday, no doubt! 😉

I hope you give this technique a try.  It’s fun… relaxing and somewhat a “care free” process.  Just dot and dot and dot.  Easy!  Have fun and thanks for allowing me to be a guest designer this month.  It’s been fun and , as always, MarkerPop images are nothing short of adorable and great to work with!!!

Have a fabulous day and I hope you have some wonderful weather to go with it!  *HUGS*

badge_tina


Copics I used:

MP9B

Adding Pleats with Copic Markers

Written by Tina Galvan-Gilliland. Posted in Eye Candy (Projects), Tutorials

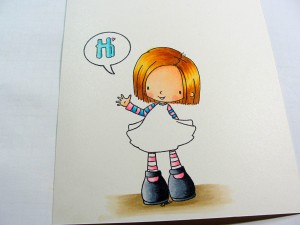
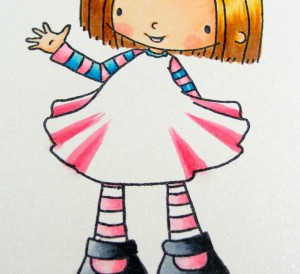
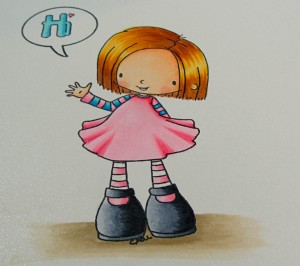
Hi everyone…. Tina here!  I’m so happy to be back sharing a little marker tip with you all today.  Today I wanted to share with you how I make an otherwise plainly colored dress have a bit more depth by adding pleats or folds to it.  I started out using Tiddly Inks, Ellie Says Hi stamped with Memento Tuxedo Black.

MPguest

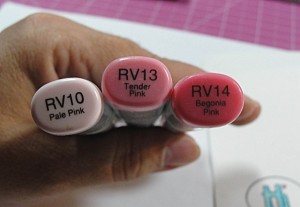
And we will be using a dark, medium and a light colored Copic to create our depth/pleats.

MP2


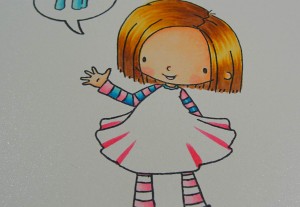
First you will use your darkest color to start the pleats.  Of course, some images are obvious where they will be… like below… the areas of dress definitely in the back will be darker.

MP3


On this image, you will notice the small “markings showing a little hint as to where the pleats will go…

DSC09305_Fotor


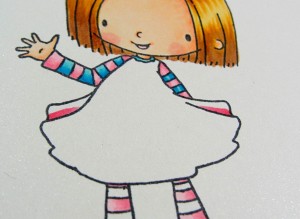
I use a somewhat tall triangular shape to put these pleats in… of course, as the dress goes up… it loses some of the pleat.  Next we will add the medium color added all song the sides of each of the darker marks.  Blend them well.

MP4


And finally, add your lightest color to fill in, again, being sure to blend well.  MP5

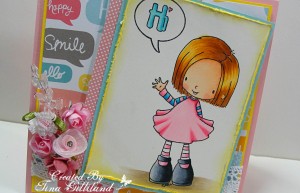
And there you have it… a finished dress with a few pleats giving your image a bit more depth and texture.  And here is our finished card all put together.

MP6


MP7

As you can see, the darker shade blends in well and it may seem a bit much when you start… but as you add the other two colors, your image really pops when you have it complete.  I hope you enjoyed the tutorial and give it a try.  It certainly makes for an image with more than just stamped and colored in.

I used Cryogen White paper to stamp  my image on.  The designer paper is from American Crafts, My Girl, paper pad.  And of course, I used Copic Sketch markers.

Have a great day and thanks for having me as your guest designer today!  *HUGS*

badge_tina


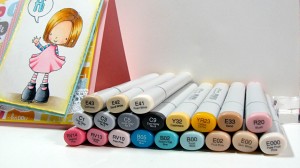
Copics I used:

MP8

Christmas from the Heart…

Written by Tina Galvan-Gilliland. Posted in Anything But a Card

photo-22

Do you like shopping for Christmas?  I don’t.  I LOVE the decorations and the spirit of everyone buying and smiling and spreading Christmas cheer, but actually SHOPPING?? No!  Not what I like at any time of the year. So.. to counter the JOB of shopping, I make as many gifts as I can for my family and friends.  Not so much to save money (because honestly, I seem to spend more on the supplies sometimes LOL) but to give them something from my heart.  Something that I think really reflects them OR my love for them.  😉

That’s my daughter up in that picture.  We headed off to Glazed Expressions and she wanted to make daddy a coffee cup with all his favorite things on it.  Food! LOL

photo-25

And, of course… she INSISTED I do the same… no, I didn’t want to but I decided to make a “personal” mug for me.

photo-26

On to more gifts… another favorite item for me to make is a personal canvas painting of some sort.  THIS one I did for my sister after I made a similar one for my mom that she loved.  And truth be known… this is SOOO her!  LOL

photo-21

I painted the canvas board black and added some white swirls.  My sentiment is printed on vellum paper and I tore the edges before adhering with Scotch Tape Glider in tiny strips hidden behind some of the letters.  BEST tape ever to hold and hold strong!!!  After I finished I was saddened to remember I had the Perfect Layers tools!!! Ugh!  It would have torn much easier and more evenly had I used them.  But, as I said… I was done and that glue is something so I didn’t want to take a chance on removing paint from my canvas.  Next time!!  But if YOU have these tools, be sure to use them.. they are AMAZING for tearing paper!

Well there you have it… a few personal gifts that I KNOW will be loved and enjoyed for many years!  I hope you plan your holiday gifts around a few personalized, homemade gifts as I can pretty much promise you they will be the receivers most favorite and treasured ones of the year.

Have a great day and thanks for stopping by!!  *HUGS*badge_tina

Copic, Making Christmas Memories…..

Written by Tina Galvan-Gilliland. Posted in Anything But a Card

MPOrnament

Hi everyone!! Tina here!  Today I wanted to share with you a cute little Christmas ornament I created for a sweet friend.  We are doing an ornament exchange and I looked everywhere for a “special” one for her and one that would have some meaning to it.  After endless searching and many many web sites, I decided I really wanted my ornament to represent “us”.  And… finally, I decided on this little sweet thing.  Why?  Because I used my Copic markers to create it.  THAT is what we have in common.  Copics!  They are what brought us together to become friends.  We are both on a design team together where we use our Copics for everything and so… that’s the reason and meaning behind my ornament.  🙂

My ornament is made using C.C.Designs, “Drozy’s Darlings Praying Angel”.  I stamped my angel on Cryogen White and colored with my Copic Sketch markers.

MPOrnamentClose

She is double layered… I added another image of her on the back…  so that if she twirls on the branch… you can still see an angel….

MPOrnamentTeal

I used Scor Tape to adhere both images together and added my ribbon tails in between also.  I then spread some clear drying glue to the inside and spread it about using a glass slide.  I did this to both sides and now, my images are sealed.  But… for added safety… I added more Scor Tape around the edges to seal the layers.  THEN… I dipped all sides in Donna Salazars Fairy Dust Glitter – Sugar Shimmer.  I added a piece of tape along the top and bottom of the slides as well just to add a touch more shimmer to the image.  🙂

MPOrnamentTealClose

These also look great with the micro glass beads added to the edges as well but I really really love this glitter and all the sparkle it adds.  Every year my family picks out ornaments for the tree and yes, these have also been added as a few more of those “homemade” memories.  I love how they sparkle and the glass also adds just even more shimmer to the tree.

These are just so much fun, fast and truly a ornament that will be treasured for years to come.  Give it a try.  And remember… there’s not always a need to make sure the whole images fits… you KNOW this is an angel… you don’t need to see her full wings.  Try a few different stamps…you’ll be surprised at how well they will fit in and work just fine.

Have a great day and thanks for stopping by to enjoy a little inspiration and holiday sparkle.  *HUGS*

badge_tina

Copics I used:

MPOrnamentCopics

Grab Our Button

i Luv MarkerPOP
Show some MarkerPOP LUV,

add this button to your blog.

I’m a Winner!

I'm a Winner on MarkerPOP Blog
Copy and paste the code under the badge

to claim your bragging rights!

I’ve Made Top 3!

WoHooooo I made it to the Top 3 on MarkerPOP Blog
Copy and paste the code under the badge

to claim your bragging rights!

Visit Us!

MarkerPOP Free Shipping MarkerPOP Boutique
18299 Mount Baldy Cir
Fountain Valley, CA 92708
Toll Free: 1-855-312-1222
Phone: 1-714-249-1222