$10 Gift Voucher - Leave a Comment

Posts Tagged ‘Lawn Fawn ink’

Sending Cheer…

Written by Holly Endress. Posted in Eye Candy (Projects), Uncategorized

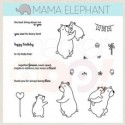
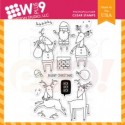
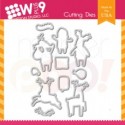
Happy Friday everyone!! It’s Holly here today with a fun Christmas card using the adorable WPlus9 All Year Cheer set and coordinating Dies.

mp2

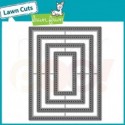
This is a great set for creating cards for many seasons or occasions. I decided to create a Winter card by using the little snowflakes in the set. I stamped the snowflakes onto a piece of Tim Holtz watercolor paper and heat embossed them in White. Then I die cut the panel with the Lawn Fawn Large Cross Stitched Rectangle Stax set. Then I smooshed some Tumbled Glass and Mermaid Lagoon Distress ink onto the background. Once it was dry I spritzed some water droplets onto the background and dabbed them off with a paper towel to create a distressed look. Then I adhered the panel to a card base.

mp1

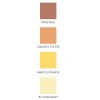
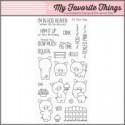
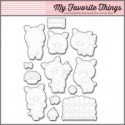
Then I die cut the bird shape and stamped the pieces using some Lawn Fawn inks in Butter, Sunflower, Black Licorice and Hippo. This set works best if you die cut the shape first them do your stamping since it has multiple pieces to create the image. I added a little pink to the cheeks with a R20 Copic Marker. I stamped the tree branch in Walnut in from Lawn Fawn and use the coordinating die to cut it out as well. The santa hat is from the WPlus9 set Santa’s Reindeer. I colored that in with Copics R24, R27 & R29.

mp3

I added some snow to the branch and a few White dots to the bird image with a White Gel pen. The sentiment is stamped in VersaFine Black ink and I used the Mini Misti to ensure I had even coverage on the textured paper. I adhered the bird image with some Foam Tape and the branch directly onto the card with some liquid glue. For some sparkle I added some Sparkling Clear Sequins from Pretty Pink Posh. This is a great card to recreate with different color combos for the bird or background colors, changing them up for the seasons.

Have a Great Weekend!!! We’ll be back tomorrow with our Winners from Challenge #108.

2


You ( And A Unicorn )…

Written by lisascreativeniche. Posted in Eye Candy (Projects)

Hello wonderful and dear crafty friends!  It is Lisa here with you today, and I have a fun and cute little card to share with you today using the newly released Winter Unicorn Stamp Set for a non-traditional Christmas Card…

img_8086

To create this card I started by using a panel of Neenah Solar White Cardstock and stamped the unicorn in the center of this panel.  I didn’t spend any time re-stamping the image for a crisper look because I knew this unicorn would be covered up.  Next I stamped little hearts and stars from this stamp set with Lawn Fawn Dye Ink in Cranberry and Altenew Crisp ink in Warm Sunshine.  The sentiment was stamped  with Versafine Ink above and below these images.  To create the look of the unicorn flying in the sky I used the Lawn Fawn Puffy Cloud Border Cut Set and adhered one to the top and the bottom of the panel after blending some distress ink in Tumbled Glass onto each of them.

Finally I stamped the unicorn onto a separate piece of cardstock with Memento Tuxedo Black ink.  I then colored it in with various Copic Markers (R20, R24, R29, R89, C0, C5, YG17, G28, G46).  Since the sentiment I used was Christmasy I decided to color her in with reds and greens to tie it all in. Next I fussy cut him out and went over the edges with my Tuxedo Black Marker.  After I popped her up with foam adhesive she needed a little sparkle so I busted out my Spectrum Noir Clear Glitter Pen.

img_8088

Thanks so much for stopping by and Happy Crafting!

designteam2016lisa

Challenge #99 It’s all about Die Cuts!

Written by Holly Endress. Posted in Challenges, Eye Candy (Projects), Tutorials, Videos

Happy Monday everyone! Who’s ready for a fun new Challenge? This week’s it’s all about Die Cuts. There are so many great stand alone dies on the market now and I love that most stamps have coordinating dies. So, let’s dig into our stash and use some of those die cuts and create a fun project!

mp99

Create a project using Die Cuts and any of the markers that we carry in the store. You may play along with other challenges, but excessive challenge pile-ons (more than 10) will result in disqualification for “The Prize”. This week we have a Mystery Box filled with Crafting Goodies!

mp_blog_prize_box

One entry will be chosen at random to receive our prize. Three additional entries will be chosen for the ”Top 3″ based on their amazing coloring skills. The prize winner and top three can all proudly post their brag buttons on their blogs for the world to see!

The Linky will close on Sunday, July 24th at 12 pm CST. The winner will have TWO weeks to claim their prize. *International winners will be responsible for shipping costs if they choose to claim their prize* As always, have fun.. We can’t wait to see what you create!


Hi everyone it’s Holly here today with a fun project using Lots and Lots of Die cuts!!

mp1

All the stamps and dies I’m using today are from My Favorite Things. I started by creating a frame using the Whimsical Woodgrain background stamp from MFT and some Doe Ink from Lawn Fawn on a piece of Kraft card stock. Then I die cut the frame using the Blueprints #15 & #29. Then I die cut an additional piece of White using the smaller rectangle from Blueprints #29. I added the frame to a top folding White A2 size card base with some liquid glue and then I trimmed out the top portion of the card base showing through the frame with a craft knife.

mp2

Then I stamped the images from the Adorable Hog Heaven set from MFT onto some Neenah Solar White card stock using Memento Tuxedo Black ink and colored them in with Copics: E30, E34, E44, E47, R0000. R00, R01, R02, YG17 & G07. I die cut the images using the coordinating dies. Using the smaller of the stitched rectangles from the Frame I created, I die cut a  piece of White card stock and added some Distress Inks in Crushed Olive and Mowed Lawn to create the grass. Then I added the images to the card front and then on the reverse side making sure they lined up.

mp3

I die cut a second panel from the smallest stitched rectangle and added some Distress Inks in Salty Ocean and Tumbled Glass. Then I die cut some Puffy Clouds from MFT and added the sentiment from Hog Heaven. This set is the Cutest!!!

Check out the video for more details on how I created this card.

Thanks for stopping by today!

Thank You!

Written by Holly Endress. Posted in Eye Candy (Projects)

Happy Friday everyone it’s Holly here today. Father’s Day is this weekend and our current Challenge is a Father’s Day theme so I created a Father’s Day card or a Thank you card for that special Father Figure in your life. Masculine cards are always hard for me, so today I kept it clean and simple.

hb2

 I’m using the two adorable bear sets from Mama Elephant Cub Cuddles and the Coordinating Dies. The sentiment is from Bear Hugs. I trimmed a piece of Neenah Solar White  to 4 x 5 1/4″ and then I die cut a circle from the front using the Framed Tags: Columbus Circle Creative Cuts from Mama Elephant. Then I stamped the sentiments onto the bottom using some Walnut ink from Lawn Fawn and some VersaFine Black Ink. Then I added some Foam mounting tape to the back side of the panel.

hb1

I stamped the bear image from the Cub Cuddles set onto some Neenah Solar White using Memento Tuxedo Black ink and the I colored the image in with Copics… E53, E34, E23 & E27. Then I die cut the image using the matching dies. I created the background for the die cut center of my card panel with some pattern patterns from My Favorite Things. The sky piece is from the Watercolor Wash 6×6 pad and the Grass is from the County Fair Plaid 6×6 pack. I die cut the Green piece with the Landscape Trio die from Mama Elephant to give it a stitched edge. I adhered the papers behind the panel to appear through the circle opening and then I added the panel to the Card front. Once the panel was in place I added some foam tape to the back of the bear image and added that inside the circle.

hb3

On the inside of the card I added a sentiment from Cub Cuddles and the paw prints from Bear Hugs. This is a card that can be mass produced or if you have kids they could each make one and change out the bear images in the center. Don’t forget to enter our Father’s Day Challenge.. it’s open until Sunday June 26th.

Thanks for stopping by today, Have a great Weekend!

12741890_10208671583206779_8747021650263878740_n

Grab Our Button

i Luv MarkerPOP
Show some MarkerPOP LUV,

add this button to your blog.

I’m a Winner!

I'm a Winner on MarkerPOP Blog
Copy and paste the code under the badge

to claim your bragging rights!

I’ve Made Top 3!

WoHooooo I made it to the Top 3 on MarkerPOP Blog
Copy and paste the code under the badge

to claim your bragging rights!

Visit Us!

MarkerPOP Free Shipping MarkerPOP Boutique
18299 Mount Baldy Cir
Fountain Valley, CA 92708
Toll Free: 1-855-312-1222
Phone: 1-714-249-1222