$10 Gift Voucher - Leave a Comment

Posts Tagged ‘Distress Inks’

Let’s Shell-ebrate!

Written by Holly Endress. Posted in Eye Candy (Projects)

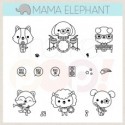
Happy Monday everyone.. I hope you all had a fun weekend. It’s Holly here today and I’ve got a card using “Trishell” from the Greeting Farm‘s new Mermaid line. I love this new line of stamps! There are 3 individual images and a mini set with lots of mermaids and undersea images.

mp2

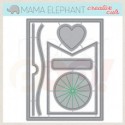
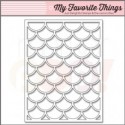
I created the background first by adding some Mermaid Lagoon, Cracked Pistachio and Wilted Violet Distress Inks to a piece of Tim Holtz Watercolor card stock. Once I had the colors all blended how I wanted them I added some drops of Perfect Pearls Mist. This product is discontinued but you can achieve the same look but added some Perfect Pearls powder to a mini mister filled with water and then use the end of the sprayer to flick drops onto your background. I also added a few drops of water and dabbed them off with a paper towel. Then I die cut the panel using the Dainty Scallop Cover up from MFT. I held all the pieces in place with some Glad Press n Seal and added some foam tape to the back and adhered it to a top folding White card base.

mp1H

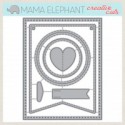
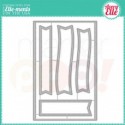
I stamped the image onto some Neenah Solar White card stock and colored it in with Copics. I used Colors similar to the background. I fussy cut the image out and added some Clear Wink of Stella to the tail and pearls in her hair. I die cut a Banner from some White card stock using the Avery Elle Pierced Banner Die set and stamped the sentiment from the “Trishell” set using some VersaFine Onyx ink.

mp3

I adhered the Mermaid and the banner to the front of the card with some Foam Tape and then I added some Mixed Sparkling Clear Sequins from Pretty Pink Posh.

I used the following Copics:

Tail~ BG11, BG13, BG15 & BV13 Hair~Y0000, Y00 & Y02 Skin~ E21, E51 & E50 Shell~E41, E42, E43 & E44 Top~BV00 & BV02 Cheeks~ R20 Pearls~ BV02 & C00

There’s still time left to enter for a chance to win a $20 GC to the store.. Head over to this post for all the details. Thanks for stopping by today!

2

Challenge #99 It’s all about Die Cuts!

Written by Holly Endress. Posted in Challenges, Eye Candy (Projects), Tutorials, Videos

Happy Monday everyone! Who’s ready for a fun new Challenge? This week’s it’s all about Die Cuts. There are so many great stand alone dies on the market now and I love that most stamps have coordinating dies. So, let’s dig into our stash and use some of those die cuts and create a fun project!

mp99

Create a project using Die Cuts and any of the markers that we carry in the store. You may play along with other challenges, but excessive challenge pile-ons (more than 10) will result in disqualification for “The Prize”. This week we have a Mystery Box filled with Crafting Goodies!

mp_blog_prize_box

One entry will be chosen at random to receive our prize. Three additional entries will be chosen for the ”Top 3″ based on their amazing coloring skills. The prize winner and top three can all proudly post their brag buttons on their blogs for the world to see!

The Linky will close on Sunday, July 24th at 12 pm CST. The winner will have TWO weeks to claim their prize. *International winners will be responsible for shipping costs if they choose to claim their prize* As always, have fun.. We can’t wait to see what you create!


Hi everyone it’s Holly here today with a fun project using Lots and Lots of Die cuts!!

mp1

All the stamps and dies I’m using today are from My Favorite Things. I started by creating a frame using the Whimsical Woodgrain background stamp from MFT and some Doe Ink from Lawn Fawn on a piece of Kraft card stock. Then I die cut the frame using the Blueprints #15 & #29. Then I die cut an additional piece of White using the smaller rectangle from Blueprints #29. I added the frame to a top folding White A2 size card base with some liquid glue and then I trimmed out the top portion of the card base showing through the frame with a craft knife.

mp2

Then I stamped the images from the Adorable Hog Heaven set from MFT onto some Neenah Solar White card stock using Memento Tuxedo Black ink and colored them in with Copics: E30, E34, E44, E47, R0000. R00, R01, R02, YG17 & G07. I die cut the images using the coordinating dies. Using the smaller of the stitched rectangles from the Frame I created, I die cut a  piece of White card stock and added some Distress Inks in Crushed Olive and Mowed Lawn to create the grass. Then I added the images to the card front and then on the reverse side making sure they lined up.

mp3

I die cut a second panel from the smallest stitched rectangle and added some Distress Inks in Salty Ocean and Tumbled Glass. Then I die cut some Puffy Clouds from MFT and added the sentiment from Hog Heaven. This set is the Cutest!!!

Check out the video for more details on how I created this card.

Thanks for stopping by today!

Happy Birthday!

Written by Holly Endress. Posted in Eye Candy (Projects)

Happy Friday everyone.. It’s Holly here today! Who’s ready for the Weekend? Today I have a Super Adorable Birthday Card featuring Mama Elephant Stamps & Dies.

mp2

I created this card for a Special Friend of mine who just turned 40!!! I created a standard A2 size card base from some Neenah Solar White and then I die cut a Piece of Dark Grey card stock with the Mama Elephant Pizazz Pieces Creative Cuts. Then I adhered it to the card front and set that piece aside. I die cut another piece of White card stock using the Dotted Details Creative Cuts and added a Background with the Geometric Grid Stencil from My Favorite Things and some Squeezed Lemonade Distress Ink.

mp1

I stamped Happy Birthday from the Big Greetings Set from Avery Elle over the center of the panel with some VersaFine Black ink and then I adhered the piece to the card front. I die cut a second frame from some Black card stock and added just the frame around the image panel. I stamped the images from the Rock and Paws Set and colored them in with Copics. Then I used the coordinating dies to cut them out. I adhered them to the card front with some Foam mounting tape.

mp3

For a touch of Shimmer I added a little Clear Wink of Stella to the Guitar and the star over the eye and the Musical Notes. This is a Masculine card so I didn’t want to over do it with the Sparkles. I really like the way Grey, Black and Yellow look together and How adorable is this stamp set?

I used the following Copics for my images:

Musical Notes ~ 100,C9,C7,C5 & C1 Speakers ~ T7,T5, T3 & T1 Dog ~ R05,W7,W5,W3,W1 &W0 Guitar ~ C3, C1 & C00 and a little 0 Colorless Blender

Thanks for stopping by today..

12741890_10208671583206779_8747021650263878740_n

Bonjour

Written by Holly Endress. Posted in Eye Candy (Projects), Uncategorized

Hi everyone.. It’s Holly here popping in today to share a card using some of the new Products from WPlus9.

mp2

I’m using the cute new addition to the Friends for All Seasons Collection. Friends for All Seasons: Summer stamp set and the Coordinating Die Cuts. I started by stamping and die cutting the images onto some Neenah Solar White card stock using Memento Tuxedo Black ink. Then I colored them in with Copics. I used the coordinating dies to cut them out with my Big Shot and I set them aside. I stamped the inside of the Kite with some Mermaid Ink from Lawn Fawn. 

mp1

Then I created a Distressed background for my images using some Tim Holtz Watercolor paper and Distress Inks in Twisted Citron, Mowed Lawn, Tumbled Glass & Salty Ocean. I die cut a panel of Watercolor Paper with the Sew Fancy Creative Cuts from Mama Elephant. and then I used the Tree Border Die from WPlus9 and cut a tree line. I cute a hillside using the Lawn Fawn Stitched Hillside Border dies as well. Using a mini ink blender I added the Distress Ink to the pieces and spritzed them with some Water to create a Distressed look. Then I reassembled the pieces to create my scene. I die cut a piece of Lawn Fawn Perfectly Plaid paper from the 6×6 pack using the Blueprints 29 from MFT and adhered it to the card front. Then I added the image panel with some Foam Adhesive.

mp3

I added a sentiment inside the card along with and extra image that I colored and die cut as well. This is a great Friendship card or a card to just say Bonjour!

I used the following Copics to color my images:

E70,71,74,77,79, R20,Y08,R05, 27, 39 & 0

Thanks for popping in today!

12741890_10208671583206779_8747021650263878740_n

Grab Our Button

i Luv MarkerPOP
Show some MarkerPOP LUV,

add this button to your blog.

I’m a Winner!

I'm a Winner on MarkerPOP Blog
Copy and paste the code under the badge

to claim your bragging rights!

I’ve Made Top 3!

WoHooooo I made it to the Top 3 on MarkerPOP Blog
Copy and paste the code under the badge

to claim your bragging rights!

Visit Us!

MarkerPOP Free Shipping MarkerPOP Boutique
18299 Mount Baldy Cir
Fountain Valley, CA 92708
Toll Free: 1-855-312-1222
Phone: 1-714-249-1222