$10 Gift Voucher - Leave a Comment

Posts Tagged ‘Avery Elle’

Macho Man

Written by Clare. Posted in Eye Candy (Projects)

Hello! Clare here today with a type of card I usually struggle to make – a masculine card! But with the Avery Elle Tough Guy, making macho cards is a cinch!

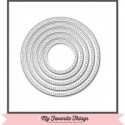
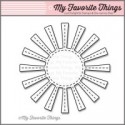
To start my card off, I took a post it note and cut triangular slits in it, to create my own ray mask (an alternative is Paper Smooches Fireworks or Sunny Skies). I then die cut a circle out of another post it note, and placed this on top of the ray.

For my blended a background, I used Scattered Straw for the pale yellow and Wild Honey for the golden glow. Right after I finished blending the background, I scattered some water on it, then picked up the water (and with it, some ink) with a paper towel. To finish it off, I stamped some wee stars in Wild Honey.

tough-guy-by-Clare-Prezzia-for-MarkerPOP

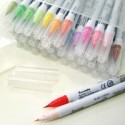
For my tough guy, I colored it in with Red, Yellow, and Pale Pink for the skin. For the boots and weights, I blended Light Gray out with some water. And then for his hair, I blended Yellow and Ochre out with some water. I die cut the guy, and layered him on another die cut chipboard.

I also added some chest and armpit hair, just because I thought the guy looked kinda funny without them.

tough-guy-close-by-Clare-Prezzia-for-MarkerPOP

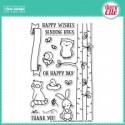
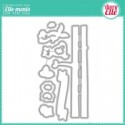
I added a little bit of shine to his belt, and then to finish of the card, I stamped the sentiment (adding the comma with a micro-pen) and a die cut border.

I hope you enjoyed this macho guy as much as I did! Thanks so much for stopping in today and God bless!

Clare Prezzia ~ Bearydo Paperie


Happy Wishes

Written by Clare. Posted in Eye Candy (Projects)

Hi all! Clare here today!

I just love stamp sets that make creating a quick, but fun, card super easy, and Avery Elle’s Woodland Wonders is just one of those stamp sets!

For today’s card, I stamped my trees and owl using Hero Arts Black ink onto some watercolor cardstock. I then colored in my tree bark simply with ZIG Clean Color Real Brush Light Gray and some water; the leaves were colored in with Pale Green and Mid Green.

happy-wishes-by-Clare-Prezzia-for-MarkerPOP

For my owl, I used a mix of Beige, Mid Brown, Gray Brown and some water to mix and blend it all out. Honestly, when I’m coloring animals, I usually start with a gray or a brown, and then add random other neutral colors till I get a color I like. ZIG brushes work well with my haphazard coloring style. 😉 I added a little Light Pink to the owl’s cheeks to tie in my background.

My background was a blend of Abandoned Coral and Festive Berries – once the cardstock was dry, I flecked some water on it, let it sit for a couple seconds, then dried it with a paper towel. The water picked up some of the ink it was sitting on, and that ink came up with water onto the towel, leaving nice light spots on the background for an extra little detail.

happy-wishes-close-by-Clare-Prezzia-for-MarkerPOP

I did some partial die cutting with the coordinating Avery Elle Woodland Wonders dies and a circle die (I have a video on how to do this HERE), and then created a shaker card by adding in some sequins. I adhered my die cut panel to my blended card base, and then topped it off with an embossed banner and sentiment.

Thanks so much for stopping in today and God bless!

Clare Prezzia ~ Bearydo Paperie

Huge Birthday Wishes

Written by jpascarella. Posted in Eye Candy (Projects)

Happy Wednesday, everyone! My name is Jessica Pascarella and I am super excited to be joining the MarkerPop design team!  So since this is my first MarkerPop post, let me introduce myself! I am a SAHM of 3 wonderful kids. My main love is card-making. But have started to expand into scrapbooking and altered items. My love for papercrafts started over 13 years ago when I made my wedding invitations. My style is mainly Clean and Simple (CAS), but I love to challenge myself to try new styles as well as new techniques. My latest obsession is using watercolors.

As I mentioned above, I love watercolors! And I have to admit it was ‘love at first sight’ when I was introduced to ZIG Clean Color Real Brush markers!  So for today’s creation, I paired up the ZIG Clean Color markers with one of the newest Avery Elle stamp set, Wild Birthday.

To start the card, I stamped the balloon image several times onto some watercolor cardstock using Memento Tuxedo Black ink. Once the ink dried, I used a variety of ZIG markers to color in the balloons. I used the Wild Birthday coordinating dies to cut out the balloons and set them aside. I repeated the process for the hippo image.

To create the sky background, I used the popular ink-smooching technique. If you are not familiar with this technique, let me explain quickly. On a piece of acetate, add a few colors of paint (in this case, I used a variety of blue ZIG markers) and mix with a small amount of water. Flip the acetate over and place on top of the cardstock you are working with. Move the acetate around to spread the color until you are satisfy with the overcome.

Time to piece the card together! A small hole is punched in the hippo and strands of twine are wrapped around the image. The end of the strands are arranged at the top of the card to line up the balloons. The balloons are attached with adhesive. The hippo is attached to the card with a foam dot. A simple sentiment is stamped on the bottom of the card.

Thank you for stopping by today and seeing my first MarkerPop creation!

Have a great day!

ZIG Clean Color used:

Balloons – (Red) 021, 022, (Orange) 052, 070, (Green) 045, 047, (Blue) 031, 032, (Purple) 080, 081

Sky – (Blue) 030, 031, 032

Hippo – (Gray) 092 & (Flesh) 071

Happy Birthday!!

Written by Holly Endress. Posted in Eye Candy (Projects)

Happy Monday… It’s Holly here today! Have you played along with Challenge #100 yet? There’s a great Prize package up for grabs for one lucky winner. This week’s theme is “Create a Scene”. I created a scene on my card today using the Stitched Cloud Edges from My Favorite Things. I’m also using the super cute new  Band Camp set from Avery Elle and the Coordinating Dies.

mp2

I started with some Neenah Solar White card stock and I added some Tumbled Glass Distress Ink to created the sky. Then I die cut the clouds from some White card stock and adhered them to the background with the Scotch Advanced Tape Glider. Then I adhered that panel to a Standard A2 size White card base.

mp1

I die cut the images first on a piece of White card stock lining them up where I would want the images. I partial die cut them by placing the cutting pad about halfway down the dies. This leaves the lower half of the dies uncut after you run it through. Then using an X-acto knife I cut out the bottom of the scene cutting around the partial die cuts. Then I placed the piece into the Mini Misti and stamped the images into the die cuts. I colored the images with Copics. I created the grass area by drawing it in with a Copic Multiliner pen.

mp3

I adhered the image panel to the background with some Foam tape to give it some dimension. This came out way cuter then I imagined it would. Have you tried partial die cutting yet?

I used the following Copic Sketch Markers: 

Alligator~ YG91, YG93, YG97 & YG99 Sax~ Y23, Y26 & Y28 Turtle~G21, G24, BG93 & BG96 Banner ~ Boo, B000, E34 &E37  Owl~E21,E34,E53,E25,E27, E37, E23, YR23, YR12, R17 & R29,

You can head over to this post to find out more about Challenge #100.. The Linky will close on Sunday Aug. 7th @ 12pm CST. We hope you will join in the fun.. Thanks for stopping by today!

2

Grab Our Button

i Luv MarkerPOP
Show some MarkerPOP LUV,

add this button to your blog.

I’m a Winner!

I'm a Winner on MarkerPOP Blog
Copy and paste the code under the badge

to claim your bragging rights!

I’ve Made Top 3!

WoHooooo I made it to the Top 3 on MarkerPOP Blog
Copy and paste the code under the badge

to claim your bragging rights!

Visit Us!

MarkerPOP Free Shipping MarkerPOP Boutique
18299 Mount Baldy Cir
Fountain Valley, CA 92708
Toll Free: 1-855-312-1222
Phone: 1-714-249-1222