$10 Gift Voucher - Leave a Comment

Posts Tagged ‘Avery Elle’

Wishing You a Magical Day!

Written by Jessica Frost. Posted in Eye Candy (Projects)

Good morning!  Jess here with a magical shaker card!  When I was in elementary school I was OBSESSED with unicorns.  I remember that there was always at least one unicorn poster for sale at every school bookfair and I bought every single one I could get my hands on.  I had unicorn notebooks, figurines, stuffed animals…unicorns everywhere! 😉 So I am personally thrilled about the resurgence of unicorns in everyday life, particularly papercrafting!  And I do not discriminate against unicorns…I’ll buy any unicorn stamp I can find.  Though, after making today’s card, this adorable unicorn might just be my favorite!

Seriously, is that not the cutest thing you’ve ever seen?!?  I’m in love.  And here’s what I created with my sparkly teal unicorn:

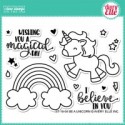
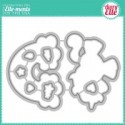
As is my preference, I combined a few different companies to make my shaker card!  I started by stamping the unicorn from Avery Elle’s Be a Unicorn onto white cardstock with versafine before heat-embossing it with clear embossing powder.  Then I colored him with copic markers.  I used N0 and N1 for shadows; R21 and R32 for his ear; BG10, BG11, and BG32 for his horn; and BG32, BG15, and BG49 for his mane, hooves, and nose.  Finally I added a layer of spectrum noir clear sparkle to his mane, hooves, and nose before die-cutting him with the coordinating dies.

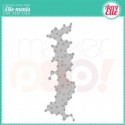
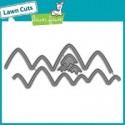
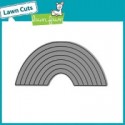
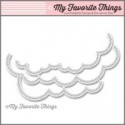
Next I die-cut the Lawn Fawn Rainbow using a variety of colored cardstock.  I listed similar colors below because I wasn’t quite sure the name of some of the cardstocks I used.  I aimed for a softer rainbow palette.  I also die-cut one from a piece of white cardstock for my background panel.  Then I stamped the sentiment from Be a Unicorn onto a second piece of white cardstock with versafine and heat-embossed it with clear embossing powder before die-cutting the cloud edge from the top of the cardstock.  I adhered a piece of acetate to the back of the background panel and then added a double-layer of foam mounting tape all around the back before filling it with sparkling clear sequins and beads.

I applied adhesive to the back of my cardstock rainbow, carefully placed it over the back of the shaker making sure to line it up with the opening of the shaker, and pressed lightly to adhere it to the foam mounting tape.  Then I added a piece of white cardstock cut down to 4″ by 5.25″ to fully seal the shaker and secure my rainbow.  I turned it over, adhered my unicorn with a little foam mounting tape, and then added a few more sequins to finish the card!

So that’s my magical little unicorn shaker!  I hope you like him as much as I do!  Yesterday was my birthday and I think I might keep him as my birthday card to myself! 😉 Thanks so much for visiting and have a wonderful weekend!

Jessica Frost ~ All the Sparkle

Supplies:


Winter Unicorn

Written by Holly Endress. Posted in Eye Candy (Projects), Tutorials, Videos

Happy Monday everyone.. It’s Holly here today and I have a new Video and fun card using the New Winter Unicorn set from Lawn Fawn. I’m also using the new Perfectly Plaid Petite 6×6 Pad and the new Storm Cloud Ink from Lawn Fawn’s latest release.

mp3

I started out by die cutting three panels from some White Card stock using the STAX Cross Stitched Rectangle Dies from Lawn Fawn and I also cut a piece of the Plaid paper with the Cross Stitched Rectangles as well. I created a White card base and added the Pattern paper. Then from two of the panels, I die cut the Stitched Mountain Border from Lawn Fawn and then Stitched Hillside Borders. From the third panel I die cut the Avery Elle Falling Snow die after I applied some Peacock Feathers Distress Ink. I added some additional Peacock Feathers ink to the hillside pieces and the mountain caps.

mp2

I stamped the Winter Unicorn image onto some Neenah Solar White card stock in Memento Tuxedo Black ink and then I colored it in with Copic Markers. Hair: BG10, BG11 & BG13 Body: C00, C01, C02 & C05 Cheeks: R20 Horn: Y00 & Y02 Scarf: R02 & R05. Then I die cut the unicorn using the coordinating Die and I added some Clear Sparkle Pen from Spectrum Noir.

mp1

I stamped the sentiment using the Mini Misti onto the lower corner of the Hillside piece with some Storm Cloud ink from Lawn Fawn. And then I assembled the scene and adhered it to the front of the card. I added the Unicorn image with some foam tape. On the inside of the card I stamped the other sentiments from the set to say  ” you! and a unicorn”. I also added a few little hearts from some other Lawn Fawn sets in Guava Ink.

Check out the video below for more details. Thank for stopping by today!

2

Tidings of Comfort and Joy!

Written by Jessica Frost. Posted in Eye Candy (Projects)

Good morning!  Jess here with another Christmas card…can you tell I’m starting to stock up for the holidays? 😉 One of my favorite things to do when I’m designing for a store rather than a stamp company is to combine companies!  Often I see new releases and I immediately think of how wonderfully they’d work with another existing stamp from another company.  Most recently I saw the fabulous sentiment set from Avery Elle, Comfort and Joy, and couldn’t wait to pair it with a beautiful floral set from Poppy Stamps, Poinsettia Peace.  And here’s what I came up with!

I started by prepping a piece of Canson Montval watercolor paper with the Inkadinkado powder bag and then stamped the sentiment and florals onto the paper with versamark.  Next I heat-embossed them with gold tinsel embossing powder.  Seriously, I could have stopped right there…those images and the sentiment seem like they were meant to go together!

But I decided to go ahead and add a little color! Using a slightly damp paintbrush and my trusty zig markers I added Geranium Red and Wine Red to the flowers and Marine Green to the pine sprigs.  Again I could have stopped at this point but I decided that I wasn’t a fan of the slightly yellowish tint of the watercolor paper…

So I got brave and with some guidance and encouragement from my friend, Emily, I added a light wash of Emerald Green.  Working in small sections I outlined the flowers and words with the zig marker and then immediately used a wet paintbrush to move the watercolor around.  I’m not quite comfortable with the technique yet but I really like how it turned out!

I feel like the green shadow really makes the red pop!  To finish the card I added a few metallic gold sequins and trimmed the watercolor paper down before adhering it to a red cardstock frame.  To be very honest the most time consuming part of this card was the background watercolor wash.  This would be a very easy card to mass-produce for a holiday card if you just wanted to watercolor the floral images and I hope it inspires you to get started on your holiday cards!  Thanks so much for visiting and have a wonderful day!

Jessica Frost ~ All the Sparkle

Supplies:


Let’s Party WILD

Written by jpascarella. Posted in Eye Candy (Projects)

Hello, everyone! It is Jessi here today. I love making CAS (Clean and Simple) cards. They are super easy cards to create. Another thing I love… stamps that have coordinating dies! They also make card-making easy!

Today, I am pairing up my favorite style with some of my favorite supplies! Avery Elle’s Wild Birthday stamps and coordinating dies and a variety of Chameleon markers.

I started this card with a blank white 3.75in x 5in cardstock panel. The banner stamp is done at an angle to make it look like it was hanging off trees. The letters from the stamp set were stamped onto the pendants to spell PARTY. The banner image is colored in using a variety of blues and greens.

The animals are stamped onto white cardstock and cut out using the coordinating dies. The animals are colored in with markers. Before the animals are attached to the panel, I used the Pink & Main’s Scalloped Waves dies to create the green grass background and attached it at the bottom of the panel. The animals are attached using tape adhesive and a foam dot. The panel is attached to a Lawn Fawn Scalloped Rectangles diecut and is mounted onto the card front.

Markers Used on today’s project:

Chameleon – Vine (Spring Meadow-YG3 & Grass Green – GR3), Banner (Sky Blue-BL3 & Royal Blue -BL6), Hippo (Cool Gray -CG8 & Deep Black-BK4), and Lion (Seville Orange-OR4, Warm Sunset-YO3 & Summer Sun YL2)

Thank you for stopping by today!

Have a great day!

Grab Our Button

i Luv MarkerPOP
Show some MarkerPOP LUV,

add this button to your blog.

I’m a Winner!

I'm a Winner on MarkerPOP Blog
Copy and paste the code under the badge

to claim your bragging rights!

I’ve Made Top 3!

WoHooooo I made it to the Top 3 on MarkerPOP Blog
Copy and paste the code under the badge

to claim your bragging rights!

Visit Us!

MarkerPOP Free Shipping MarkerPOP Boutique
18299 Mount Baldy Cir
Fountain Valley, CA 92708
Toll Free: 1-855-312-1222
Phone: 1-714-249-1222