$10 Gift Voucher - Leave a Comment

Author Archive

“I Pick You” Fall Themed Card with Heidi

Written by Heidi. Posted in Eye Candy (Projects)


Hello everybody Heidi here, welcome back to the Marker POP blog, tomorrow is Thanksgiving day here in the USA, we are hoping that all your preparations, travel, and family gatherings are all going well.

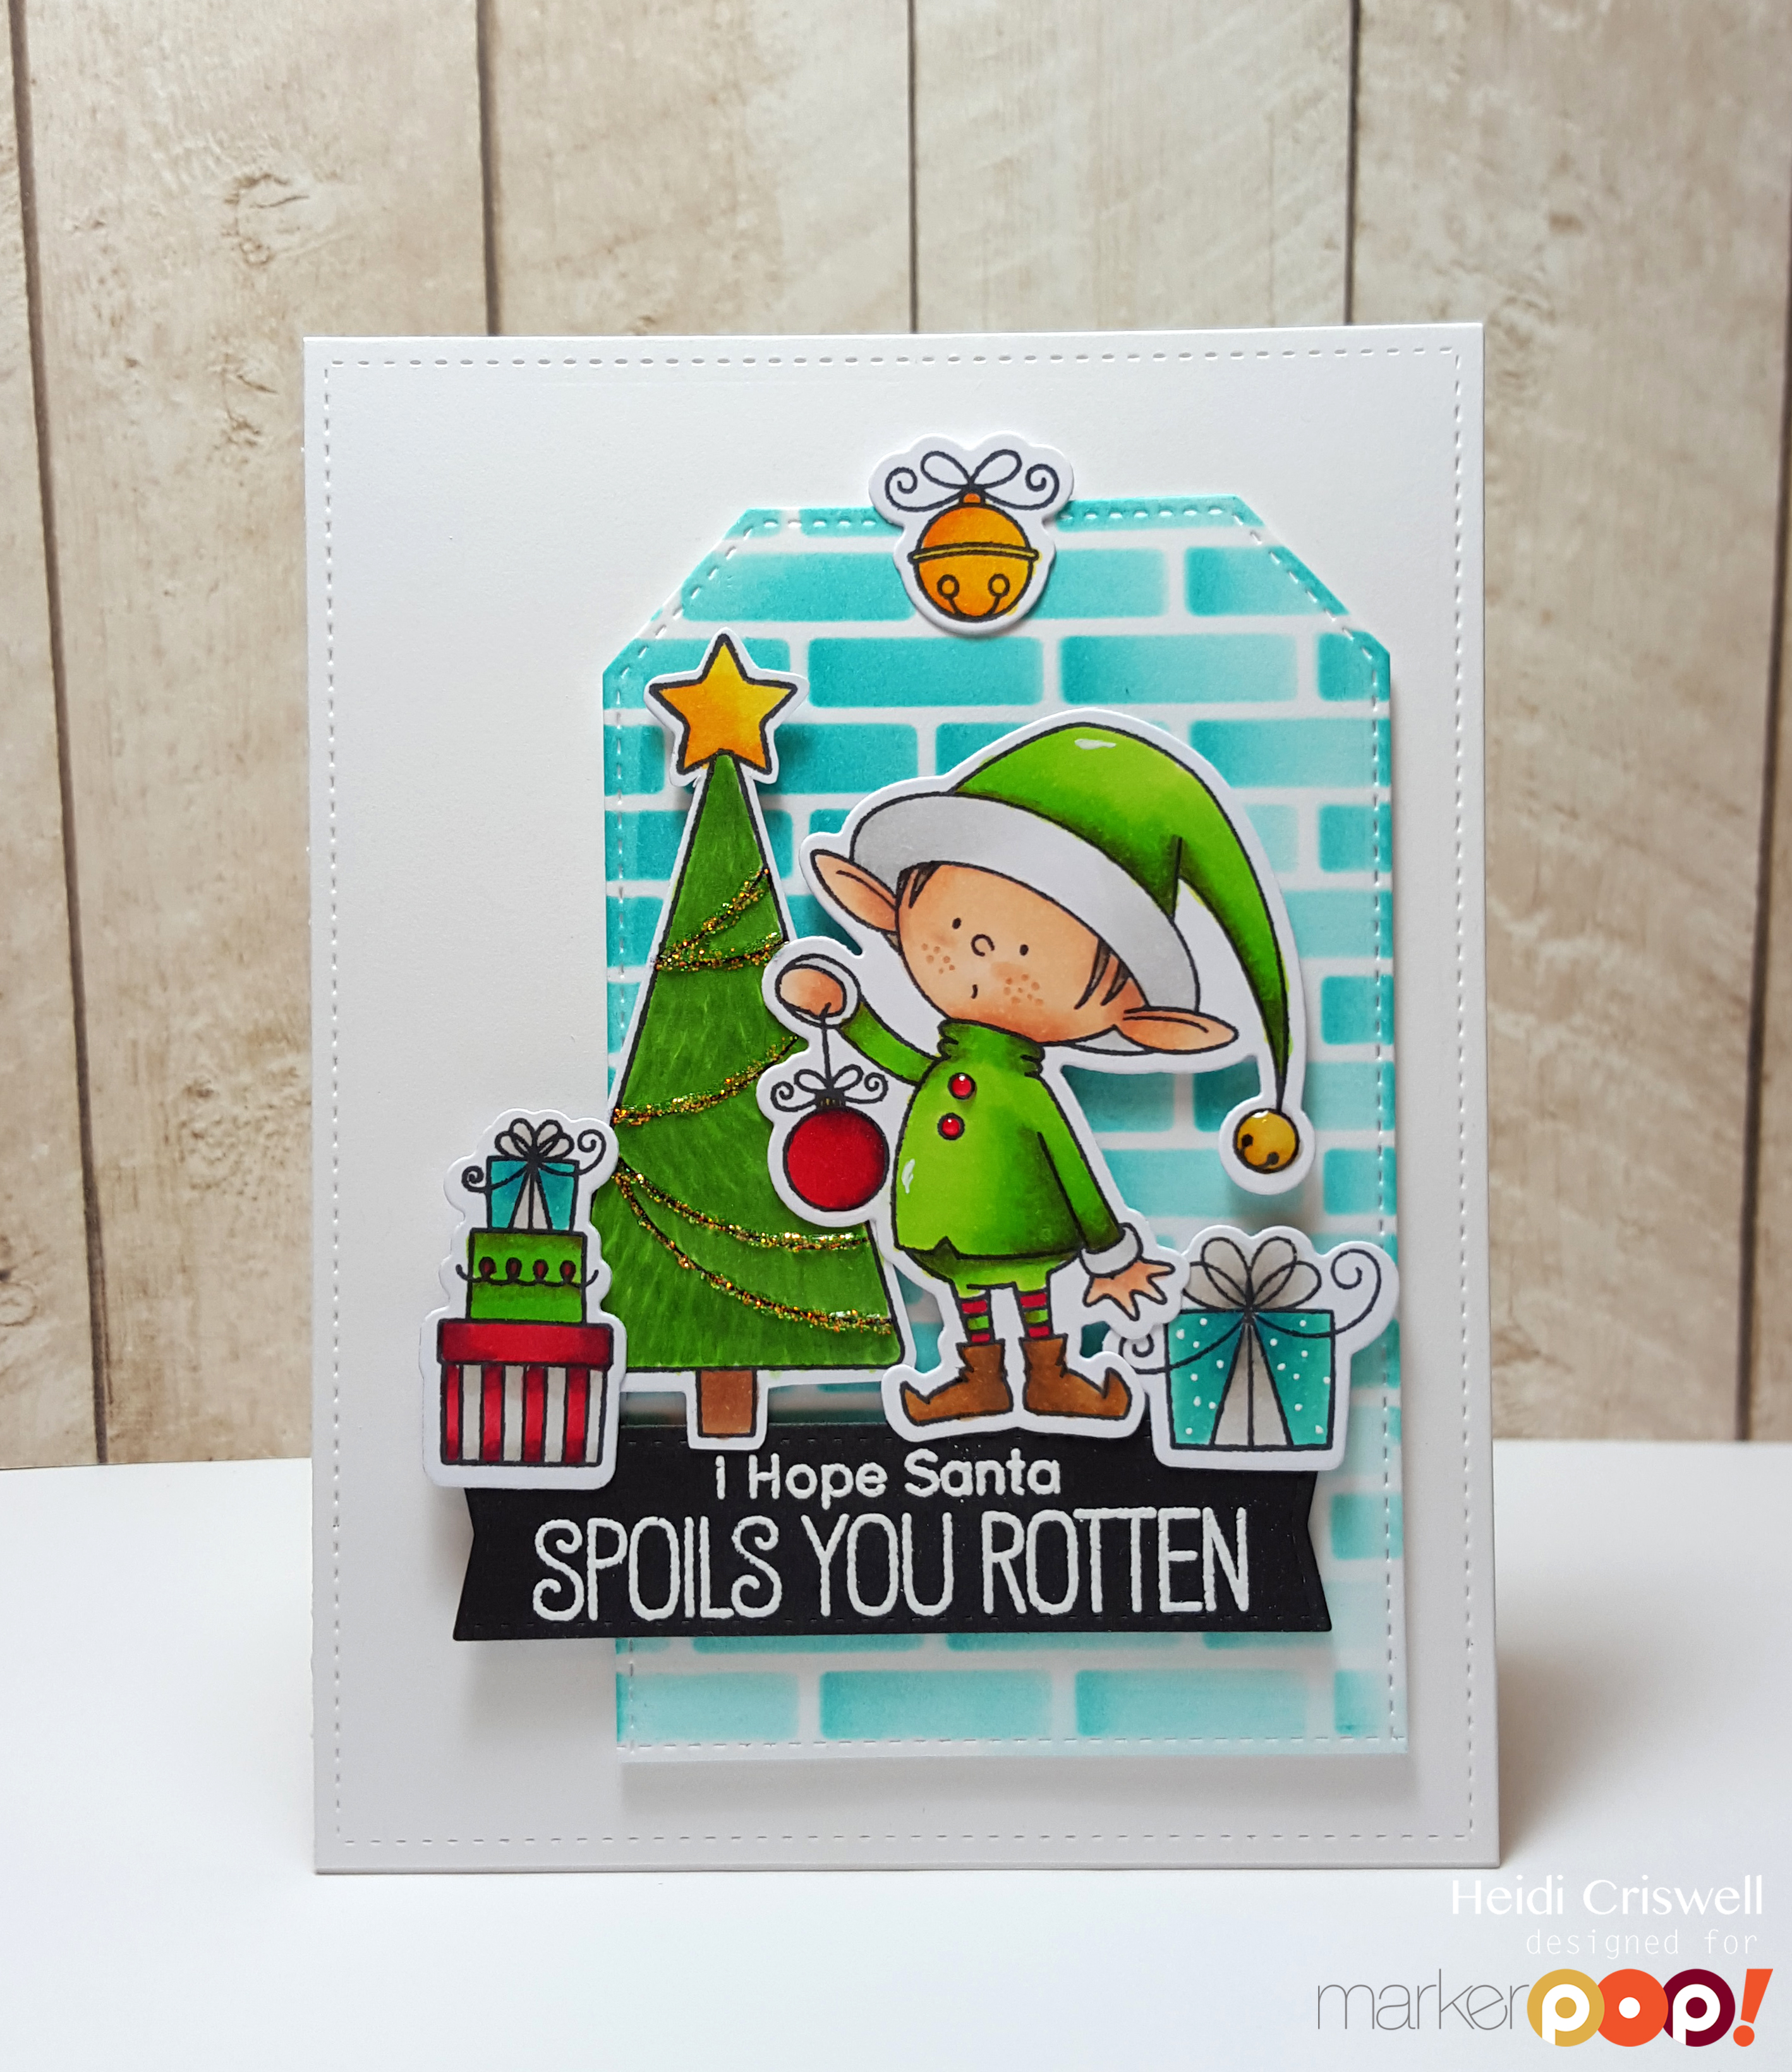
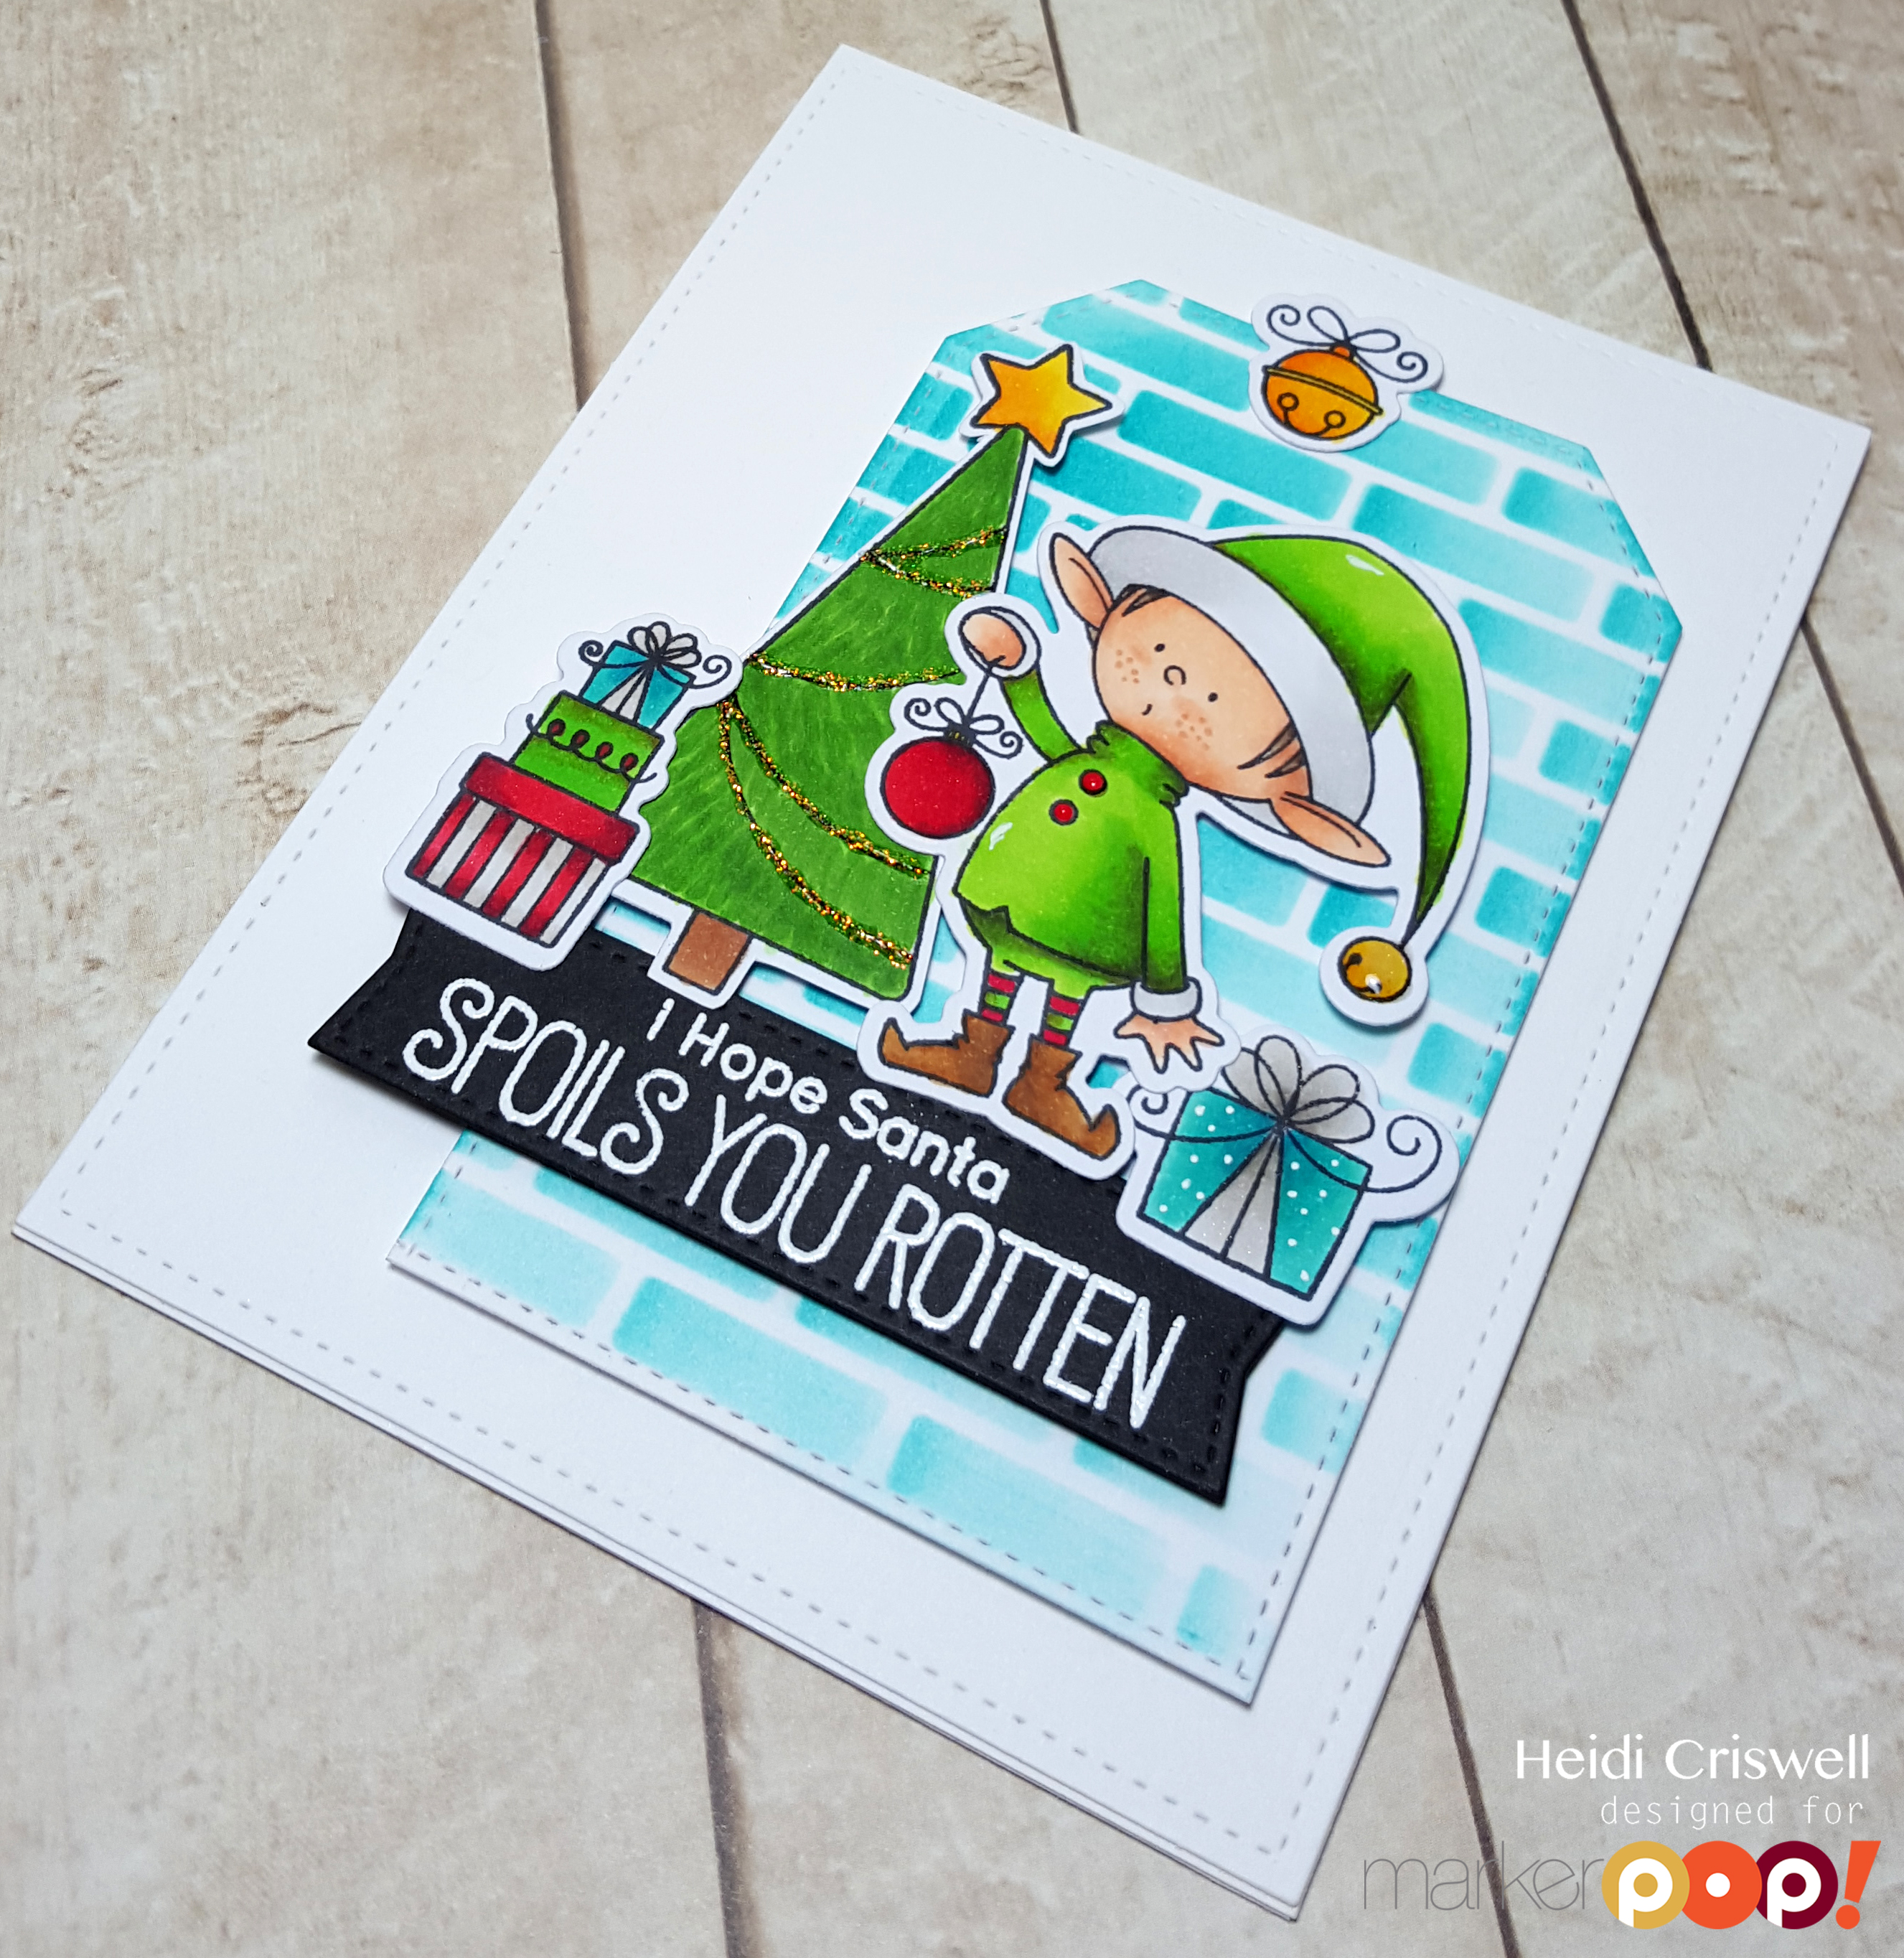
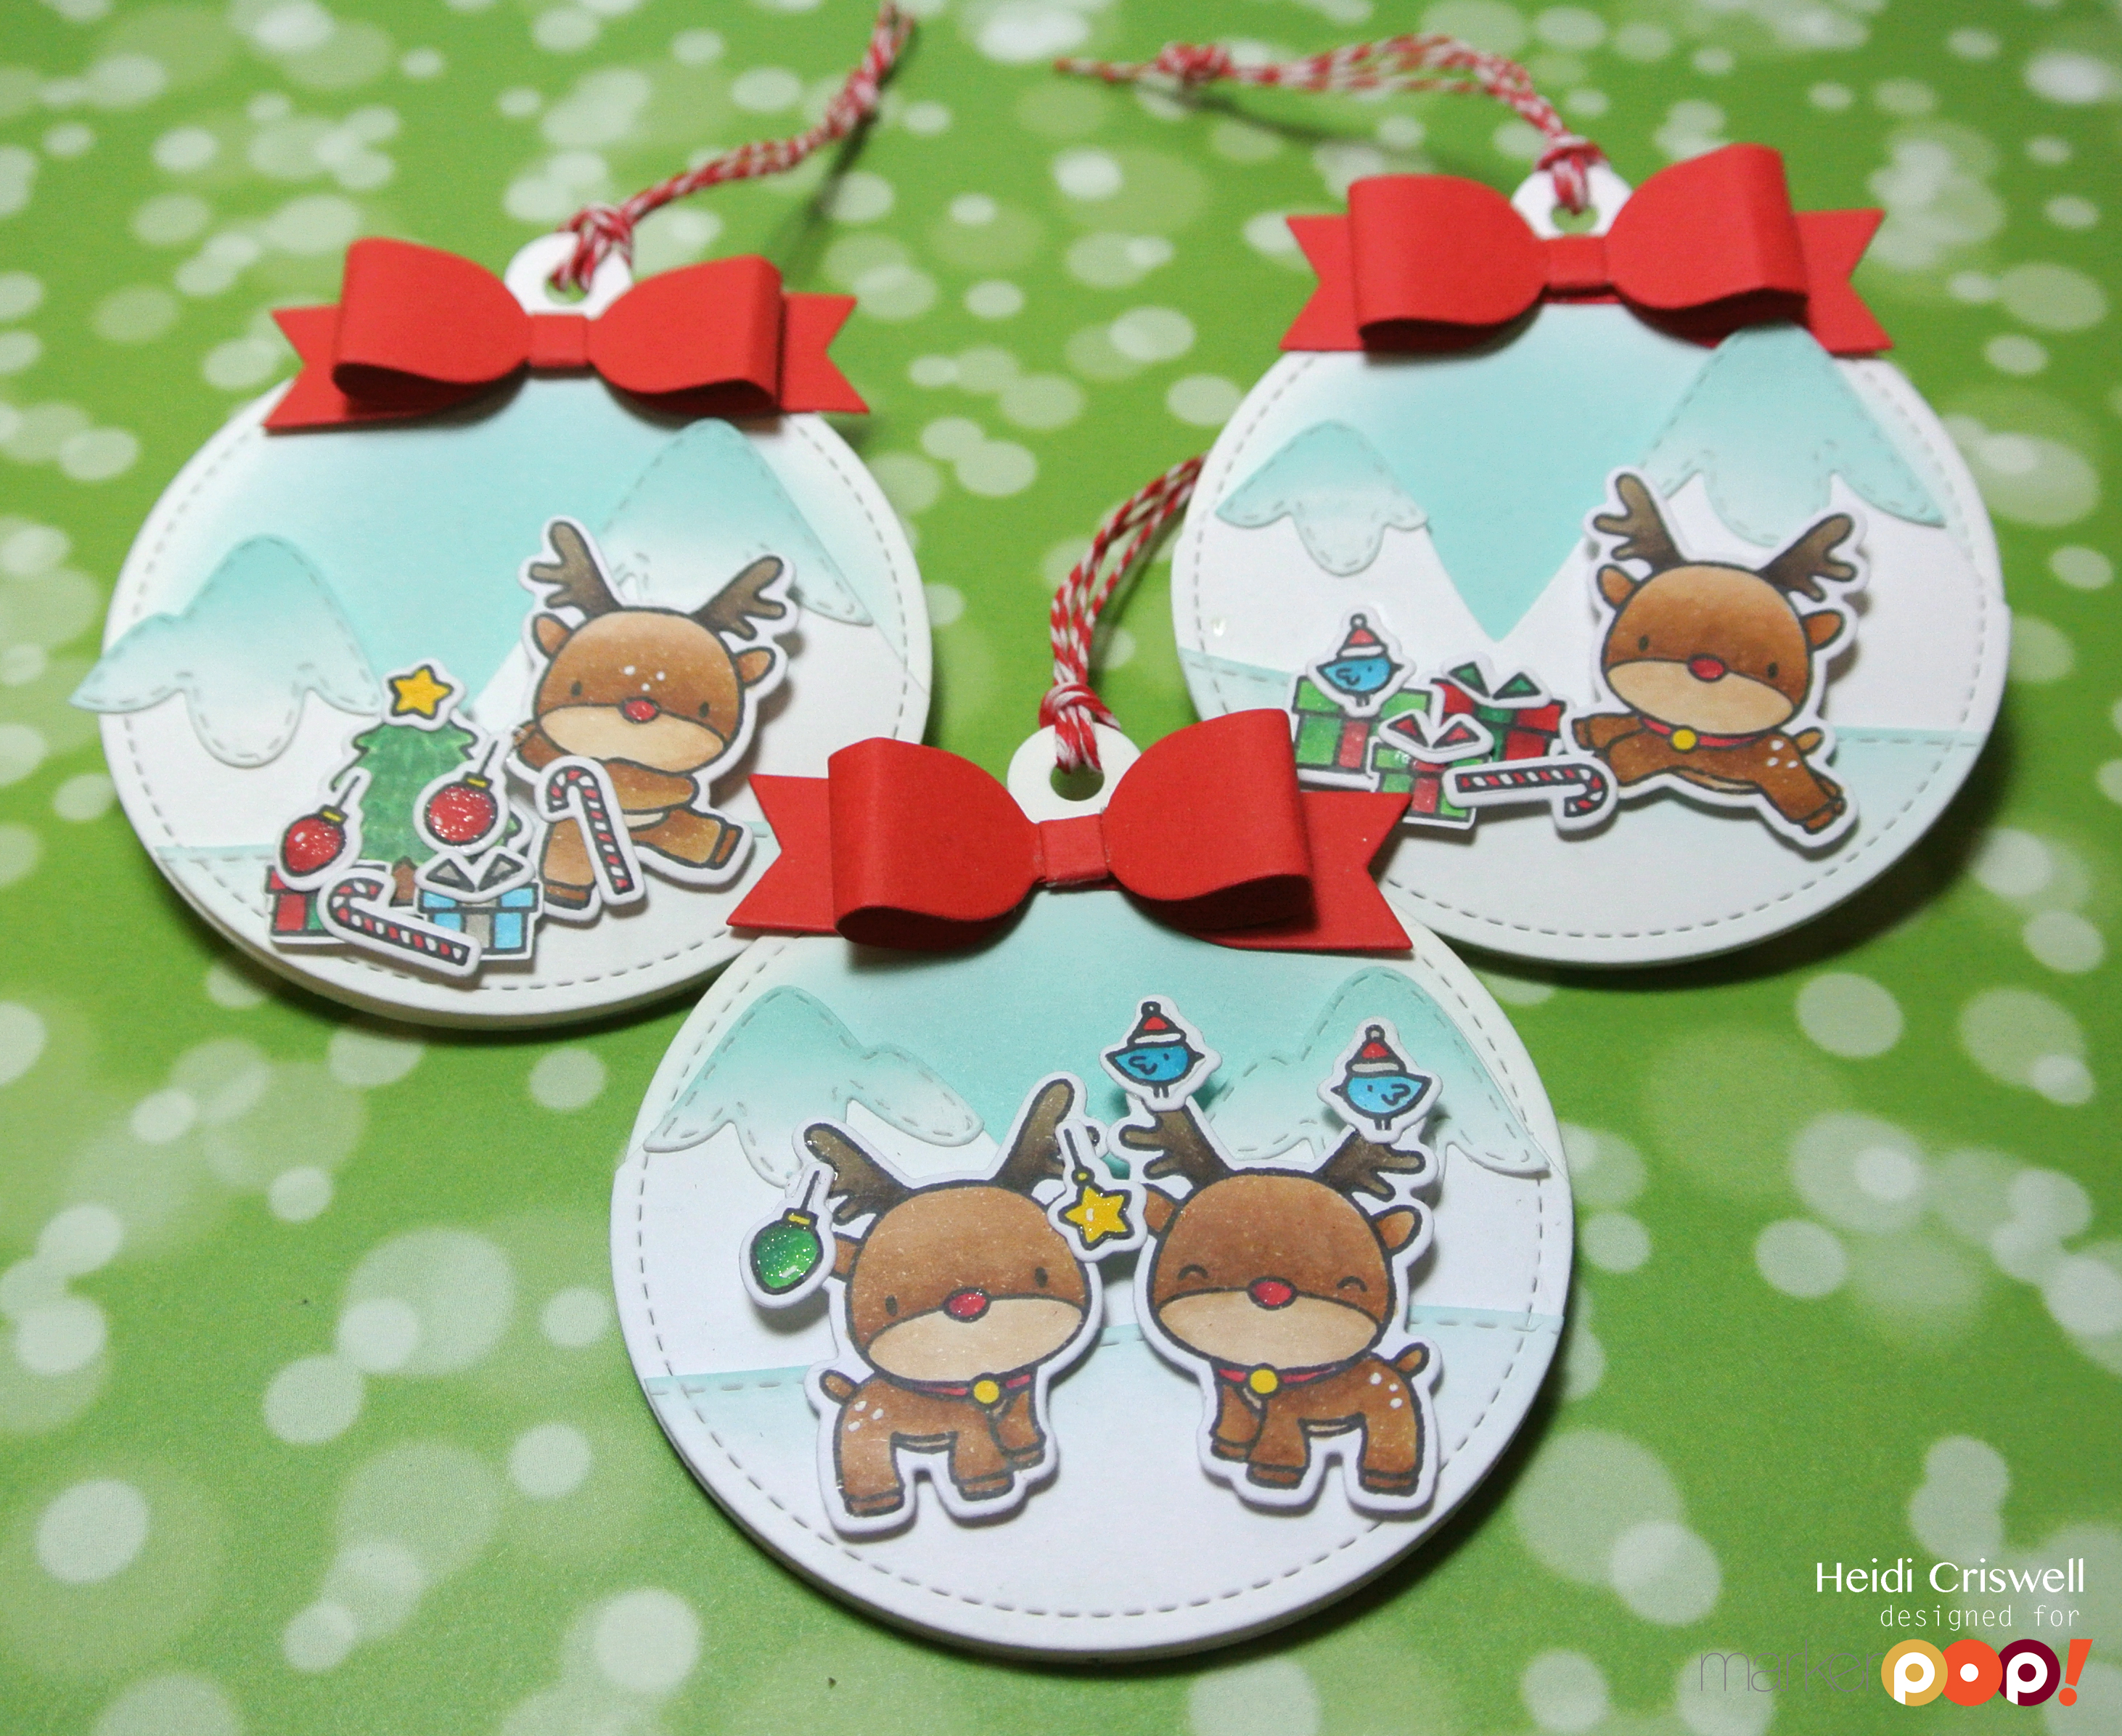
For today I prepared a fall themed card featuring the “Harvest Mouse” stamp and coordinated Dienamics set by My Favorite Things, I also used the Picket fence border die by Lawn Fawn. Let me show you the card that I made, and I will be telling you a little bit more about it.

20151120_230443
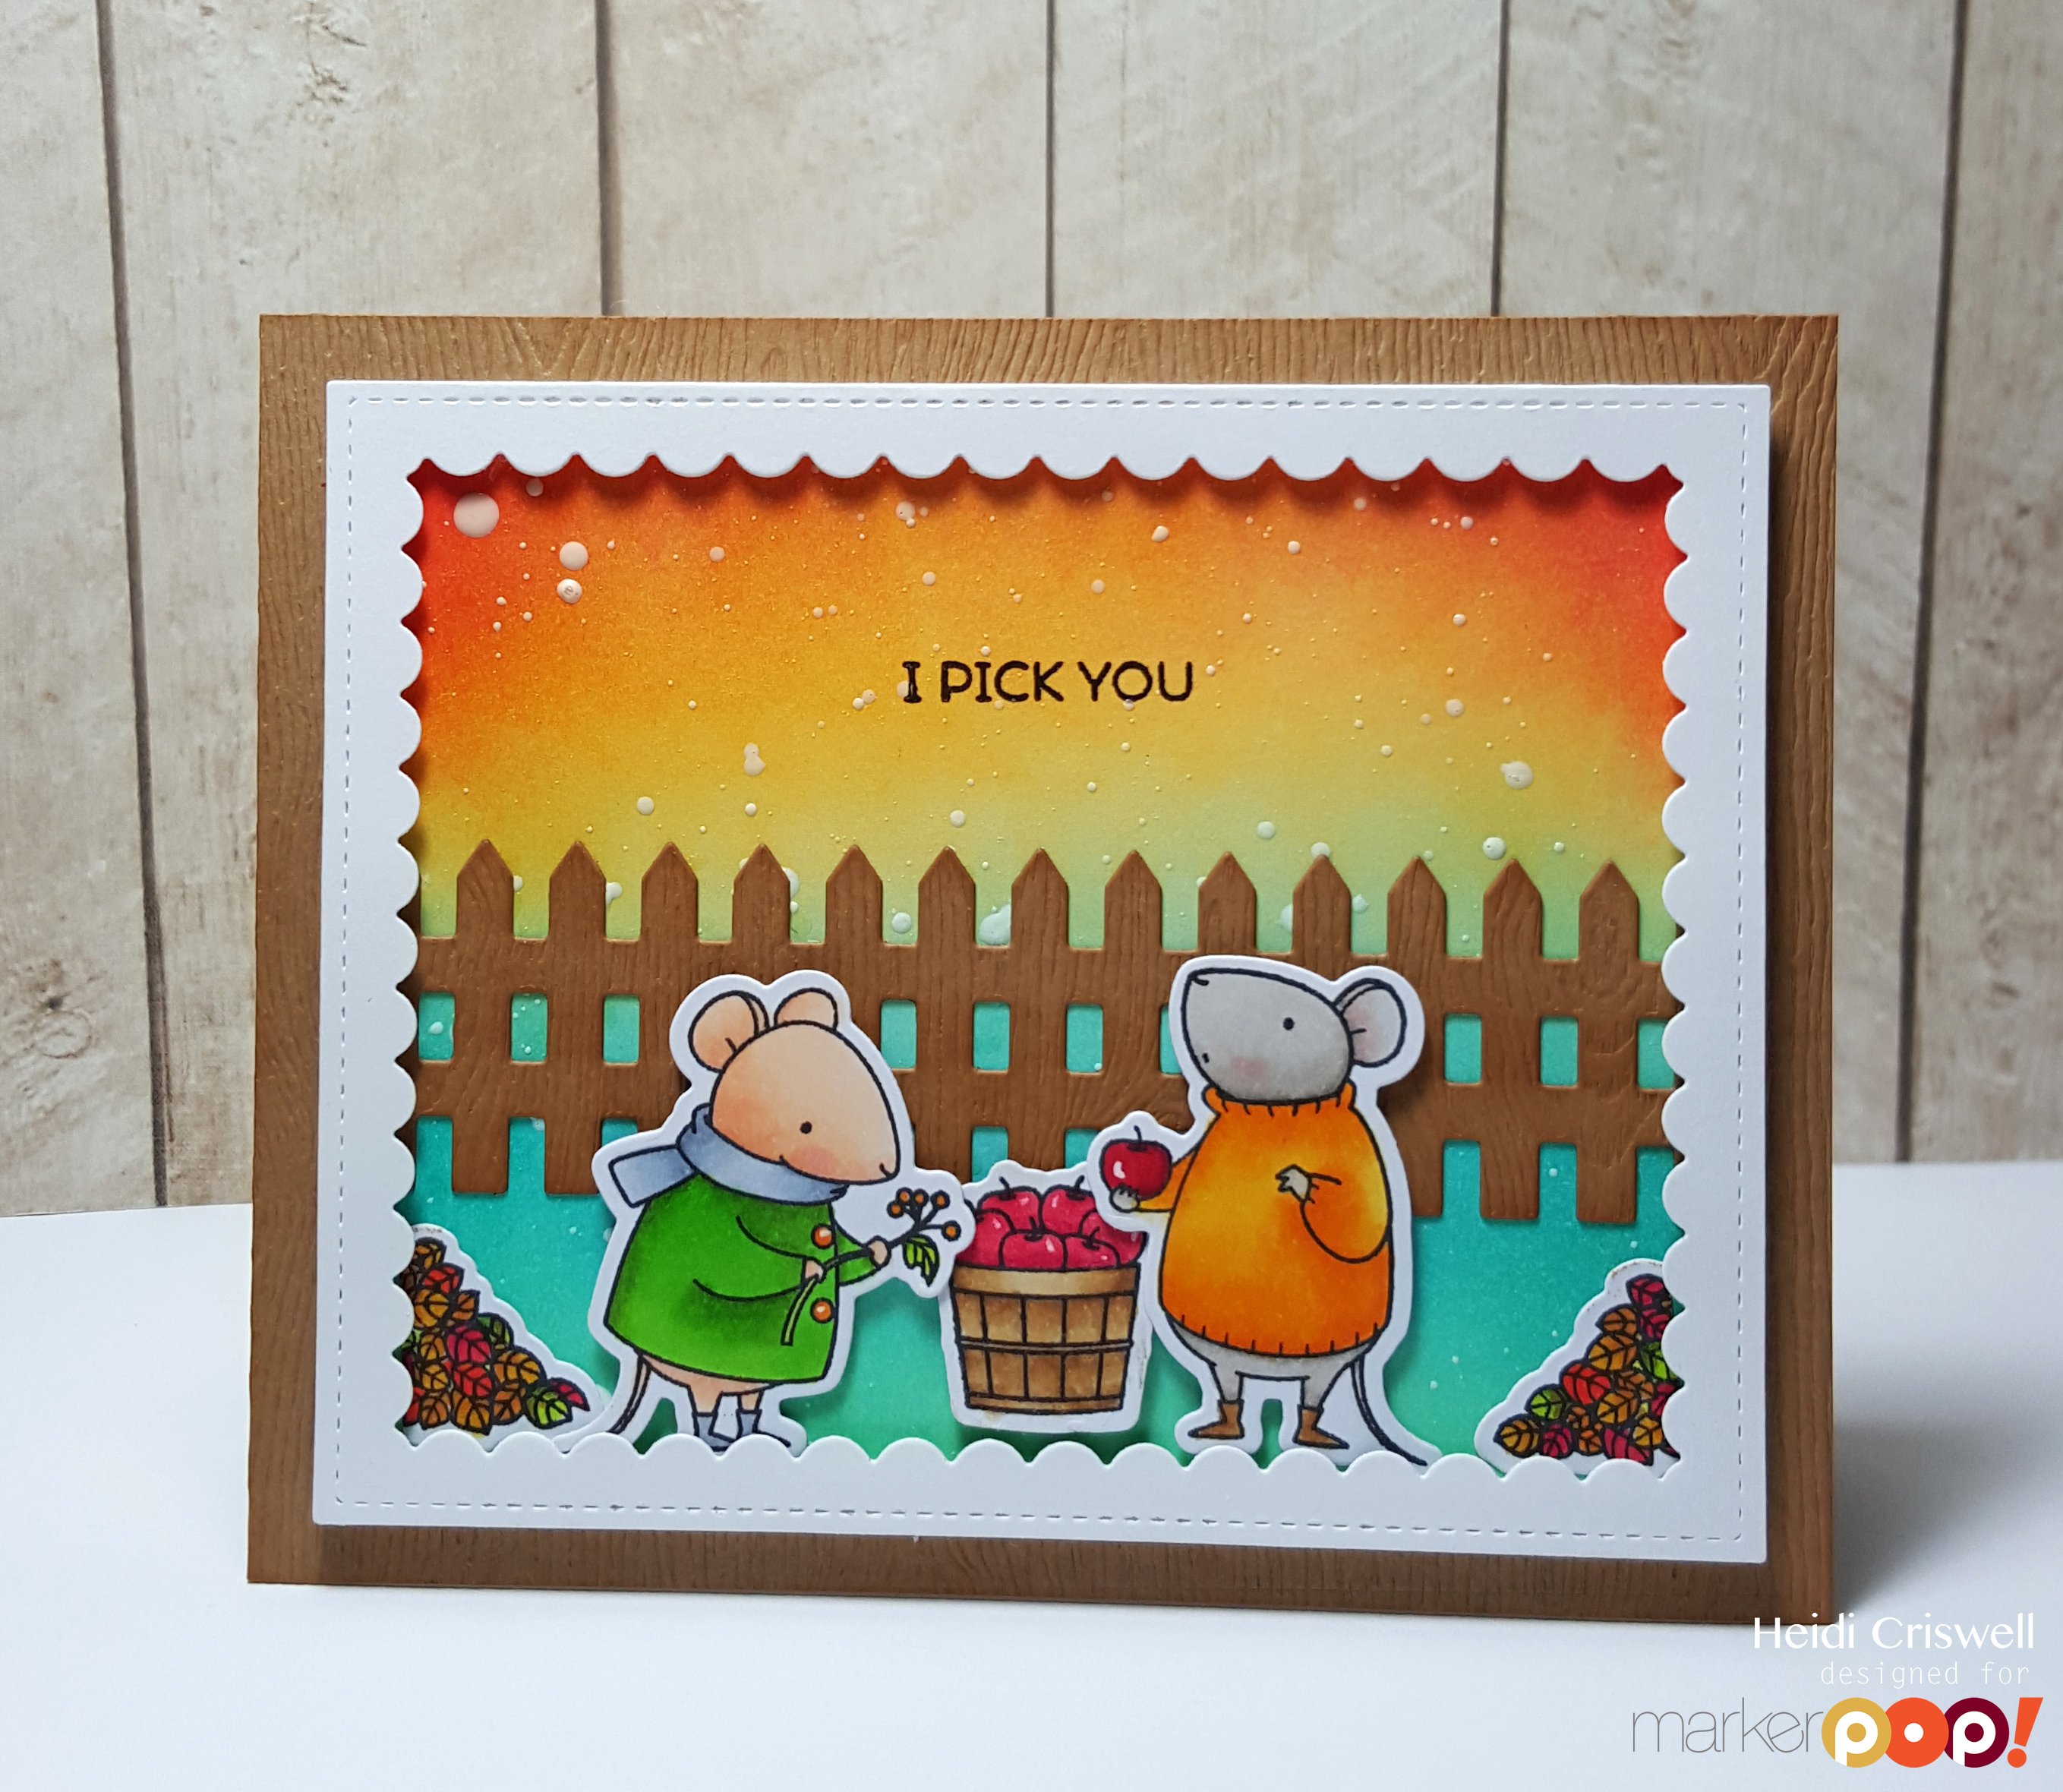
To created the background for this card I used, Abandoned Coral, Spiced Marmalade, Peacock Feathers, and Cracked Pistachio Distress inks, then I splattered some white liquid enamel. I adhered the picket fence die cut which I sponged with some “Old Paper Distress Ink

20151120_230718
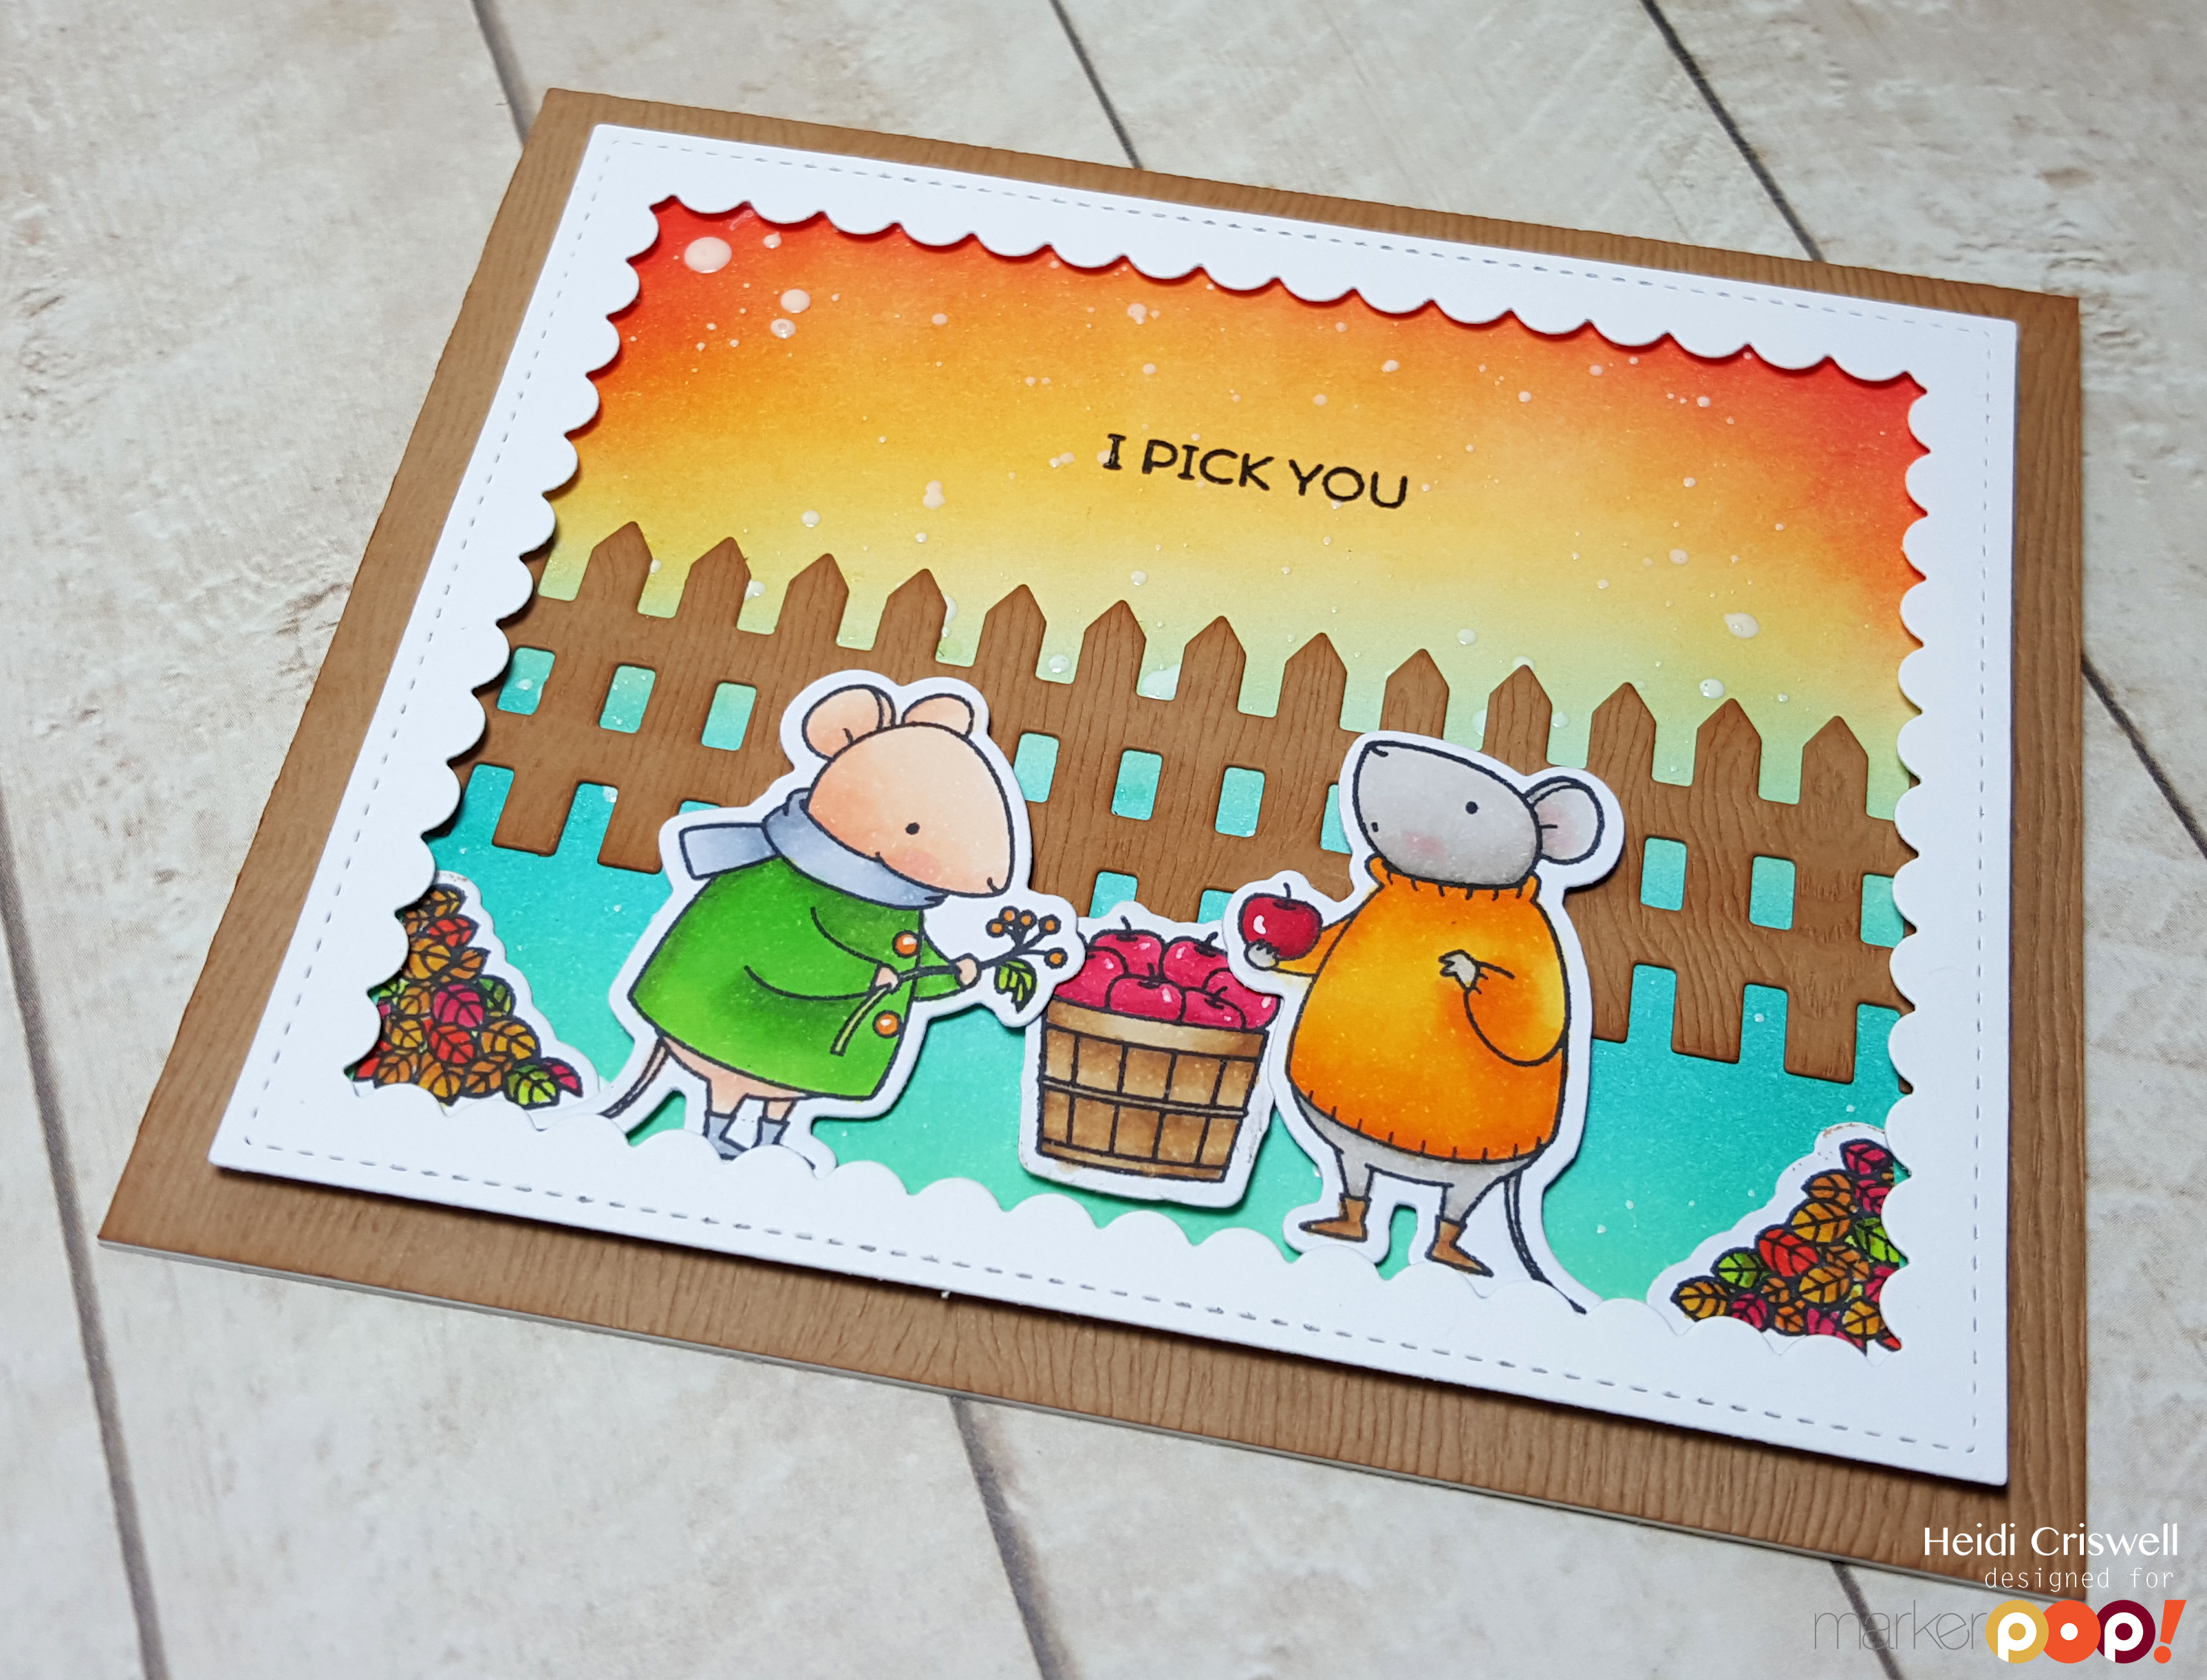
I die cut, stamped and color all the images using Copic Markers, and I placed then on the card panel using foam adhesive. I used an exclusive-to-Pretty Pink Posh die to frame the whole scene, however, any sort of stitched frames will work and will have the same effect, we have a great variety of frames and other stitched dies available at the Marker POP store  There are some larger sentiments on this stamp set but I wanted to keep the scene as clear as possible so I chose to stamp the smallest of the sentiments “I pick you” and it goes good with the images.

I hope you enjoyed this card and I wish you a Happy Thanksgiving

Thanks so much for stopping by, I’ll see you soon with more inspiration and projects!

Heidi

Newton’s Christmas

Written by Heidi. Posted in Eye Candy (Projects), Saturday Spotlight

Hello everybody, Heidi here, welcome back to the Marker POP blog, I hope you had a great week. Today I am sharing some Christmas inspiration featuring Newton’s Nook “Naptime” stamp and coordinated die set, I also use elements from other brands, which I will list below, however the main focus of my card is Newton sleeping on the blankets on Christmas night. Let me show you the card and I will be telling you a little bit more about it.


20151116_144015I blended a night sky background using Salty Ocean and Chipped Sapphire Distress inks and I used a stencil to add some snow. Then I cut the window using the “Die-namics Blueprints No.20” and I also place some a stitched snow hill on the out side of the window. The lights hanging form the window are from the “Baaah Humbug” stamp and coordinated die by Lawn Fawn, and the silhouette of the Santa’s sled and reindeer are from the “Ready Set Snow” stamp set

20151116_144028
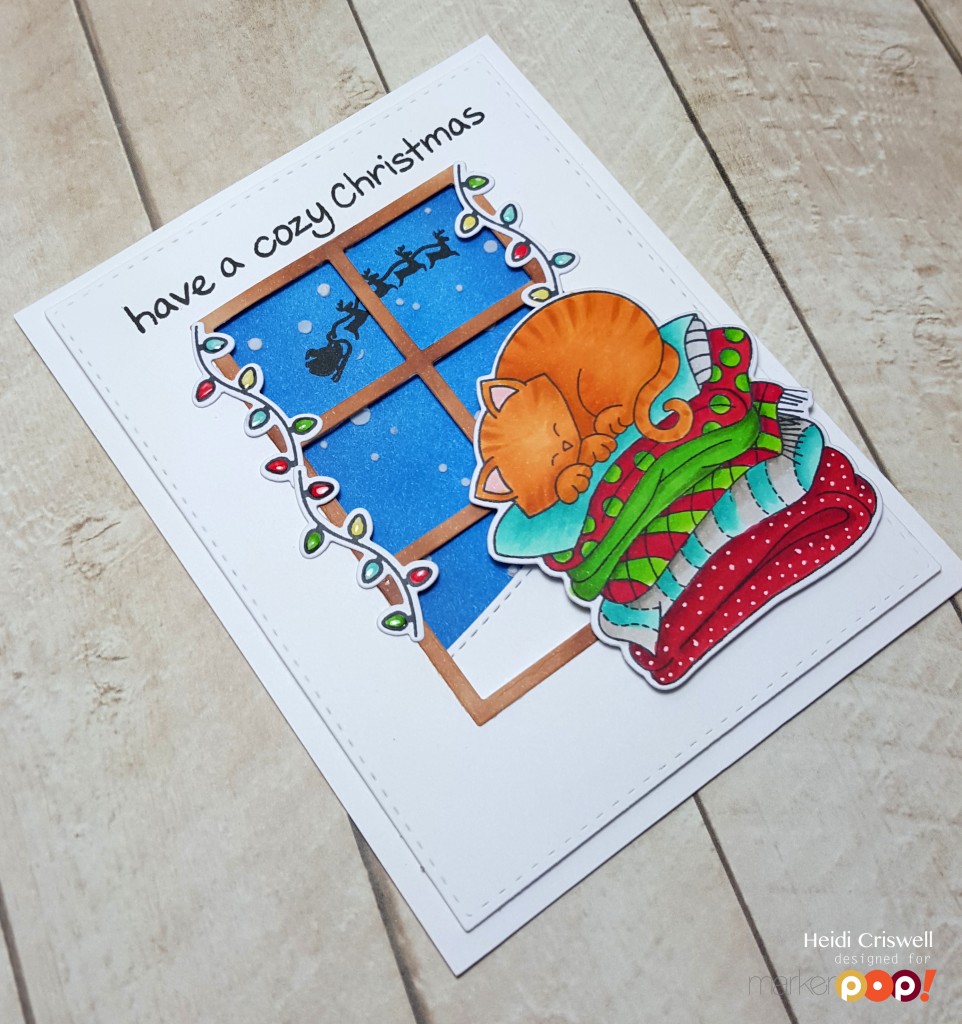
I colored Newton and the blankets, and the the Christmas lights using Copic Markers and added some details with a white gel pen and Glossy Accents. I stamped the sentiment ditectly on the card panel from the “Cozy Christmas” stamp set by Lawn Fawn, and I adhered the card panel to the card base using foam adhesive.

I hoped you enjoyed this card and that you got some inspiration for your Christmas and holiday projects.
Have a lovely day!

Thanks so much for stopping by, I’ll see you soon with more projects and inspiration.

Heidi

Holiday Card Featuring My Favorite Things

Written by Heidi. Posted in Eye Candy (Projects)


Hello everybody, Heidi here! Today I am sharing with you some inspiration using the “Santa’s Elves” stamp and coordinated die set by My Favorite Things. I love everything elf related and this adorable set is not exception!

Let me show you the card and I will be telling you a little bit more about how I created this card

20151110_174530_001I cut a panel of white cardstock using the larger stitched rectangle by Lawn Fawn, then I cut the largest Dienamics stitched tag by My Favorite Things and I used the English Brick Wall stencil by My Favorite Things to created the background on the tag; I used “Peacock Feather Distress Ink” to ink the stenciled background.  

20151110_174630I die cut and stamped the images and then I colored them using Copic Markers, I heat embossed the sentiment on to black cardstock using white embossing powder, and I arranged the elements which I adhered to the card using foam and liquid adhesive.  To finish the card I added some gold ‘Stickles‘ to the trim of the tree, some Wink of Stella, and some Ranger glossy accents 

Copic Markers I used: YG97, YG07, YG05, E00, E02, E13, R89, R27, R24, BG49, BG15, BG13, T02, T00, E27, E25, E57, W01, W03, W05,

Thanks so much for stopping by, I’ll see you soon with more colorful inspiration

Heidi

MarkerPop! Challenge #81: Any Shape BUT Rectangle

Written by Heidi. Posted in 3D, Anything But a Card, Challenges, Eye Candy (Projects)

Hi Crafters!! It’s time for our next Challenge, and the theme is Any Shape BUT Rectangle!

MarkerPOP! Challenge #81: Any Shape BUT a Rectangle!

THE CHALLENGE: Any Shape BUT Rectangle!

Create a project using your Copics or any of the markers that we carry!

You may play along with other challenges, but excessive challenge pile-ons (more than 10) will result in disqualification for our amazing prize. As always, have fun creating!
THE PRIZE this month is the 2 Little Darlings Candibean stamps: Daisy’s Winter Lamp Post, AND Shop ’til You Drop!
 MarkerPOP! Challenge #81 Prize

One entry will be chosen at random to receive our prize. Three additional entries will be chosen for the ‘Top 3′ based on their amazing coloring skills. The prize winner and top three can all proudly post their brag buttons on their blogs for the world to see!

Entries are due by Sunday, November 15, 2015 at noon CST.  Winner will have TWO weeks to claim their prize.

**International winners will be responsible for shipping costs if they choose to claim their prize**

_____________________________________________________________________________________________

Hello everybody Heidi here with a new Marker POP challenge! This time we are hosting a very exciting challenge, “Any Shape But A Rectangle” how fun is that? I have some inspiration for you using Mama Elephant stamps and dies.

I made this ornament-tags using the adorable “Reindeer games” stamp and die set by Mama Elephant, I used other elements that I’ll list below. Let me show you and I will tell you all about it!

DSC_8242To cut the base of this round tag I used the large of the Lawn Fawn “Stitched Circle Tags” on white cardstock. Then I cut the Snow Capped Mountains by Mama Elephant and I inked the stitched tops. Then I cut a snow border using the Mama Elephant creative cuts “Landscape Trio” to set the little deer. I inked the little snow border a little bit to give it some of dept. 

DSC_8253I stamped and colored all the images using Copic Marker, then I die cut them, using the “Reindeer games” Creative cuts coordinated dies. I set the scenes, and I adhered all the elements using foam adhesive and liquid glue. I also added some details to the deer using a white gel pen.

DSC_8222To finish the tags I die cut a the smallest bow out of red cardstock using a “Dienamics Beautiful Bows” by My Favorite Things,” but you could used any bow you have handy or even ribbon. Then I thread some red and white bakers twine through the tag’s holes. At this point, you can decide, if you want a tag, then stamp the words “to and from” in the back, or you could make an ornament out of it, by inserting the tag in the middle of one of those ornaments that come in two halves, these tags fit perfectly in the 70 mm. ornaments. 

I hope you got inspired to enter this challenge, you’ll have until the Friday November 13th to enter.

Thanks so much for stopping by, have a lovely day!

Heidi


Grab Our Button

i Luv MarkerPOP
Show some MarkerPOP LUV,

add this button to your blog.

I’m a Winner!

I'm a Winner on MarkerPOP Blog
Copy and paste the code under the badge

to claim your bragging rights!

I’ve Made Top 3!

WoHooooo I made it to the Top 3 on MarkerPOP Blog
Copy and paste the code under the badge

to claim your bragging rights!

Visit Us!

MarkerPOP Free Shipping MarkerPOP Boutique
18299 Mount Baldy Cir
Fountain Valley, CA 92708
Toll Free: 1-855-312-1222
Phone: 1-714-249-1222