
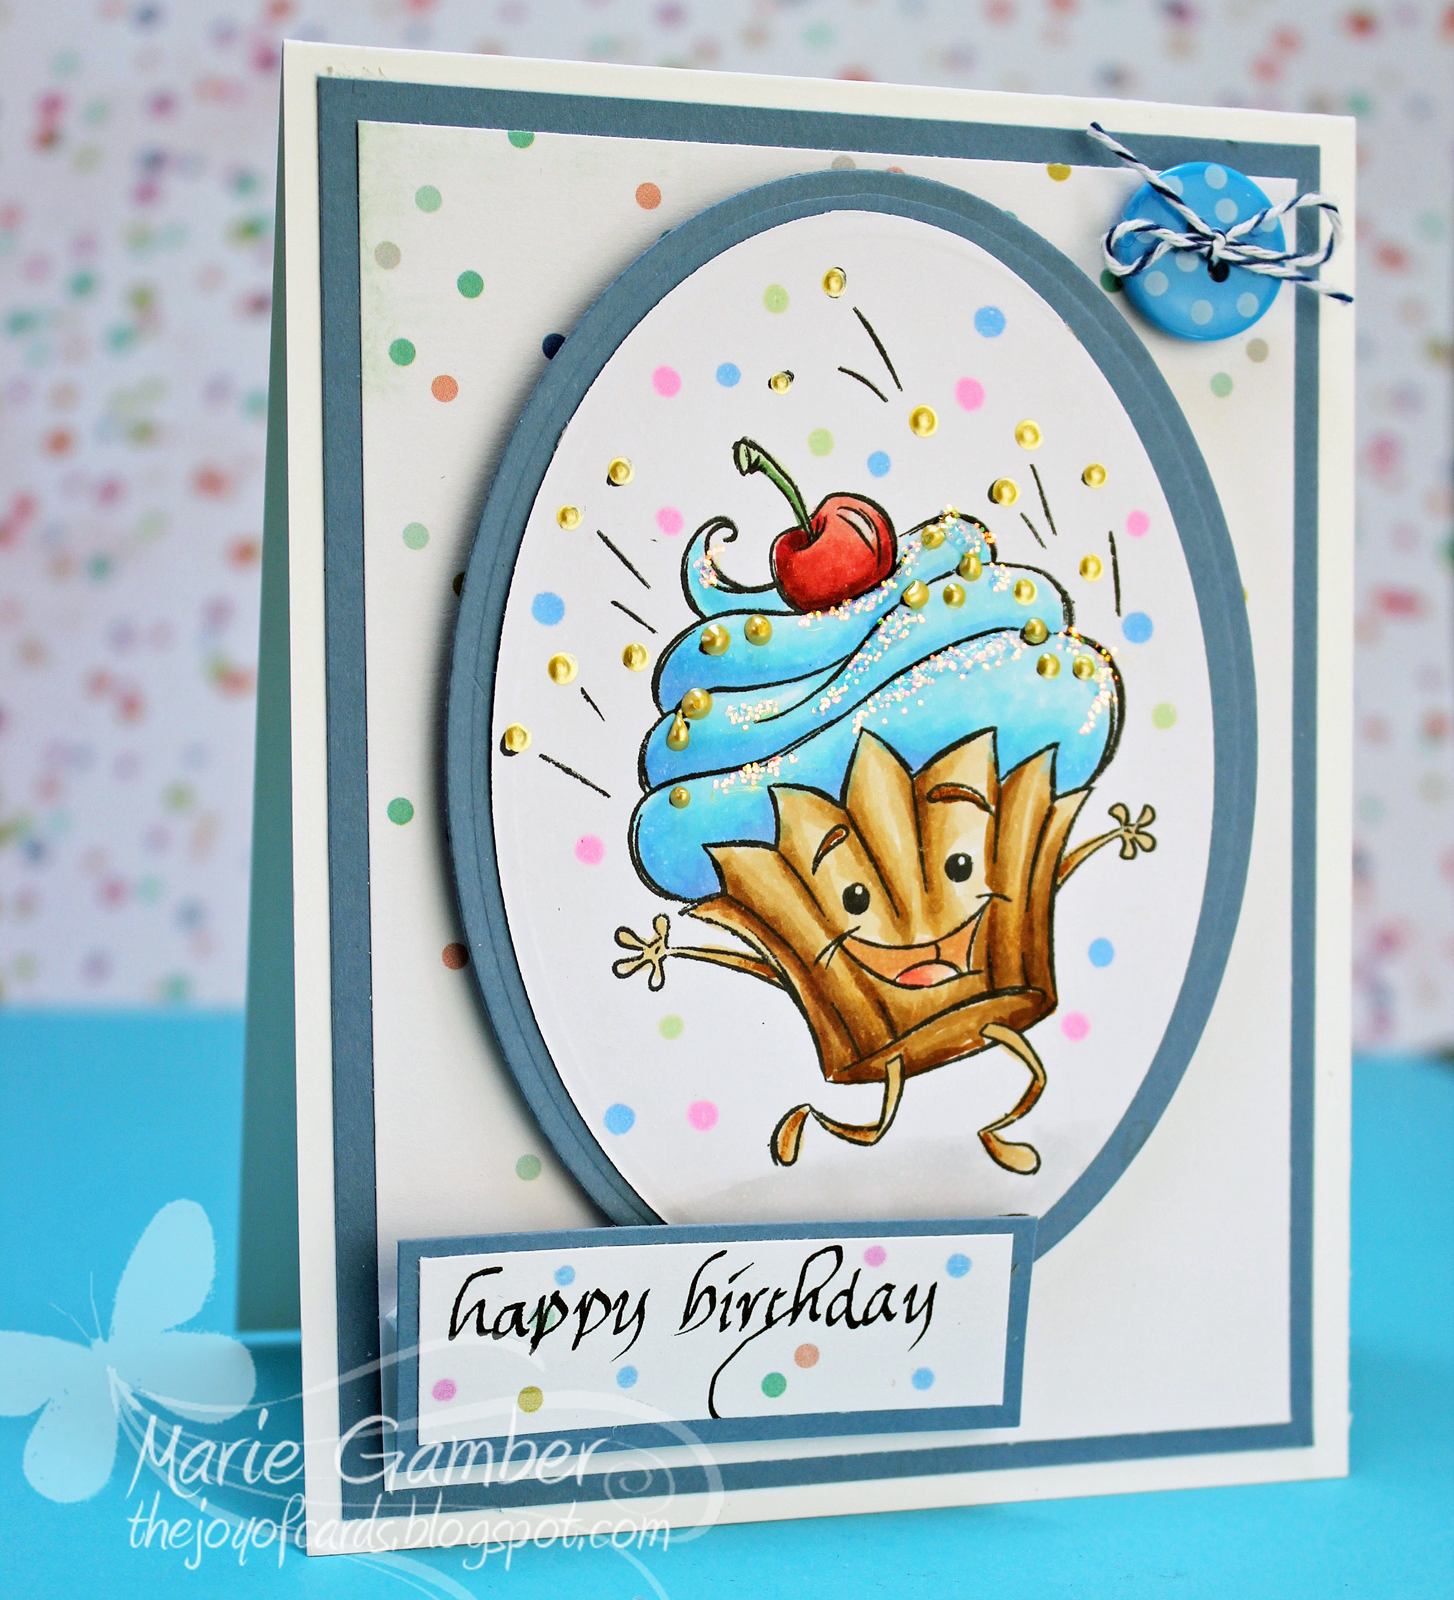
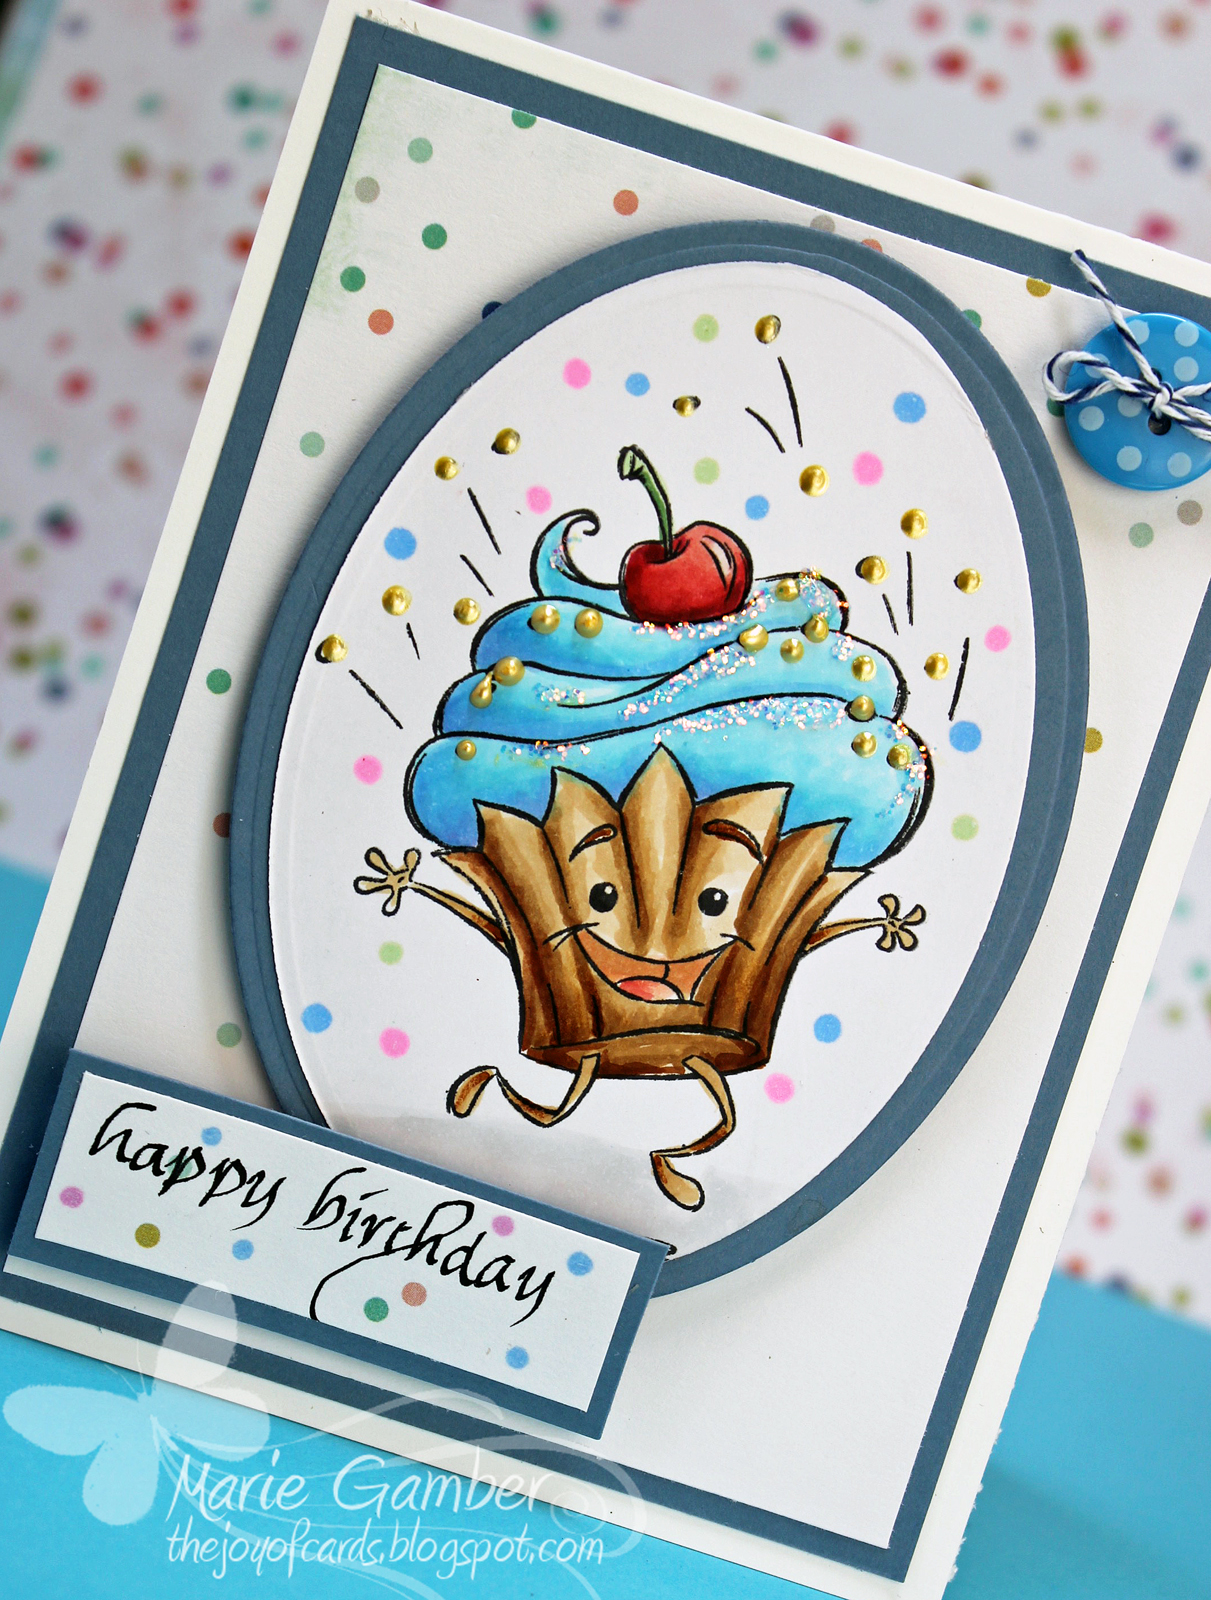
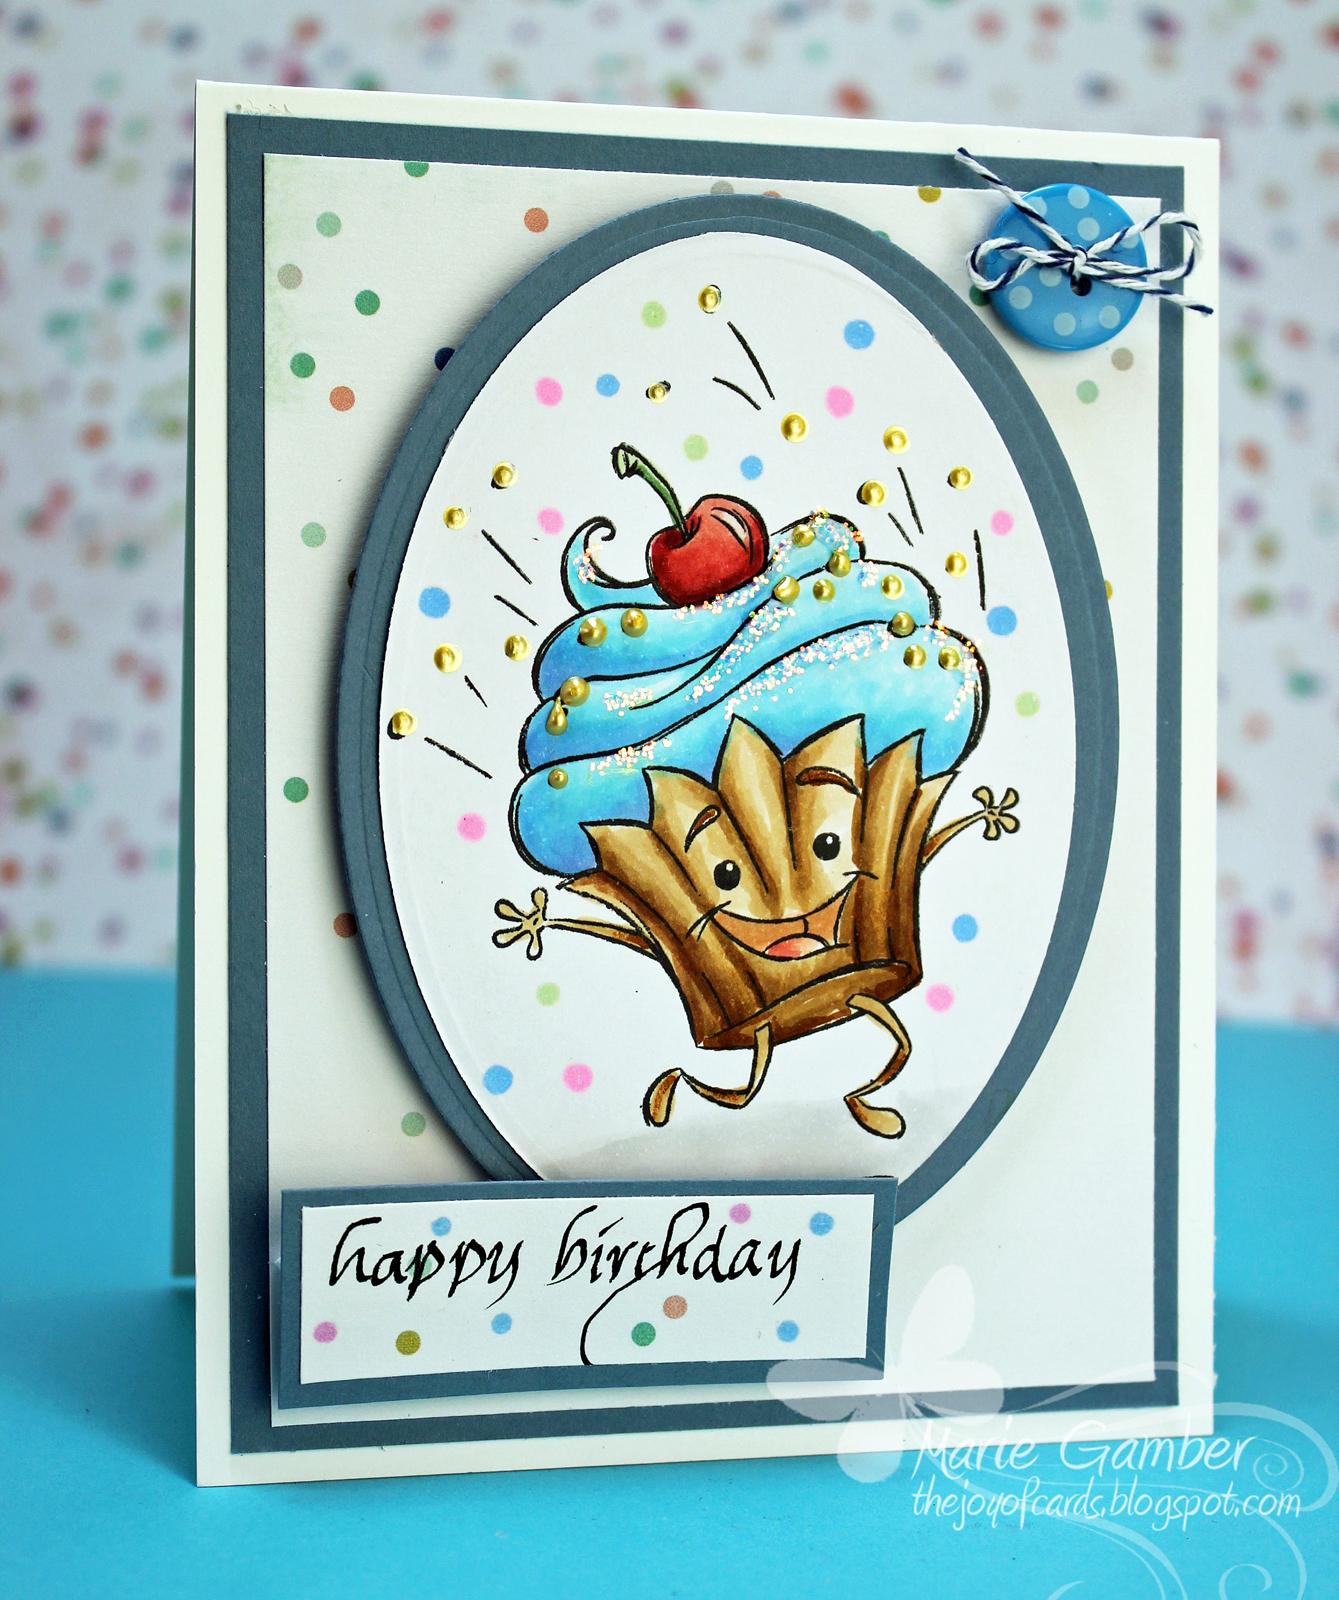
Happy Cupcake: A Closer Look at Light Source and Shading
Hello and WELCOME!
It’s Friday! Yea! I hope everyone has a great weekend planned!
Today I am doing a video featuring light source, shadows and shading. This is a special request from my friend Kristine!
I have used the light source guides before but I wanted to explain how I use the linear guide in a little more detail.
I will share some of the other guides later!
But for now – let’s get started with Shadows & Shading with the linear guide !
Here’s to you, Kristine! 😀
***
My other Tutorials can be found HERE
Supplies
Stamp
Happy Cupcake (Whimsy Stamps)
Ink
Copic Sketch Markers
Memento Tuxedo Black (Tsukineko)
Calligraphy Ink
Paper
x-Press It
Neenah Premium Cover Cardstock – 110# Solar White
Candy Buttons – Bazzill Card Shoppe
Mixed Company Paper Pad by Heidi Swapp
Other
Adhesive – Scotch Advanced Tape Glider
Scotch ATG Tape Refill
Ranger Stickles
Ranger Liquid Pearls
Baker’s Twine – Periwinkle
Color Palette
Frosting: B00, B01, B32, optional B62 (sparingly)
Cup Cake Cups – E30, E31, E33, E35, E49
Background dots to coordinate with dotted designer paper: RV13, B41, G40
Hope you enjoyed this tutorial!
Come back soon!
![]()
Tags: Birthday, Happy Birthday, Marie, Whimsy, whimsy Stamps
Trackback from your site.

Comments (4)
Kristina (CraftyPaws)
| #
Thanks for a wonderful tutorial. Adorable image and really brought to life with your fantastic coloring! TFS Big hugs, Kristina
Reply
Marie Gamber
| #
Thank you Kristina! So glad you liked it! Thank you for stopping by! Hugs, marie
Reply
Valerie Ward
| #
What an incredibly adorable card, Marie, and your shading is amazing! It looks totally 3D, like it’s going to jump off the card! I can’t wait to see the video!
Reply
Marie Gamber
| #
Thank ou, my friend! Glad you liked it! Hugs, marie
Reply