$10 Gift Voucher - Leave a Comment

Happy Mail

Written by Holly Endress. Posted in Eye Candy (Projects), Tutorials, Uncategorized, Videos

Welcome back everyone.. It’s Holly here today and this week our Bi-Weekly Challenge is all about “Embossing” so I created a cute card with some Heat embossed images and I watercolored them with Distress Inks. You can find out more about the challenge in this post here. I also have a new video for you today as well.. you can find a link for it at the bottom of this post.

mp5

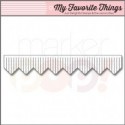
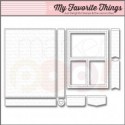
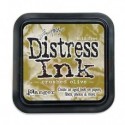
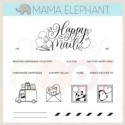
I started out by die cutting a piece of Tim Holtz Watercolor paper using the All Prettied Up Creative Cuts from Mama Elephant. Then I used an anti static powder bag on it and stamped the Happy Mail sentiment from the Mama Elephant Happy Mail set in VersaMark ink and heat set it using some Hero Arts White embossing powder. Then I did some ink smooshing all over the background with a piece of acetate and some Pick Raspberry Distress ink. I added a few drops of water and lifted the color with a paper towel to create a distressed look. Then I heat set the panel and adhered it to the a top folding card base with some fun foam and my ATG.

mp1

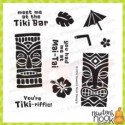
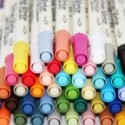
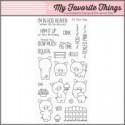
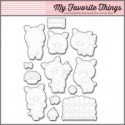
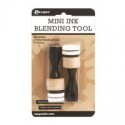
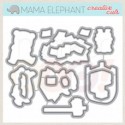
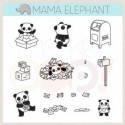
I stamped and heat embossed images from the adorable Incoming Mail set also from Mama Elephant in White and Clear embossing powders onto a piece of Tim Holtz Watercolor card stock. Then I colored the images in with Distress Inks by creating a palette on my craft mat. I used a small damp paintbrush to add the color to the images. Once they were dry I die cut them using the coordinating dies from Mama Elephant and my Big Shot. Then I adhered them to the lower portion of the panel with some Ranger Multi Medium Matte and some Scotch Foam tape. For a touch of sparkle I added a few Pretty Pink Post Sparkling Clear sequins from the Mix collection.

mp8

I created two of these cards changing up some of the colors but they are both so cute!! I really can’t get enough of this technique with the Distress Inks.

Check out the video below for all the details on how I created these cards. Thanks for stopping by today!

2

Tiki Time!!

Written by Holly Endress. Posted in Eye Candy (Projects), Tutorials, Videos

Happy Thursday everyone.. It’s Holly here today with a fun card using the new Tiki Time set from Newton’s Nook! I created a card with the color Layering Pineapple from Hero Arts a few weeks ago and I was asked for a video. So, I created a similar card using the same technique.

mp2

I stamped the Tiki Time images randomly on a piece of Watercolor Card stock using Distress Ink pads and Distress Markers. I spritzed each image with a mini mister after applying the ink just before stamping it. Using a marker and the ink pad of the same color gives a great variation in the color without loosing opacity like you’d get with stamping off or second generation stamping.

mp1

Once I had the background they way I wanted it, I die cut the panel with the Blueprints 29 die~namics from MFT and a piece of the Doodlebug Fun in the Sun 6×6 paper. I added some splatters of Black Soot Distress paint and Tarnished Brass Distress Stain with a small paintbrush. Then I heat set the panel with a heat tool. I created a top folding White card base and adhered the patter paper and my image panel using some foam adhesive.

I stamped more of the images from the set onto an additional piece of watercolor paper using the markers and die cut them with the coordinating dies. I die cut a piece of vellum using the stitched circle stax from MFT and assembled the images on it using some foam tape. I die cut a banner from the same blueprints #29 and stamped the sentiment using some VersaFine Black ink.

mp3

I created a fringe strip using the Chevron fringe die from MFT and some kraft card stock and adhered that across the front of the card. Then I added the vellum piece over it. For a touch of sparkle I added some Sparkling clear mix sequins from Pretty Pink Posh.

I used the following Distress Markers:

Rusty Hinge, Mowed Lawn, Mustard Seed, Brushed Corduroy, Picked Raspberry & Salty Ocean. I also used the Mowed Lawn, Rusty Hinge and Picked Raspberry Distress Ink Pads.

Check out the video below for more details on how I created this card.

2

Challenge #99 It’s all about Die Cuts!

Written by Holly Endress. Posted in Challenges, Eye Candy (Projects), Tutorials, Videos

Happy Monday everyone! Who’s ready for a fun new Challenge? This week’s it’s all about Die Cuts. There are so many great stand alone dies on the market now and I love that most stamps have coordinating dies. So, let’s dig into our stash and use some of those die cuts and create a fun project!

mp99

Create a project using Die Cuts and any of the markers that we carry in the store. You may play along with other challenges, but excessive challenge pile-ons (more than 10) will result in disqualification for “The Prize”. This week we have a Mystery Box filled with Crafting Goodies!

mp_blog_prize_box

One entry will be chosen at random to receive our prize. Three additional entries will be chosen for the ”Top 3″ based on their amazing coloring skills. The prize winner and top three can all proudly post their brag buttons on their blogs for the world to see!

The Linky will close on Sunday, July 24th at 12 pm CST. The winner will have TWO weeks to claim their prize. *International winners will be responsible for shipping costs if they choose to claim their prize* As always, have fun.. We can’t wait to see what you create!


Hi everyone it’s Holly here today with a fun project using Lots and Lots of Die cuts!!

mp1

All the stamps and dies I’m using today are from My Favorite Things. I started by creating a frame using the Whimsical Woodgrain background stamp from MFT and some Doe Ink from Lawn Fawn on a piece of Kraft card stock. Then I die cut the frame using the Blueprints #15 & #29. Then I die cut an additional piece of White using the smaller rectangle from Blueprints #29. I added the frame to a top folding White A2 size card base with some liquid glue and then I trimmed out the top portion of the card base showing through the frame with a craft knife.

mp2

Then I stamped the images from the Adorable Hog Heaven set from MFT onto some Neenah Solar White card stock using Memento Tuxedo Black ink and colored them in with Copics: E30, E34, E44, E47, R0000. R00, R01, R02, YG17 & G07. I die cut the images using the coordinating dies. Using the smaller of the stitched rectangles from the Frame I created, I die cut a  piece of White card stock and added some Distress Inks in Crushed Olive and Mowed Lawn to create the grass. Then I added the images to the card front and then on the reverse side making sure they lined up.

mp3

I die cut a second panel from the smallest stitched rectangle and added some Distress Inks in Salty Ocean and Tumbled Glass. Then I die cut some Puffy Clouds from MFT and added the sentiment from Hog Heaven. This set is the Cutest!!!

Check out the video for more details on how I created this card.

Thanks for stopping by today!

Challenge #98: Let’s Celebrate!!

Written by Holly Endress. Posted in Challenges, Eye Candy (Projects), Videos

Happy Monday everyone! It’s time for a new Bi-Weekly Challenge and this week’s theme is the 4th of July!!!

challenge2

Create a 4th of July themed project using your Copics or any of the markers that we carry in the store. You may play along with other challenges, but excessive challenge pile-ons (more than 10) will result in disqualification for “The Prize”. This week we have a Mystery Box filled with Crafting Goodies!

Untitled4

One entry will be chosen at random to receive our prize. Three additional entries will be chosen for the ” Top 3″ based on their amazing coloring skills. The prize winner and top three can all proudly post their brag buttons on their blogs for the world to see!

Entries are due by Sunday, July 10th at 12 pm CST. The winner will have TWO weeks to claim their prize. *International winners will be responsible for shipping costs if they choose to claim their prize* As always, have fun.. We can’t wait to see what you create!


 For today’s card I created a fun 4th of July card that would be perfect for a Summer Party Invite. I’m using the Patriotic Owl stamp from Whipper Snapper Designs and some Patriotic Picnic Papers from Doodlebug Designs.

mp2

I started out by stamping the Owl image onto some Neenah Solar White card stock and then I colored it in with Copics. I die cut the panel using the Wonky Stitched Rectangle Die set from My Favorite Things. Then I stamped the sentiment from the Altenew Super Script set using some VersaFine Black ink and my Mini Misti Tool. I die cut two piece of the pattern paper using the same die.

mp1

I created a top folding White card base and I adhered the Pattern Papers tilted so they would stick out behind the image panel. Then I adhered the image panel with some Foam and my ATG. For a bit of Sparkle I added some Clear Wink of Stella to parts of the image and some Sparkling Clear Mixed Sequins from Pretty Pink Posh.

mp3

Check out the video below for more details on how I created these cards.

I used the following Copics to color the images: 

YG21, YG03, YG17, E53, E55. E57, E59, R22, R24, R27, Y02. Y15, Y17, Y38, C3, C1, C00 & 0 Colorless Blender.

12741890_10208671583206779_8747021650263878740_n

Grab Our Button

i Luv MarkerPOP
Show some MarkerPOP LUV,

add this button to your blog.

I’m a Winner!

I'm a Winner on MarkerPOP Blog
Copy and paste the code under the badge

to claim your bragging rights!

I’ve Made Top 3!

WoHooooo I made it to the Top 3 on MarkerPOP Blog
Copy and paste the code under the badge

to claim your bragging rights!

Visit Us!

MarkerPOP Free Shipping MarkerPOP Boutique
18299 Mount Baldy Cir
Fountain Valley, CA 92708
Toll Free: 1-855-312-1222
Phone: 1-714-249-1222