
Copics On Solid Stamped Images

Hi! It’s Lisa here with you today and I have a fun technique to share with you today that can take your stamping to the next level. Now, before I begin I want to state that if you don’t want to color your solid stamped images in, that is totally fine I don’t always do it or even think to do it on mine. But, as a refresher or if you are looking for one more way to add depth and detail to those solid images using your Copic® Markers…
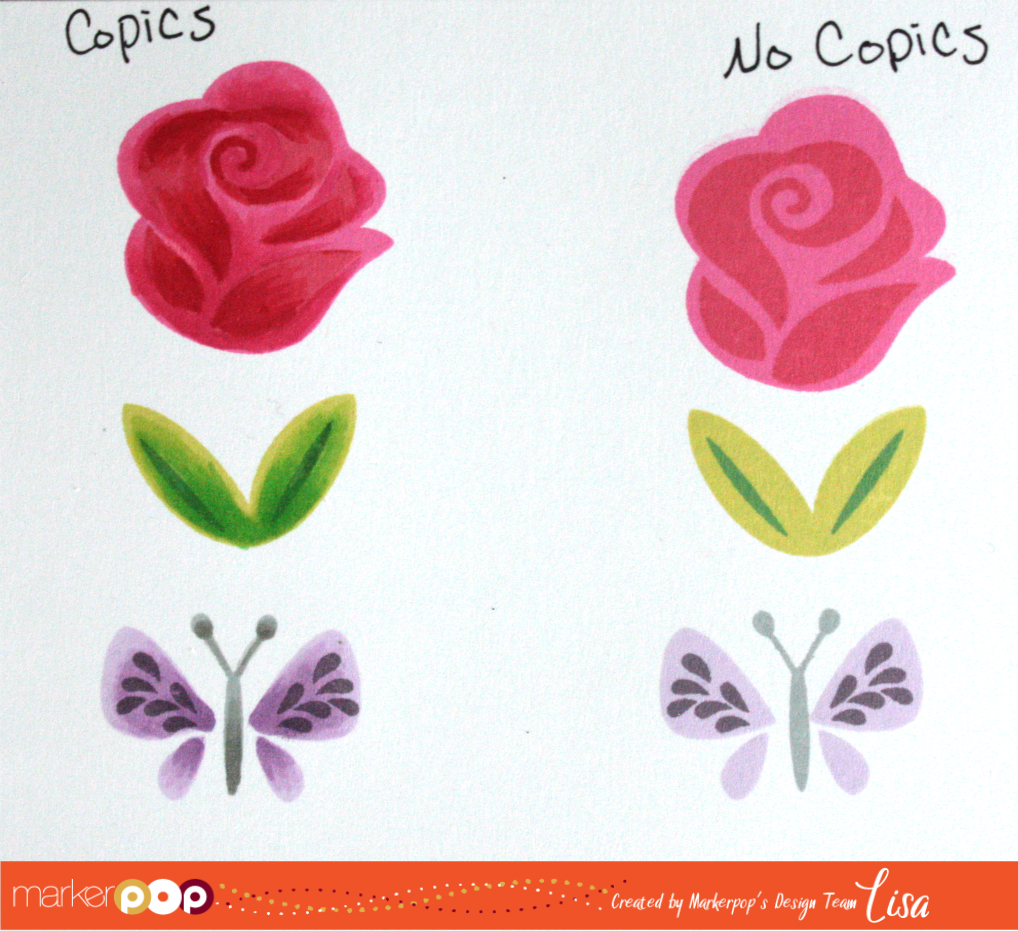
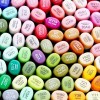
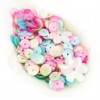
As you can see I’ve labeled the right side as no Copic® Markers used, and the left side as the Copics® used side. Isn’t it cool to see the difference when they are lined up side by side? Any who, these images are from the newly released Fab Flowers by Lawn Fawn. They are super cute as is, and even thought they have a second “layer” that I have stamped on each image, you can still create more depth by shading the images in with Copics®. Now keep in mind that these images were stamped in Copic® friendly ink, because we definitely do not want to cause damage to our precious markers, so make sure you are aware of what ink you’ve stamped your images in first. I have used Memento Dye Inks: Rose Bud, Love Letter, Pear Tart, Cottage Ivy, Lulu Lavender, Elderberry, London Fog. Copic® Markers used include: R24, R29, RV14, RV23, RV25, YG13, G14, V000, V12, V15, W3, W5. Tips for this technique: Start by using your darkest marker choice first, this way if you go a little too heavy you can lightly up your coloring by going over it with a lighter marker. Also, don’t be afraid to experiment and maybe even try coloring with a different, but complimentary color to the color you’ve already stamped your image in.
Since I had already colored the images up, I had to create a project with them…
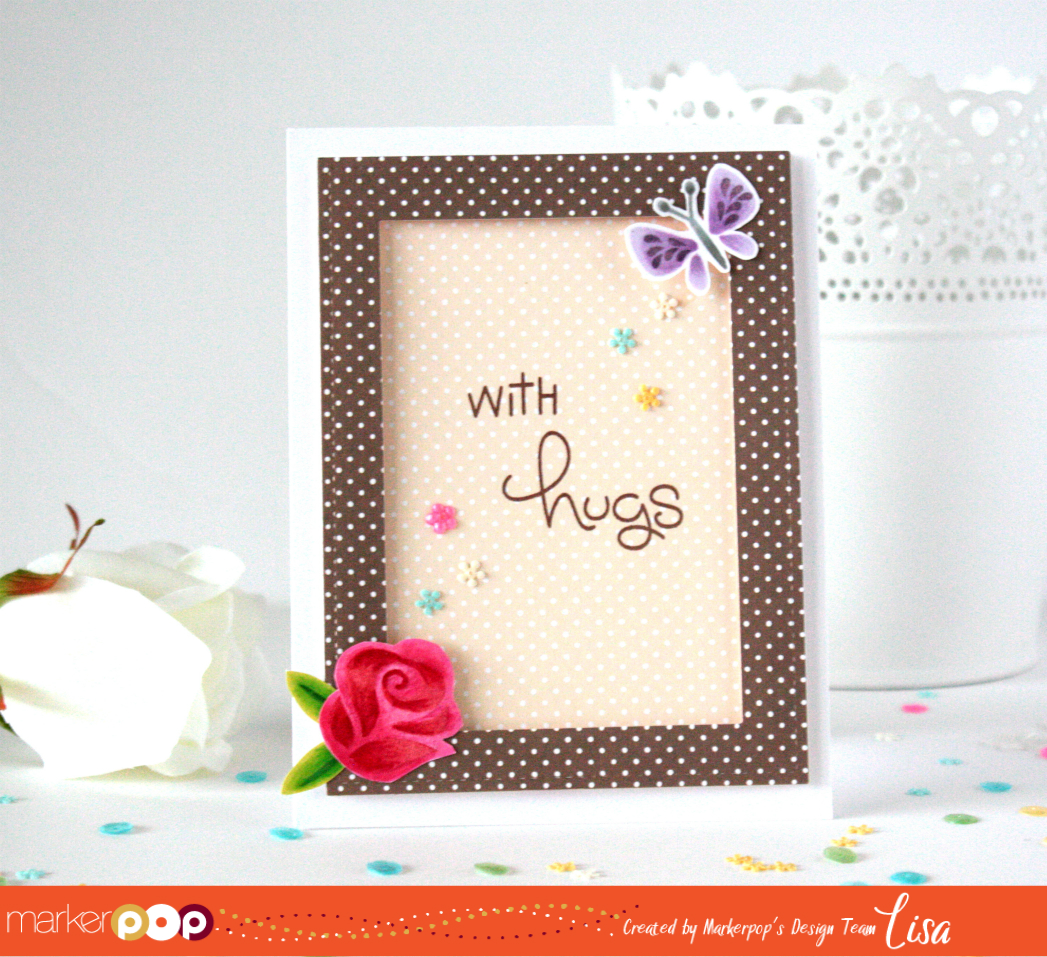
I started by fussy cutting my stamped and colored images, and then created my frame with Lawn Fawn’s Stax Large Stitched 4 Bar Rectangle Dies and Lawn Fawn Patterned Paper.
Thanks so much for stopping by, and I would love to see what you create using this technique! Also, Don’t forget to get your name entered in the amazing giveaway going on here right now!
Happy Crafting!

Supplies Used:
Tags: Copic Markers, Lawn Fawn, Lisa Lahiff, Memento Ink
Trackback from your site.

Comments (17)
Donna T
| #
Gorgeous card and hat a great tip, thanks!
Reply
lisascreativeniche
| #
Thank you so much!
Reply
Louise
| #
This is interesting. How do I know which inks are not copic firendly?
Reply
lisascreativeniche
| #
Well I can tell you that all Memento Inks are Copic friendly, if you have a specific ink that you use but are unsure of how they would react with Copics then you can always contact the maker and I’m sure they can let you know.
Reply
Sue LD
| #
I like the extra depth with the Copic markers–thanks for sharing.
Reply
lisascreativeniche
| #
You’re welcome, thanks for stopping by!
Reply
Lynette
| #
The coloring really adds a lot to the solid image stamps. Such a smart idea to get more out of your stamps.
Reply
lisascreativeniche
| #
🙂 Share with us if you try it!
Reply
Hanh
| #
What a good idea. I never thought of coloring on solid stamps.
Reply
lisascreativeniche
| #
Yay! Thanks!
Reply
Vivian C.
| #
The richness of the added depth is amazing. It really does take the image to a whole new level.
Reply
lisascreativeniche
| #
I know! I was so excited when I figured it out 🙂
Reply
Berina Febin
| #
This is such a nice idea to add depth to the layering stamps! Thanks for sharing!! Your coloring is beautiful!
Reply
lisascreativeniche
| #
Thank you! So glad you like it!
Reply
Crafty Math Chick
| #
I never would have thought to do this! But the technique adds so much depth to the image! Thanks for the idea!
Reply
D Ann Comer
| #
I’d’ve never thought to do this! thanks for the inspiration!!
Reply
D.Ann C
| #
I love how this improved the image and I’d’ve never thought to try this technique… thanks for the inspiration!!
Reply