$10 Gift Voucher - Leave a Comment

Posts Tagged ‘Bazzill’

Welcome Baby!!

Written by Holly Endress. Posted in Eye Candy (Projects), Uncategorized

Hi everyone.. Are you ready for a new week full of great projects from the Design Team? Today I have an adorable Baby card using a Stamp from Whipper Snapper Designs. If you aren’t familiar with this line, it’s loaded with cute fun images that are great for coloring.

mp3

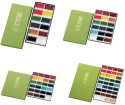
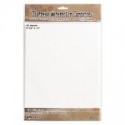
I used the “A Blessing from Heaven” stamp to create a set of Baby cards for a gift. I stamped the image onto some Watercolor Card Stock using VersaFine Onyx Black ink. Then I colored the image in using the Kuretake Gansai Tambi Watercolor set.  I used no. 47, 20, 61, 34, 43, 44, 50 ,46 & No. 10 . I mixed a few of the colors together to create custom colors. I like to use the plastic insert that comes in the box as a palette.

mp1

After the panels were dry I re-stamped the image using the Mini Misti so the outline would be crisp. Then I die cut the panel with a Large Stitched Rectangle Die.  Then I added some foam tape to the back of each panel and adhered them to a Standard A2 Card base. The card bases are a mix of Yellow and Blue cardstocks. I added an envelope for each card and packaged them up. The inside is blank so the Mommy to be can use them as Thank You cards or a note card.

mp2

Thanks for stopping by today!

2


Sugar Rush

Written by Marie Gamber. Posted in Eye Candy (Projects), Tips & Tricks, Tutorials

mp050815b

Hello everyone!

Marie here and I have a basic dimensional coloring tutorial  for you using
Sugar Rush Stamp Set by Winnie & Walter.

This tutorial is for all of you Copic Lovers that are just learning to use their markers.
Although these  techniques will cover BASIC Masking and dimensional coloring –
I hope the intermediate and advanced colorists will enjoy the tutorial as well!

I will be using  V91, V93, V95 Color combo

More tutorials can be found HERE.

mp050815c

This wonderful stamp set  comes with 31 clear stamps including banners, sentiments, cakes, donuts, cupcakes, hearts and stars!
Imagine all the cool ideas you can create with all these stamps!

Supplies: 

Stamp
Sugar Rush Stamp Set – Winnie & Walter

Ink
Copic Alcohol Ink Markers
Sweet Plum – Memento

Paper
X-press It Blending Card
Sour Grape Bazzill Card Shoppe Paper
Silverton Hall – Wild Rose Studio

Other
Scotch ATG
Scotch ATG Tape
Stickles – Sprinkled Sugar by Ranger

mp050815a

Thank you so much for stopping by and I hope you will check out all
of MarkerPOP’s new arrivals!

Stay healthy and be crafty!

Marie

You’re EARresistible!

Written by Marie Gamber. Posted in Tips & Tricks, Tutorials


mp032015d

Hello and Welcome!
It’s Marie and I had so much fun coloring this adorable image from
Lawn Fawn called An Eggstra Special Easter.

mp032015aa

I am sharing a Dark Suntan Copic Color Combo
E13, E15, E25
Colorless Blender

***


:

My other YouTube Tutorials can be found HERE

mp032015bb

Stamp
 Eggstra Special Easter (Lawn Fawn)

Ink
Copic Alcohol Ink Markers
Copic Opaque White Ink
Copic Colorless Blender
Wink of Stella Glitter Pen – Clear
Memento Tuxedo Black Ink Pad

Paper
X-Press It Blending Card
Bazzill Card Shoppe – Gumdrop
Designer Paper from my stash
Quilling paper.

Other
ATG
Scotch Tape Refills

Copic Markers Used
Bunnie:   E13, E15, E25, E91, E95, Colorless Blender
Bow:  Y00, Y02, Y21 (I could have gone darker with my shadow 😀 )
Grass:  G40, G43, G46, YG03, Colorless Blender

mp032015c


Thank you for stopping by!
See you next Friday with another tutorial using  this same wonderful stamp set.
Next week will be dimensional coloring!

Marie

Distress Inking with Copic Markers – Part 2- Clothing

Written by Marie Gamber. Posted in Tutorials

  mp021115aaShaker Card

Hello everyone!  Marie here with another tutorial for you!

This is part 2 of the Scandinavian – Inspired Distress Inking with Copic Markers – Clothing.
This is a technique I learned from the fabulous Suzanne Dean. I hope you enjoy it.

The three things I want to share about the Scandinavian- Inspired Distress Inking is –
1.   The outer edges are very dark.
2.   The corners and deep recesses have a pooling gray tone.
3.  There is a lot of light in this technique.
Usually mid-tones constitute 2/3  of the image.
In this technique 2/3 on the image will be light in color. 

***

My other YouTube Tutorials can be found HERE
***

mp021115b

 Stamp

Tilda with Rose Lace Dress
All the Magnolia images would be perfect for this technique!

Ink
Copic Alcohol Ink Markers (.too, Inc)
Memento Tuxedo Black (Tsukineko)

Paper
Card Base 120# White
Layer: Bazzill Card Shoppe Paper -Gummy Bear
Designer: New Bloom (First Edition)
X-Press It Blending Card

Other
Crafter’s Companion Double Sided Tape
Shake It Clear Adhesive Pouches (IO)
Pearls
Micro Beads

mp021115c

I had a special request from my friend Kathy Stacy.
Kathy would like me to show how I colored a Prismacolor background
for one of my images.
That will be my project for February 16th – next Monday.
Here’s to you Kathy CHECK IT OUT next Monday!

badge_marie

Grab Our Button

i Luv MarkerPOP
Show some MarkerPOP LUV,

add this button to your blog.

I’m a Winner!

I'm a Winner on MarkerPOP Blog
Copy and paste the code under the badge

to claim your bragging rights!

I’ve Made Top 3!

WoHooooo I made it to the Top 3 on MarkerPOP Blog
Copy and paste the code under the badge

to claim your bragging rights!

Visit Us!

MarkerPOP Free Shipping MarkerPOP Boutique
18299 Mount Baldy Cir
Fountain Valley, CA 92708
Toll Free: 1-855-312-1222
Phone: 1-714-249-1222