$10 Gift Voucher - Leave a Comment

Posts Tagged ‘Wink of Stella’

Little Stinker

Written by jpascarella. Posted in Eye Candy (Projects)

Hello, MarkerPOP friends! It is Jessi here for a second post this week. Christmas is right around the corner, but is it too soon to have Valentine’s Day on the mind? Who do you send Valentine’s Day cards to? That special someone? Family? Friends?

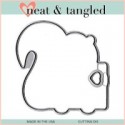
Today, I am showcasing a CAS card using an adorable Neat & Tangled stamp set, Little Stinker:

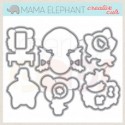
The skunk image is stamped and colored in. The coordinating die is used to cut out the image. The coordinating die set also includes a tiny heart die. I used the die to cut out three hearts. I attached a red piece of cardstock underneath the white cardstock. The panel is then attached to the card front. A fun stripe print is added at the bottom of the panel. The skunk is attached and a sentiment is stamped above the printed paper.

To add some more detail to the card, I used a Wink of Stella pen to add glitter touches to the hearts on the card.

The following Chameleon markers were used on today’s project: RD4, BK4, CG8, PK3 and CB.

Thank you for stopping by today!

Happy Birthday!

Written by Holly Endress. Posted in Eye Candy (Projects)

Happy Friday everyone.. It’s Holly here today! Who’s ready for the Weekend? Today I have a Super Adorable Birthday Card featuring Mama Elephant Stamps & Dies.

mp2

I created this card for a Special Friend of mine who just turned 40!!! I created a standard A2 size card base from some Neenah Solar White and then I die cut a Piece of Dark Grey card stock with the Mama Elephant Pizazz Pieces Creative Cuts. Then I adhered it to the card front and set that piece aside. I die cut another piece of White card stock using the Dotted Details Creative Cuts and added a Background with the Geometric Grid Stencil from My Favorite Things and some Squeezed Lemonade Distress Ink.

mp1

I stamped Happy Birthday from the Big Greetings Set from Avery Elle over the center of the panel with some VersaFine Black ink and then I adhered the piece to the card front. I die cut a second frame from some Black card stock and added just the frame around the image panel. I stamped the images from the Rock and Paws Set and colored them in with Copics. Then I used the coordinating dies to cut them out. I adhered them to the card front with some Foam mounting tape.

mp3

For a touch of Shimmer I added a little Clear Wink of Stella to the Guitar and the star over the eye and the Musical Notes. This is a Masculine card so I didn’t want to over do it with the Sparkles. I really like the way Grey, Black and Yellow look together and How adorable is this stamp set?

I used the following Copics for my images:

Musical Notes ~ 100,C9,C7,C5 & C1 Speakers ~ T7,T5, T3 & T1 Dog ~ R05,W7,W5,W3,W1 &W0 Guitar ~ C3, C1 & C00 and a little 0 Colorless Blender

Thanks for stopping by today..

12741890_10208671583206779_8747021650263878740_n

Happy Birthday!!

Written by Holly Endress. Posted in Eye Candy (Projects), Videos

Hi everyone it’s Holly here today with a fun card using the Big Top Birthday set from Neat & Tangled and a new video. This set is so cute and I love all the fun images in it.

mp2

I started out by stamping the images on a piece of White card stock using my large Misti and some Memento Tuxedo Black ink. I was able to stamp all the images at once using the Misti and then I colored them in with Copics. I die cut them with the coordinating dies and my Big Shot. Then I used the MFT Blueprints #27 to cut the Black frame and the White scalloped piece. I adhered the White panel to a Red Top Folding card base with my ATG Gun.

mp1

I cut two strips of the Carta Bella Circus Party Pattern paper and adhered one behind the long opening in the Frame. I added the images with some foam adhesive. Then I added each image behind the squares trimming them as needed and the other piece of Pattern paper behind them. Using some foam adhesive I added the image panel to the card front. Then I adhered the banner with some foam tape as well.

mp3

For some Shimmer I added some Red, Clear & Yellow Wink of Stella to the different images. This came out so cute and there are several fun sentiments in the set perfect for any occasion. Check out the video below for more details on how I created this card.

Copics used:

C0,C1,C3 / T0,T1,T3,T5,T7 / R00,R20,R21,R22,R05,R08,R14,R29 / Y13,Y15,Y17, y21 / YR04,YR21,YR23 , YR27 / E11, E13, E18, E25, E27, E29, E21, E50, E51 / BG11, BG13, BG18 and 0.

https://youtu.be/jVCXsWzHssQ

Thanks for stopping by today!

12741890_10208671583206779_8747021650263878740_n

Hooray!!

Written by Holly Endress. Posted in Eye Candy (Projects), Tutorials, Videos

Happy Friday everyone.. It’s Holly here and today I have a card using the super adorable Space Bears and dies from Mama Elephant.

hooray2

I started by created a Galaxy Background on a piece of Watercolor paper using Distress Inks in … Squeezed Lemonade, Picked Raspberry, Seedless Perserves,Blueprint Sketch, Chipped Sapphire and Black Soot. I added the Distress inks in layers drying in between and then once it was dry I splattered on some Picket Fence paint and a few drops of Stain.

hooray1

I die cut the panel using the Large Stitched Wonky Dies from MFT and the I heat embossed the sentiments and a few stars from the same set using some White embossing powder. I adhered the panel to a top folding White card base using some Foam adhesive.

horay3

I stamped the bear and balloon image from Space Bears onto some White card stock using Memento Tuxedo Black ink and colored the in with Copics... I used W00, W1, W3 & W5 for the Bear and a BG 10, BG11 & Bg13 for the Balloon. I added a little BG10 around the Helmet and then covered it with some Clear Wink of Stella. I die cut both images using the coordinating died and adhered them to the card front using foam adhesive. I love how the background came out I wanted the bear to really pop against the background so I was going for a lighter center in my Galaxy.

hooray4

Check out the video below to see more details on how I created this card.


https://youtu.be/6Gm9CR3V9Yw

Thanks for stopping in today.

 DesignTeam2016-04

Grab Our Button

i Luv MarkerPOP
Show some MarkerPOP LUV,

add this button to your blog.

I’m a Winner!

I'm a Winner on MarkerPOP Blog
Copy and paste the code under the badge

to claim your bragging rights!

I’ve Made Top 3!

WoHooooo I made it to the Top 3 on MarkerPOP Blog
Copy and paste the code under the badge

to claim your bragging rights!

Visit Us!

MarkerPOP Free Shipping MarkerPOP Boutique
18299 Mount Baldy Cir
Fountain Valley, CA 92708
Toll Free: 1-855-312-1222
Phone: 1-714-249-1222