$10 Gift Voucher - Leave a Comment

Posts Tagged ‘Copic’

Matching Colors with Copics!!

Written by Holly Endress. Posted in Eye Candy (Projects)

Happy Friday everyone… Are you ready for the weekend? it’s Holly here today and we are celebrating Copic Marker’s 30th Birthday all month long. Today I have a card and a short tutorial for you on using Copic Color Charts to color match your images and cardstock.

I colored in this super cute The Stuffie Gang Stamp from Stampingbella using my Copic Markers. If you love coloring with your Copics and like to have a coloring guide these stamps are great for that. They have a full color photo on the front of the package which is great for a guide. Another great way to figure out what colors to use is a Color Chart. Copic has a great Blank Color Chart on their site that you can color in with your Copics, so you have an extact match. I use the color chart to match pattern papers I want to use with my project with the colors I will use on the images.

On today’s project I started with the pattern paper and used the chart to find the colors that matched and then based my Copic choices on those colors. Here I have a piece of the Lawn Fawn Perfectly Plaid Petite Fall 6×6 paper. I’m matching the Orange color in the paper using my Hex Chart. You can use any chart that you hand colored to find your colors. I’m going to use YR12 as my lightest orange color. You can do this with a Colored image on a stamp package too. You will have a general guideline of what colors they may have used or are recommending.

For the Brown colors I’m going to use E44 and it’s coordinating colors.

Once I knew which colors I needed to match the paper I started coloring the image. The image is stamped onto some Copic X-Press it blending card stock using Lawn Fawn’s Jet Black Ink. I colored the image in and then I added a Frame from the pattern paper that I die cut with the Lawn Fawn Stitched Rectangle Frames. Then I adhered the panel to a top folding card base.

I stamped the sentiment onto some White card stock and die cut it using the Blueprints #27 Die-namic from MFT. Then I cut an additional banner from some the coordinating patter paper and added that as well. Super cute, I need to get more of these out of my stash and color this month!

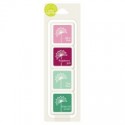
I used the following Copics:

YR12, YR15, YR18, E40, E42, E44, E47, E49, Y21 & YR23. YG11, YG13, YG17, E50, E53, W3, E70, E71, E74, E77. C6, C9, 100, BG0000, BV20, C1, C4, BG11, BG45, BG49.


Be sure to head over to this post so you can find out how you can enter to WIN one of our Copic Marker 30th Birthday Celebration Prizes valued at $300!!!

Let’s Clean & Refill those Copics!

Written by Valerie Ward. Posted in Tips & Tricks, Tutorials


Hi Crafters! It’s Valerie here, and guess what?! It is Copic Marker’s 30th Birthday (check out this Copic web site page showing their Timeline!)! And to celebrate, MarkerPop is having a month-long giveaway where you will have chances to win multiple prizes, in fact, there will be over $300 in Copic products giveaways!

TO ENTER, you MUST be a follower of The MarkerPop Facebook page, their Pinterest Page, their Instagram Page, and their blog. You must leave a comment on the blog posts, and share this post on at least one social media account.

 This contest started 03/06, and ends 04/06.

The winner will be announced on 04/13.

Today I am going to share how I clean my Copic markers. I don’t know about you, but my beautiful babies get messy very easily. So every once in awhile I clean them and spiffy them up (as my Gramps used to always say). Here are a few in all their messy glory:
There are 4 ways you can clean your markers: isopropyl alcohol, hand sanitizer, hand wipes, or Copic 0 Colorless Blender refill ink. Then you’ll need cotton balls and/or Q-tips:
Look at this poor R24 marker in the next 2 pics; see how not only is the outside barrel all messy, but when you take the caps off, you see the tips of the barrel are nasty, and the inside of the cap on the side I use the most is an absolute disaster!:
Now I’ve heard that baby wipes will clean your Copic markers. I tried it, and it was OK, but I think this method is really only good enough if you’re looking for a slight clean-up. I wiped and rubbed that marker with the wipe, and you can see how much ink is still left:
The next method I’ve only heard about, and I didn’t expect it to work; it’s using hand sanitizer. I had some in my purse, so I grabbed it, soaked a cotton ball with it, and wa-la, it took the ink RiGHT OFF, easy as pie!:
Now the R24 was so clean, I had to grab another marker, my E29; look at the mess on that one.
This time I used my most trusted method that I love, and that’s isopropyl alcohol. Get a cotton ball soaked with it, and you’ll see the ink come off your marker beautifully!:

Now the hard part… the INSIDES of the caps (blech!):

First I soaked a Q-tip in hand sanitizer, and got to work on the insides. It worked, but I could see I’d go through 10 or more Q-tips on each cap:
So instead, I poured my isopropyl alcohol (i.a.) into the caps, then rubbed the insides of the caps (while still filled with i.a.) with Q-tips. I poured out the then colored i.o and rinsed with water. Look how beautiful they got!:
Here is that original set of markers from the beginning of the post, and clean and shiny again:
I’m going to move on to another issue we all have once-in-awhile… a dried out nib. What you’ll need is a new nib, Nib Tweezers if you have them (I don’t), Copic Boosters, and your Refill Ink.
First, pull out the old nib, and put your new nib in; here’s my new nib in my marker barrel. In the background, you can see I’ve pulled the Booster needle out of it’s plastic cap; it’s like a long needle with a base on it:
Go to your wide end of your marker, take it out, and then put the booster needle into the inside of the marker:
Then start dripping the ink in; you’ll know when it’s full when the nib on the other end gets all juicy & wet. Then put the nibs back in:
So there she is! A clean, filled, great working Copic marker!:
Thanks for stopping by, and don’t forget to go to check out the other designers’ Copic posts!

Be You & Be Happy

Written by lisascreativeniche. Posted in Eye Candy (Projects), Tutorials

Hi!  It’s Lisa here today and as we are celebrating Copics® this month with an incredible giveaway, click here to find full details on how you can be entered to win over $300 in goodies! Woot Woot!

A few weeks ago I had shared a post using my Copic® Markers on vellum, and so I thought I would share a few more step by step photos with how I did this on a different project.  Todays project features the newly released Be Strong Stamp Set by Altenew.  I love the fun font used with some really uplifting sentiments, plus it’s so different from the typical sets I buy that I just had to have it!

On this card the light strings and the cactus are all embossed and colored on vellum.  When creating a project like this is best to have a thicker vellum, mine is 65# so it can hold up to the embossing and is not likely to tear when I am coloring it.  Now I will share a few close ups of the coloring done on the lights…

Step 1. I embossed the lights onto my velum with gold embossing powder.

2. Next I turn it over and colored with Y15 and Y17.  Tip:  You always want to go darker with your color choices as the vellum will really soften them up.  This is the back side so the colors look a little brighter at the moment.

3.  This is another backside view showing that I’ve added a darker Yellow (YR24) to the lights, because they were barely showing through.  I’ve also added the blue to the top of the lights with B28.  Tip: Your coloring will not look “beautiful” or “precise” on the backside of the vellum, you merely want to get the color down so that when you flip it over the embossed edges will cover any imperfections and only the color will show through.

Also note that you will not really be able to blend with your markers on the vellum.  I do add layers of color, as you can see on the cactus with the greens (YG06, YG17, G29), but you need to wait for each color to dry before adding the next or you will erase the first color.  What you are mainly doing is layering the colors up on the backside, and when you flip the image over you will see what appears to be a watercolored look of blending.

Thanks so much for stopping by and I hope you’ll give this technique a try.  Why not try it with our latest challenge?

Happy Crafting!

Supplies Used:

Adding details with copics!

Written by Jessica Frost. Posted in Eye Candy (Projects)

Good morning, Jess here!  I wanted to create a CAS card using primarily stamping with ink pads but with a little extra details from copic markers and I’m really pleased with how it turned out.  Concord & 9th is one of the newest companies that MarkerPop is carrying and I wanted to show you how easy it is to create a bunch of really pretty cards with nothing but a handful of ink pads and copics!

That little bit of copic shading at the base of each bottle tree really adds depth to the card!  So I started by stamping the trees from Concord & 9th’s O Christmas Tree across my card base using a variety of dye inks.  I also used my MISTI to make sure my trees lined up correctly.

Next I added shading using two copic markers for each tree.  I left the color lighter in the middle of the curve to give it a little depth.  Then I added clear spectrum noir sparkle and trimmed the panel down to 4″ by 5.25″.  Once it dried I prepped it with my powder tool and then stamped the sentiment across the card with versamark before  I heat-embossing it with gold embossing powder.  Finally I covered the edge of another piece of white cardstock with versamark and heat-embossed it with gold embossing powder to create a frame.  I adhered the tree panel to the gold frame and that was it!

These would be fun and easy cards to mass produce for a holiday card.  You could use different color palettes or do an ombre look using varying shades of one color.  Thanks so much for stopping by today and have a wonderful day.

jess

Supplies:

Grab Our Button

i Luv MarkerPOP
Show some MarkerPOP LUV,

add this button to your blog.

I’m a Winner!

I'm a Winner on MarkerPOP Blog
Copy and paste the code under the badge

to claim your bragging rights!

I’ve Made Top 3!

WoHooooo I made it to the Top 3 on MarkerPOP Blog
Copy and paste the code under the badge

to claim your bragging rights!

Visit Us!

MarkerPOP Free Shipping MarkerPOP Boutique
18299 Mount Baldy Cir
Fountain Valley, CA 92708
Toll Free: 1-855-312-1222
Phone: 1-714-249-1222