$10 Gift Voucher - Leave a Comment

Posts Tagged ‘Lawn Fawn’

Happy Birthday to Ewe

Written by Clare. Posted in Eye Candy (Projects)

Hi there! Clare here today! For today’s card, I wanted to show how to use a Christmas themed stamp set to make a birthday card!

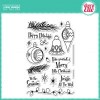
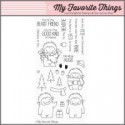
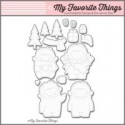
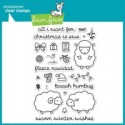
To start off, I took the Baaah Humbug stamp set, and colored my little ewe simply with some Light Gray and Gray ZIG’s, with some water to blend it out. I die cut my lamb, then also stamped, heat embossed and die cut a present from the same stamp set. The present’s bow was topped off with some Stickles.

birthday-ewe-by-clareprezzia-for-markerpop

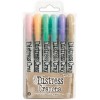
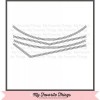
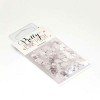
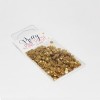
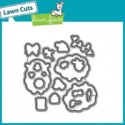
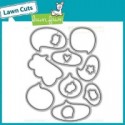
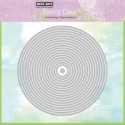
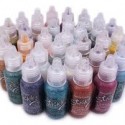
I die cut a frame for my ewe from My Favorite Things Pierced Rectangles die set, then die cut a window in that frame using Hero Arts Circle Infinity dies. To create my shaker, I quickly blended a background using Tim Holtz Abandoned Coral, and filled it up with some sequins.

birthday-ewe-close-by-clareprezzia-for-markerpop

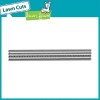
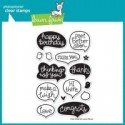
I adhered my shaker frame to a gray card base, adhered my ewe, and topped it off with a die cut sentiment from Lawn Fawn’s Chit Chat, using Hero Arts Charcoal.

Thanks so much for stopping in today and God bless!

Clare Prezzia ~ Bearydo Paperie

Happy Holidays: Retro Style…

Written by lisascreativeniche. Posted in Eye Candy (Projects)

Hello!  It is Lisa Lahiff here with you today, and I’m very excited to share this CAS Christmas Card with a Retro Feel…

img_8132

I used a fun mix of products to create this card including: Retro Ornaments by Avery Elle, Lawn Fawn Stitch Border Cuts, and set #5 of the Tim Holtz Distress Crayons.  To be honest this card started out as a happy accident.  When I first got my distress crayons I just wanted to play around and test them out so I mixed a few colors onto watercolor cardstock and went over them with a baby wipe. I then spritzed it with some water and perfect pearls and set it off to dry.  The stitched background was inspired by a card I had seen Jennifer McGuire create quite some time ago, and I had been itching to create one too so I did.  I also decided to round the bottom of the stitched background with My Favorite Things Die-namic Stitched Basic Edges.  I then went back to my now dry watercolor cardstock and stamped the ornament images with Versafine Ink, cut them out and added a few accents with a gold pen. I stamped the sentiment in the right corner of some patterned paper, and then I layered it all onto my cardbase.

img_8134

Thank you so much for stopping by and Happy Crafting!
designteam2016lisa


You ( And A Unicorn )…

Written by lisascreativeniche. Posted in Eye Candy (Projects)

Hello wonderful and dear crafty friends!  It is Lisa here with you today, and I have a fun and cute little card to share with you today using the newly released Winter Unicorn Stamp Set for a non-traditional Christmas Card…

img_8086

To create this card I started by using a panel of Neenah Solar White Cardstock and stamped the unicorn in the center of this panel.  I didn’t spend any time re-stamping the image for a crisper look because I knew this unicorn would be covered up.  Next I stamped little hearts and stars from this stamp set with Lawn Fawn Dye Ink in Cranberry and Altenew Crisp ink in Warm Sunshine.  The sentiment was stamped  with Versafine Ink above and below these images.  To create the look of the unicorn flying in the sky I used the Lawn Fawn Puffy Cloud Border Cut Set and adhered one to the top and the bottom of the panel after blending some distress ink in Tumbled Glass onto each of them.

Finally I stamped the unicorn onto a separate piece of cardstock with Memento Tuxedo Black ink.  I then colored it in with various Copic Markers (R20, R24, R29, R89, C0, C5, YG17, G28, G46).  Since the sentiment I used was Christmasy I decided to color her in with reds and greens to tie it all in. Next I fussy cut him out and went over the edges with my Tuxedo Black Marker.  After I popped her up with foam adhesive she needed a little sparkle so I busted out my Spectrum Noir Clear Glitter Pen.

img_8088

Thanks so much for stopping by and Happy Crafting!

designteam2016lisa

Rare Friends

Written by Clare. Posted in Eye Candy (Projects)

Hi all, it’s Clare here today! I couldn’t stop with My Favorite Things Beast Friends after last week – I wanted to show how you could use it to make a non-holiday or even winter card.

I started out by die cutting a bunch of trees using My Favorite Things Birch Trees dies, and adhered them to navy cardstock. I then stamped a bunch of little leaves from Avery Elle’s Woodland Wonders, and colored them with Blue Gray, Cobalt Blue and some water to lighten it up. After die cutting the leaves, I adhered them to my trees.

rare-friends-by-clareprezzia-for-markerpop

Next was the landscape – I die cut two pieces of vellum using Lawn Fawn’s Stitched Hillside border dies, then die cut a piece of white cardstock using the same die. I inked my sentiment first with Versamark, then with Hero Arts Navy, added some Sparkle clear embossing powder, and heat embossed the sentiment. I trimmed my hills down, and adhered them to the base.

rare-friends-close-by-clareprezzia-for-markerpop

Next was the beast! I colored the little dude pretty much with Mid Brown – I struggle to color images that have “large” spaces, such as his tummy.

rare-friends-close2-by-clareprezzia-for-markerpop

I brought in a little pink with some butterflies from Avery Elle’s Woodland Wonders, colored with Light Carmine and water.

Thanks so much for stopping in today and God bless!

Clare Prezzia ~ Bearydo Paperie

Grab Our Button

i Luv MarkerPOP
Show some MarkerPOP LUV,

add this button to your blog.

I’m a Winner!

I'm a Winner on MarkerPOP Blog
Copy and paste the code under the badge

to claim your bragging rights!

I’ve Made Top 3!

WoHooooo I made it to the Top 3 on MarkerPOP Blog
Copy and paste the code under the badge

to claim your bragging rights!

Visit Us!

MarkerPOP Free Shipping MarkerPOP Boutique
18299 Mount Baldy Cir
Fountain Valley, CA 92708
Toll Free: 1-855-312-1222
Phone: 1-714-249-1222