$10 Gift Voucher - Leave a Comment

Posts Tagged ‘ZIG Clean Color Real Brush’

Let’s Hang Out

Written by jpascarella. Posted in Eye Candy (Projects)

Hello, MarkerPOP friends! It is Jessi here, today. Last week, I mentioned that Neat & Tangled is one of my favorite stamp companies. So I decided to break out some of their stamps and make a fun card for today’s post. Please stop by the Neat & Tangled section in the MarkerPOP store.

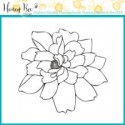
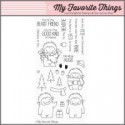
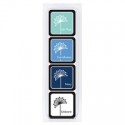
I am working with the Better Together stamp set:


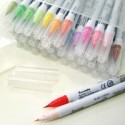
I used the no-line technique on this card. To start, I stamped the image in a light colored ink. I used a variety of Zig Clean Color Brush Markers to color in the image. To make sure the colors do not run into each other, I painted different areas and let them dry completely. Once the image is dried, I run over the outlines with a the matching color.


I used a green to color in the grass. Once that was completely dry, I stamped the sentiment to finish the scene. The panel is attached to a few different prints to layer the card.

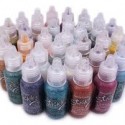
The following Zig Clean Color markers were used on today’s project: 023, 035, 047, 060, 062, 065, 070.

Don’t forget to comment for your chance to win a $10 MarkerPOP gift card. The more posts you comment on, the higher chances to win!

Thank you for stopping by!

Jessi

Thank You for Everything

Written by jpascarella. Posted in Eye Candy (Projects)

Hello, MarkerPOP friends! It is Jessi here! We are in the middle of holiday season. The holiday cards are being sent and gifts are being exchanged. I find that after all the gift exchanges, I am in need of lots of thank you cards. I also find that it is hard to find time to create them all at once. So I try to create a few here and there in preparation.

Today, I am working with the Honey Bee Stamps’ Thank You and Lotus stamp sets:

I wanted to use the no-line technique on the flowers. I stamped them onto the cardstock in a light ink color. I used a pink and yellow Zig Clean Color markers to paint the flower. The sentiment is stamped onto a stripe of blue cardstock and attached to the card. The panel is then cut out using a rectangle die cut.

Stop by the MarkerPOP blog for the list of supplies used.

Thank you for stopping by! Have a great day!

Happy Birthday to Ewe

Written by Clare. Posted in Eye Candy (Projects)

Hi there! Clare here today! For today’s card, I wanted to show how to use a Christmas themed stamp set to make a birthday card!

To start off, I took the Baaah Humbug stamp set, and colored my little ewe simply with some Light Gray and Gray ZIG’s, with some water to blend it out. I die cut my lamb, then also stamped, heat embossed and die cut a present from the same stamp set. The present’s bow was topped off with some Stickles.

birthday-ewe-by-clareprezzia-for-markerpop

I die cut a frame for my ewe from My Favorite Things Pierced Rectangles die set, then die cut a window in that frame using Hero Arts Circle Infinity dies. To create my shaker, I quickly blended a background using Tim Holtz Abandoned Coral, and filled it up with some sequins.

birthday-ewe-close-by-clareprezzia-for-markerpop

I adhered my shaker frame to a gray card base, adhered my ewe, and topped it off with a die cut sentiment from Lawn Fawn’s Chit Chat, using Hero Arts Charcoal.

Thanks so much for stopping in today and God bless!

Clare Prezzia ~ Bearydo Paperie

Rare Friends

Written by Clare. Posted in Eye Candy (Projects)

Hi all, it’s Clare here today! I couldn’t stop with My Favorite Things Beast Friends after last week – I wanted to show how you could use it to make a non-holiday or even winter card.

I started out by die cutting a bunch of trees using My Favorite Things Birch Trees dies, and adhered them to navy cardstock. I then stamped a bunch of little leaves from Avery Elle’s Woodland Wonders, and colored them with Blue Gray, Cobalt Blue and some water to lighten it up. After die cutting the leaves, I adhered them to my trees.

rare-friends-by-clareprezzia-for-markerpop

Next was the landscape – I die cut two pieces of vellum using Lawn Fawn’s Stitched Hillside border dies, then die cut a piece of white cardstock using the same die. I inked my sentiment first with Versamark, then with Hero Arts Navy, added some Sparkle clear embossing powder, and heat embossed the sentiment. I trimmed my hills down, and adhered them to the base.

rare-friends-close-by-clareprezzia-for-markerpop

Next was the beast! I colored the little dude pretty much with Mid Brown – I struggle to color images that have “large” spaces, such as his tummy.

rare-friends-close2-by-clareprezzia-for-markerpop

I brought in a little pink with some butterflies from Avery Elle’s Woodland Wonders, colored with Light Carmine and water.

Thanks so much for stopping in today and God bless!

Clare Prezzia ~ Bearydo Paperie

Grab Our Button

i Luv MarkerPOP
Show some MarkerPOP LUV,

add this button to your blog.

I’m a Winner!

I'm a Winner on MarkerPOP Blog
Copy and paste the code under the badge

to claim your bragging rights!

I’ve Made Top 3!

WoHooooo I made it to the Top 3 on MarkerPOP Blog
Copy and paste the code under the badge

to claim your bragging rights!

Visit Us!

MarkerPOP Free Shipping MarkerPOP Boutique
18299 Mount Baldy Cir
Fountain Valley, CA 92708
Toll Free: 1-855-312-1222
Phone: 1-714-249-1222