$10 Gift Voucher - Leave a Comment

Posts Tagged ‘MFT paper’

Have Yourself a Merry Little Christmas

Written by lisascreativeniche. Posted in Eye Candy (Projects)

Hello, hello!  It is Lisa here with you again today and I’m going Retro and bright with today’s Christmas card, take a peek…

img_8323

To create todays card I started by diecutting my background from a mix of Lawn Fawn Beach Size Petite Paper Pack and My Favorite Things Plaid Patterns Merry and Bright Paper Pack.  Using the My Favorite Things Stitched Basic Edges Die cut I was able to create the fun layered pattern.  Once it was all adhered together I stamped the ornaments and sentiment from the Avery Elle Retro Ornaments Set onto Neenah Solar White cardstock and colored them in with my Copic® Markers (B02, B05, RV14, RV25, YG01, YG03, YG25, Y11, Y15, Y24,Y26).  These were then cut out and I decided to pop them up foam foam adhesive and some gold thread.  The sentiment was diecut from the Pretty Pink Posh Stitched Banner Duo and adhered on the left side of the card.

img_8324

Thanks so much for joining me today and Happy Crafting!

designteam2016lisa

Supplies Used:

Thank You!

Written by Holly Endress. Posted in Eye Candy (Projects)

Happy Friday everyone it’s Holly here today. Father’s Day is this weekend and our current Challenge is a Father’s Day theme so I created a Father’s Day card or a Thank you card for that special Father Figure in your life. Masculine cards are always hard for me, so today I kept it clean and simple.

hb2

 I’m using the two adorable bear sets from Mama Elephant Cub Cuddles and the Coordinating Dies. The sentiment is from Bear Hugs. I trimmed a piece of Neenah Solar White  to 4 x 5 1/4″ and then I die cut a circle from the front using the Framed Tags: Columbus Circle Creative Cuts from Mama Elephant. Then I stamped the sentiments onto the bottom using some Walnut ink from Lawn Fawn and some VersaFine Black Ink. Then I added some Foam mounting tape to the back side of the panel.

hb1

I stamped the bear image from the Cub Cuddles set onto some Neenah Solar White using Memento Tuxedo Black ink and the I colored the image in with Copics… E53, E34, E23 & E27. Then I die cut the image using the matching dies. I created the background for the die cut center of my card panel with some pattern patterns from My Favorite Things. The sky piece is from the Watercolor Wash 6×6 pad and the Grass is from the County Fair Plaid 6×6 pack. I die cut the Green piece with the Landscape Trio die from Mama Elephant to give it a stitched edge. I adhered the papers behind the panel to appear through the circle opening and then I added the panel to the Card front. Once the panel was in place I added some foam tape to the back of the bear image and added that inside the circle.

hb3

On the inside of the card I added a sentiment from Cub Cuddles and the paw prints from Bear Hugs. This is a card that can be mass produced or if you have kids they could each make one and change out the bear images in the center. Don’t forget to enter our Father’s Day Challenge.. it’s open until Sunday June 26th.

Thanks for stopping by today, Have a great Weekend!

12741890_10208671583206779_8747021650263878740_n

Happy Purr-thday!

Written by Valerie Ward. Posted in Eye Candy (Projects)

Today I’m digging into some new AND old MFT goodies!

The new Cool Cat stamp set & coordinating die set were a MUST HAVE for me, as I love anything “cats & dogs”. And it works perfectly with the older set, I Knead You. I stamped the images with Memento Tuxedo Black ink onto X-Press IT Blending Card Paper, and colored them with my Copic Sketch markers (colors listed at the end). The sentiment is stamped using VersaFine Onyx Black ink.

MFT stamps & dies & paper, Pretty Pink Posh sequins, Copics {ValByDesign, 2016}

I pulled out the MFT March Release paper collection, Tranquil Textures, and used 2 sheets from it. The purple patterned one is die cut using the 2nd largest die from the MFT Croos-Stitch Rectangle STAX die set.

The perfect final touch was adding Pretty Pink Posh sequins with Glossy Accents:

MFT stamps & dies & paper, Pretty Pink Posh sequins, Copics {ValByDesign, 2016}

I also used some AWESOME new tools (check out our new Crafter’s Essentials section in the store for the latest products we’re carrying that every crafter must have!!)

The card base is a sheet of Bazzill White Cardstock. The white foam on the back of the die cut images is glued on using Tombow Mono Glue. I used my Crafter’s Companion Adhesive to tape down the wood patterned paper to the card base. And I store my Copic Markers in Crafter’s Companion storage shelves

MFT stamps & dies & paper, Pretty Pink Posh sequins, Copics {ValByDesign, 2016}

The Copic colors I used are:

  • Cats: YR20, YR21, YR23, YR24, YR27 / Ears: R20 / Noses: R22
  • Yarn: BG72, BG75, BG78
  • Shelf: E23, E25, E27
  • Mouse: E11, E13, E15 / Sweater: Y13, Y15, & YR04, YR07 

Thanks so much for stopping by today; have a great week, and Happy Crafting!

Valerie

Happy Birthday to EWE

Written by Valerie Ward. Posted in Eye Candy (Projects)

Well whaddya know? It’s Monday already {sigh!}; it’s Valere here today, and let’s start the week off with something adorable and cheerful to start the week off with a smile! I did just that with a card today using lots of My Favorite Things cuteness and Pretty Pink Posh goodies!

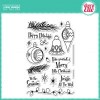
I started out by stamping my images from the MFT Ewe are the Best stamp set onto X-Press IT blending Card Paper with Memento Tuxedo Black Ink and coloring them with my Copic Markers (colors are listed at the end of the post). Then I die cut the images with the MFT Ewe are the Best die set.

MFT stamps & dies & paper, Pretty Pink Posh sequins, Distress ink, Copics {ValByDesign, 2016}

The first layer of the scene is the sky; I die cut a piece of Distress Watercolor Card Stock with the largest die from the MFT Cross-Stitch Rectangle STAX die set, and then added Tumbled Glass ink to it with my Mini Ink Blending Tool.

Next, I die cut the fence using the MFT Rolling Hills die set, and then the grass line using the same die set; and then I cut the front grass line using the MFT Grassy Fields die set. The final step for this top layer was to assemble the entire scene (so fun to do!).

MFT stamps & dies & paper, Pretty Pink Posh sequins, Distress ink, Copics {ValByDesign, 2016}

I added a piece of Bazzill Sour Lemon paper behind the top layer, then the layer of paper from the MFT Subtle Plaids Paper Pack, and last layer is a piece of Bazzill Spearmint Stick paper.

I scattered Pretty Pink Posh Cupped 6mm Lemon Drop sequins and Cupped 4mm Orchid sequins areound the perimeter of the card, and I added a Pretty Pink Posh 6mm Clear Droplet and 2 4mm Clear DropletsThe final touch was adding Zig Clear Wink of Stella and Glossy Accents to the balloon.

MFT stamps & dies & paper, Pretty Pink Posh sequins, Distress ink, Copics {ValByDesign, 2016}

Thanks so much for stopping by; have a great Monday, a wonderful week, and fun crafting!!

Copic colors used:

  • Sheep: E50, E53 / Legs: R11 / Hooves: W5, W7 / Face: R0000, R00 / Hat: Y02, Y06, Y08
  • Balloon: V01, V05, V06
  • Roumd Tree: G21, G24, G28 / Trunk: E18
  • Skinny Trees: YG61, YG63, YG67 / Trunk: E37
  • Flowers: RV21, RV23 / YR18 / Leaves: YG07, YG09
  • Hill: YG11, YG25, YG09
  • Windmill: E30, E31, E33 / E84, E87, E89 / Roof: T6, T8 / Door & Windows: N6 / Blades: BG0000

Valerie - MarkerPop!

Grab Our Button

i Luv MarkerPOP
Show some MarkerPOP LUV,

add this button to your blog.

I’m a Winner!

I'm a Winner on MarkerPOP Blog
Copy and paste the code under the badge

to claim your bragging rights!

I’ve Made Top 3!

WoHooooo I made it to the Top 3 on MarkerPOP Blog
Copy and paste the code under the badge

to claim your bragging rights!

Visit Us!

MarkerPOP Free Shipping MarkerPOP Boutique
18299 Mount Baldy Cir
Fountain Valley, CA 92708
Toll Free: 1-855-312-1222
Phone: 1-714-249-1222