$10 Gift Voucher - Leave a Comment

Posts Tagged ‘Jessica Frost-Ballas’

So Cute…it’s Scary!!

Written by Jessica Frost. Posted in Eye Candy (Projects)

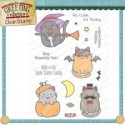
Good morning!  Jessica here with a cute Halloween card featuring an adorable kitty from The Greeting Farm against a spooky night sky!

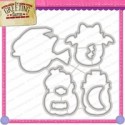
The expression on the cat makes me laugh everytime I look at him…he’s so cute!  To create my card I started by stamping the cat from Scaredy Cats onto Neenah Solar White cardstock with Versafine and heat-embossing him with clear embossing powder.  Then I colored him with copic markers and die-cut him with the coordinating dies.  I decided to cut out the little area between his tail and his body with a craft knife so there wouldn’t be so much white space.  I went over his hat with the spectrum noir clear sparkle marker for a little extra sparkle.  Next I die-cut the stitched fishtail banner from black cardstock, stamped the sentiment from Scaredy Cats with versamark and heat-embossed it with white embossing powder.

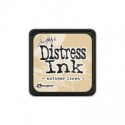
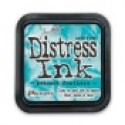
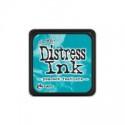
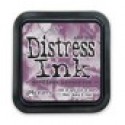
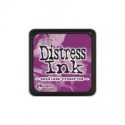
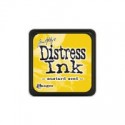
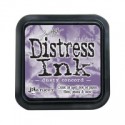
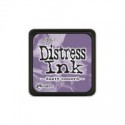
Then it was time to work on my night sky.  I started by blending Mustard Seed, Seedless Preserves, Dusty Concord, and Peacock Feathers distress ink onto watercolor paper in a random pattern.  It looks pretty awful at this point but just wait! 😉

Once it dried I flicked water over it, waited 15 seconds and then blotted it off.  Then I repeated the process but waited a minute before blotting off the water which results in lighter spots.  I also flicked white and silver paint across the panel to create lots of stars in my sky.  I let it dry overnight and then die-cut it with a stitched square die from Lawn Fawn.  Doesn’t it look better now! 🙂

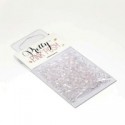
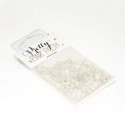
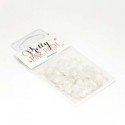
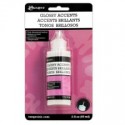
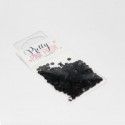
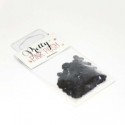
Then I adhered the watercolor panel to a black cardbase, added the sentiment banner, and adhered my kitty with foam mounting tape for a little dimension.  Finally I scattered a few onyx sequins across my card!

I hope you liked my “so cute it’s scary” Halloween card!  Thanks so much for visiting today and have a wonderful weekend!
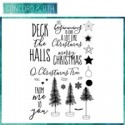
Jessica Frost ~ All the Sparkle

Supplies:

Wishing You a Magical Day!

Written by Jessica Frost. Posted in Eye Candy (Projects)

Good morning!  Jess here with a magical shaker card!  When I was in elementary school I was OBSESSED with unicorns.  I remember that there was always at least one unicorn poster for sale at every school bookfair and I bought every single one I could get my hands on.  I had unicorn notebooks, figurines, stuffed animals…unicorns everywhere! 😉 So I am personally thrilled about the resurgence of unicorns in everyday life, particularly papercrafting!  And I do not discriminate against unicorns…I’ll buy any unicorn stamp I can find.  Though, after making today’s card, this adorable unicorn might just be my favorite!

Seriously, is that not the cutest thing you’ve ever seen?!?  I’m in love.  And here’s what I created with my sparkly teal unicorn:

As is my preference, I combined a few different companies to make my shaker card!  I started by stamping the unicorn from Avery Elle’s Be a Unicorn onto white cardstock with versafine before heat-embossing it with clear embossing powder.  Then I colored him with copic markers.  I used N0 and N1 for shadows; R21 and R32 for his ear; BG10, BG11, and BG32 for his horn; and BG32, BG15, and BG49 for his mane, hooves, and nose.  Finally I added a layer of spectrum noir clear sparkle to his mane, hooves, and nose before die-cutting him with the coordinating dies.

Next I die-cut the Lawn Fawn Rainbow using a variety of colored cardstock.  I listed similar colors below because I wasn’t quite sure the name of some of the cardstocks I used.  I aimed for a softer rainbow palette.  I also die-cut one from a piece of white cardstock for my background panel.  Then I stamped the sentiment from Be a Unicorn onto a second piece of white cardstock with versafine and heat-embossed it with clear embossing powder before die-cutting the cloud edge from the top of the cardstock.  I adhered a piece of acetate to the back of the background panel and then added a double-layer of foam mounting tape all around the back before filling it with sparkling clear sequins and beads.

I applied adhesive to the back of my cardstock rainbow, carefully placed it over the back of the shaker making sure to line it up with the opening of the shaker, and pressed lightly to adhere it to the foam mounting tape.  Then I added a piece of white cardstock cut down to 4″ by 5.25″ to fully seal the shaker and secure my rainbow.  I turned it over, adhered my unicorn with a little foam mounting tape, and then added a few more sequins to finish the card!

So that’s my magical little unicorn shaker!  I hope you like him as much as I do!  Yesterday was my birthday and I think I might keep him as my birthday card to myself! 😉 Thanks so much for visiting and have a wonderful weekend!

Jessica Frost ~ All the Sparkle

Supplies:


Challenge #103: Watercolors

Written by Jessica Frost. Posted in Challenges, Eye Candy (Projects)

Happy Monday everyone.. are you ready for a new Challenge? This week it’s all about Watercolor.. There are many different types of products on the market that you can watercolor your images with. Distress markers or Inks, Zig Clean Color Real Brush Markers, Tombow Markers, watercolor pencils and many more. Check out the great Watercolor products we carry in the store.
103mpc
Create a Watercolor project using any brand of products that we carry in the store. You may play along with other challenges, but excessive challenge pile-ons (more than 10) will result in disqualification for “The Prize”.
mp_blog_prize_box
One entry will be chosen at random to receive our prize. Three additional entries will be chosen for the ”Top 3″ based on their creative use of the Challenge theme. The prize winner and top three can all proudly post their brag buttons on their blogs for the world to see! The Linky will close on Sunday, September 18th at 12 pm CST. The winner will have TWO weeks to claim their prize. *International winners will be responsible for shipping costs if they choose to claim their prize*

Check out what Jessica has created below with Watercoloring… We can’t wait to see what you create!


Good morning, Jess here!  I decided to push myself to use my distress ink markers for no-line watercoloring for this challenge!  This is definitely a technique that I’m still getting comfortable with but it was fun to try something different this week and I can’t wait to see how you interpret our watercolor challenge!
To start I stamped the foliage from Altenew’s Freeform Greenery onto watercolor paper with Antique Linen distress ink to give me guidelines for my watercoloring.
Next I traced the stamped lines with distress markers and then used a wet paintbrush to blend the colors out.  I used Rusty Hinge, Wild Honey, Spiced Marmalade, Mustard Seed, Festive Berries, Fired Brick, and Crushed Olive for my leaves.  In the photo below you can see the leaf in the middle of the panel before I blended it with water.  I like this technique because it doesn’t have to be perfect.  My hand isn’t the steadiest when working on rough watercolor paper and I like how forgiving this technique is.
After I finished all the greenery I scribbled a few distress inks onto an acrylic block, added water, and then splattered them across the panel.  I let them dry and then splattered a gold paint across the panel with my Gansai Tambi Starry watercolors.  While that was drying I stamped a few more leaves with versamark and heat-embossed them with gold tinsel embossing powder.  I colored them with distress ink markers and blended them with water before fussy-cutting them.  Then I stamped the sentiment from Altenew’s Beautiful Quotes onto Red Hots cardstock with versamark and then heat-embossed it with white embossing powder.  I trimmed it down to label size and adhered it to my card around my embossed leaves and over a tangle of metallic gold thread with foam mounting tape.  Finally I blended a little more Antique Linen distress ink over the edges of the card panel.  I adhered the watercolor panel over a red card base at an angle to show a peek of the red cardstock around the watercolor panel.
Thanks so much for visiting and have a wonderful day!
jess
Supplies:

Adding details with copics!

Written by Jessica Frost. Posted in Eye Candy (Projects)

Good morning, Jess here!  I wanted to create a CAS card using primarily stamping with ink pads but with a little extra details from copic markers and I’m really pleased with how it turned out.  Concord & 9th is one of the newest companies that MarkerPop is carrying and I wanted to show you how easy it is to create a bunch of really pretty cards with nothing but a handful of ink pads and copics!

That little bit of copic shading at the base of each bottle tree really adds depth to the card!  So I started by stamping the trees from Concord & 9th’s O Christmas Tree across my card base using a variety of dye inks.  I also used my MISTI to make sure my trees lined up correctly.

Next I added shading using two copic markers for each tree.  I left the color lighter in the middle of the curve to give it a little depth.  Then I added clear spectrum noir sparkle and trimmed the panel down to 4″ by 5.25″.  Once it dried I prepped it with my powder tool and then stamped the sentiment across the card with versamark before  I heat-embossing it with gold embossing powder.  Finally I covered the edge of another piece of white cardstock with versamark and heat-embossed it with gold embossing powder to create a frame.  I adhered the tree panel to the gold frame and that was it!

These would be fun and easy cards to mass produce for a holiday card.  You could use different color palettes or do an ombre look using varying shades of one color.  Thanks so much for stopping by today and have a wonderful day.

jess

Supplies:

Grab Our Button

i Luv MarkerPOP
Show some MarkerPOP LUV,

add this button to your blog.

I’m a Winner!

I'm a Winner on MarkerPOP Blog
Copy and paste the code under the badge

to claim your bragging rights!

I’ve Made Top 3!

WoHooooo I made it to the Top 3 on MarkerPOP Blog
Copy and paste the code under the badge

to claim your bragging rights!

Visit Us!

MarkerPOP Free Shipping MarkerPOP Boutique
18299 Mount Baldy Cir
Fountain Valley, CA 92708
Toll Free: 1-855-312-1222
Phone: 1-714-249-1222