$10 Gift Voucher - Leave a Comment

Posts Tagged ‘Holly’

Fay Loves Fall…

Written by Holly Endress. Posted in Eye Candy (Projects), Tips & Tricks, Tutorials, Videos

Hi everyone, it’s Holly here and today I have a cute Fall card using the adorable Fay Loves Fall stamp from the Tiny Townie line from Stampingbella.

mph2

I stamped the image onto a piece of White card stock using some Memento Tuxedo Black ink and I colored it in with the following Copics:

 YG01,03,17 & 67 / YR04,68 & 09 / E31, E34 & E37 / E50, 21 & R20 / BV000, 01, 02 & 08 / W00, 3, 7 & 9 / C1, 3, 5 & 9 /BG0000 & BG000 / YR27, R27 & R46 / 0 Colorless Blender & Copic Multi-liner 0.3

Then I added some Clear Wink of Stella to the lace and the flower on her hat for a bit of shimmer. I die cut the image panel using the Mama Elephant Basics Die set and then I stamped the sentiment from the same set onto the upper corner.

mp3

I die cut a piece of Fall Friends 6×6 pattern paper from Doodlebug using the large scallop border in the same Mama Elephant die set and I adhered that piece to a top folding A2 size card base using the Scotch ATG gun. Then I added some foam adhesive to the back of the image panel and attached it to the card front. This such a great image for Fall and so fun to color!

mp1

Check out the video below..

https://youtu.be/pdP_dZGPn74

Holly


Thanks so much!!

Written by Holly Endress. Posted in Eye Candy (Projects), Tips & Tricks, Tutorials, Videos

Hello everyone and welcome back to the markerPop blog it’s Holly here and today I have a card for you using the Watercolor Flowers and Written in Watercolor Sets from My Favorite Things.

wf1

I stamped the flower images onto a piece of Ranger Distress watercolor cardstock on the smooth side using Distress Ink Markers. The stamp had three layers and the first was stamped with Festive Berries and then Fired Brick and Gathered Twigs. The center of the flowers is stamped with Black Soot. You could also stamp this with the Distress Inks as well… but this is another great use for the markers. The leaves are stamped in Peeled Paint and Forest Moss. I created a soft wash behind the flowers using Stormy Sky. I scribbled the marker onto a clear block and applied it with a wet brush.

wf2

Once the inks were all dry I stamped the sentiment from Written in Watercolor using some Black VersaFine ink. Then I trimmed the panel to size. I created a white top folding card base and I added a piece of pattern paper from the Pebbles Happy Day 6×6 pad. I backed the image panel with a piece of Black cardstock and titled each panel and adhered them to the card front using some foam tape.

wf3

I wanted to bring in a little more black with any added sparkle so I added some Onyx sequins in 4 & 6mm sizes from Pretty Pink Posh. These sequins are great because they have a Matte finish and are perfect when you want a more subtle look. Tip: If your image is a bit splotchy after stamping onto the watercolor paper you can smooth it out with a damp water brush and it’ll give even more of a watercolor look.

Check out the video to see how I created this look.

Holly

MarkerPop! Challenge #78: Halloween (Booyah!!!)

Written by Holly Endress. Posted in Challenges, Eye Candy (Projects), Tutorials, Uncategorized, Videos

Hi Crafters!! It’s time for our next Challenge, and the theme is Halloween!

Challenge #78: Halloween

THE CHALLENGE: Halloween!

Create a project using your Copics or any of the markers that we carry!

You may play along with other challenges, but excessive challenge pile-ons (more than 10) will result in disqualification for our amazing prize. As always, have fun creating!
THE PRIZE this month is the PAPER SMOOCHES GHOULFRIENDS STAMP SET!
Challenge #78 Prize

One entry will be chosen at random to receive our prize. Three additional entries will be chosen for the ‘Top 3′ based on their amazing coloring skills. The prize winner and top three can all proudly post their brag buttons on their blogs for the world to see!

Entries are due by Sunday, October 4, 2015 at noon CST.  Winner will have TWO weeks to claim their prize.

**International winners will be responsible for shipping costs if they choose to claim their prize**

_____________________________________________________________________________________________

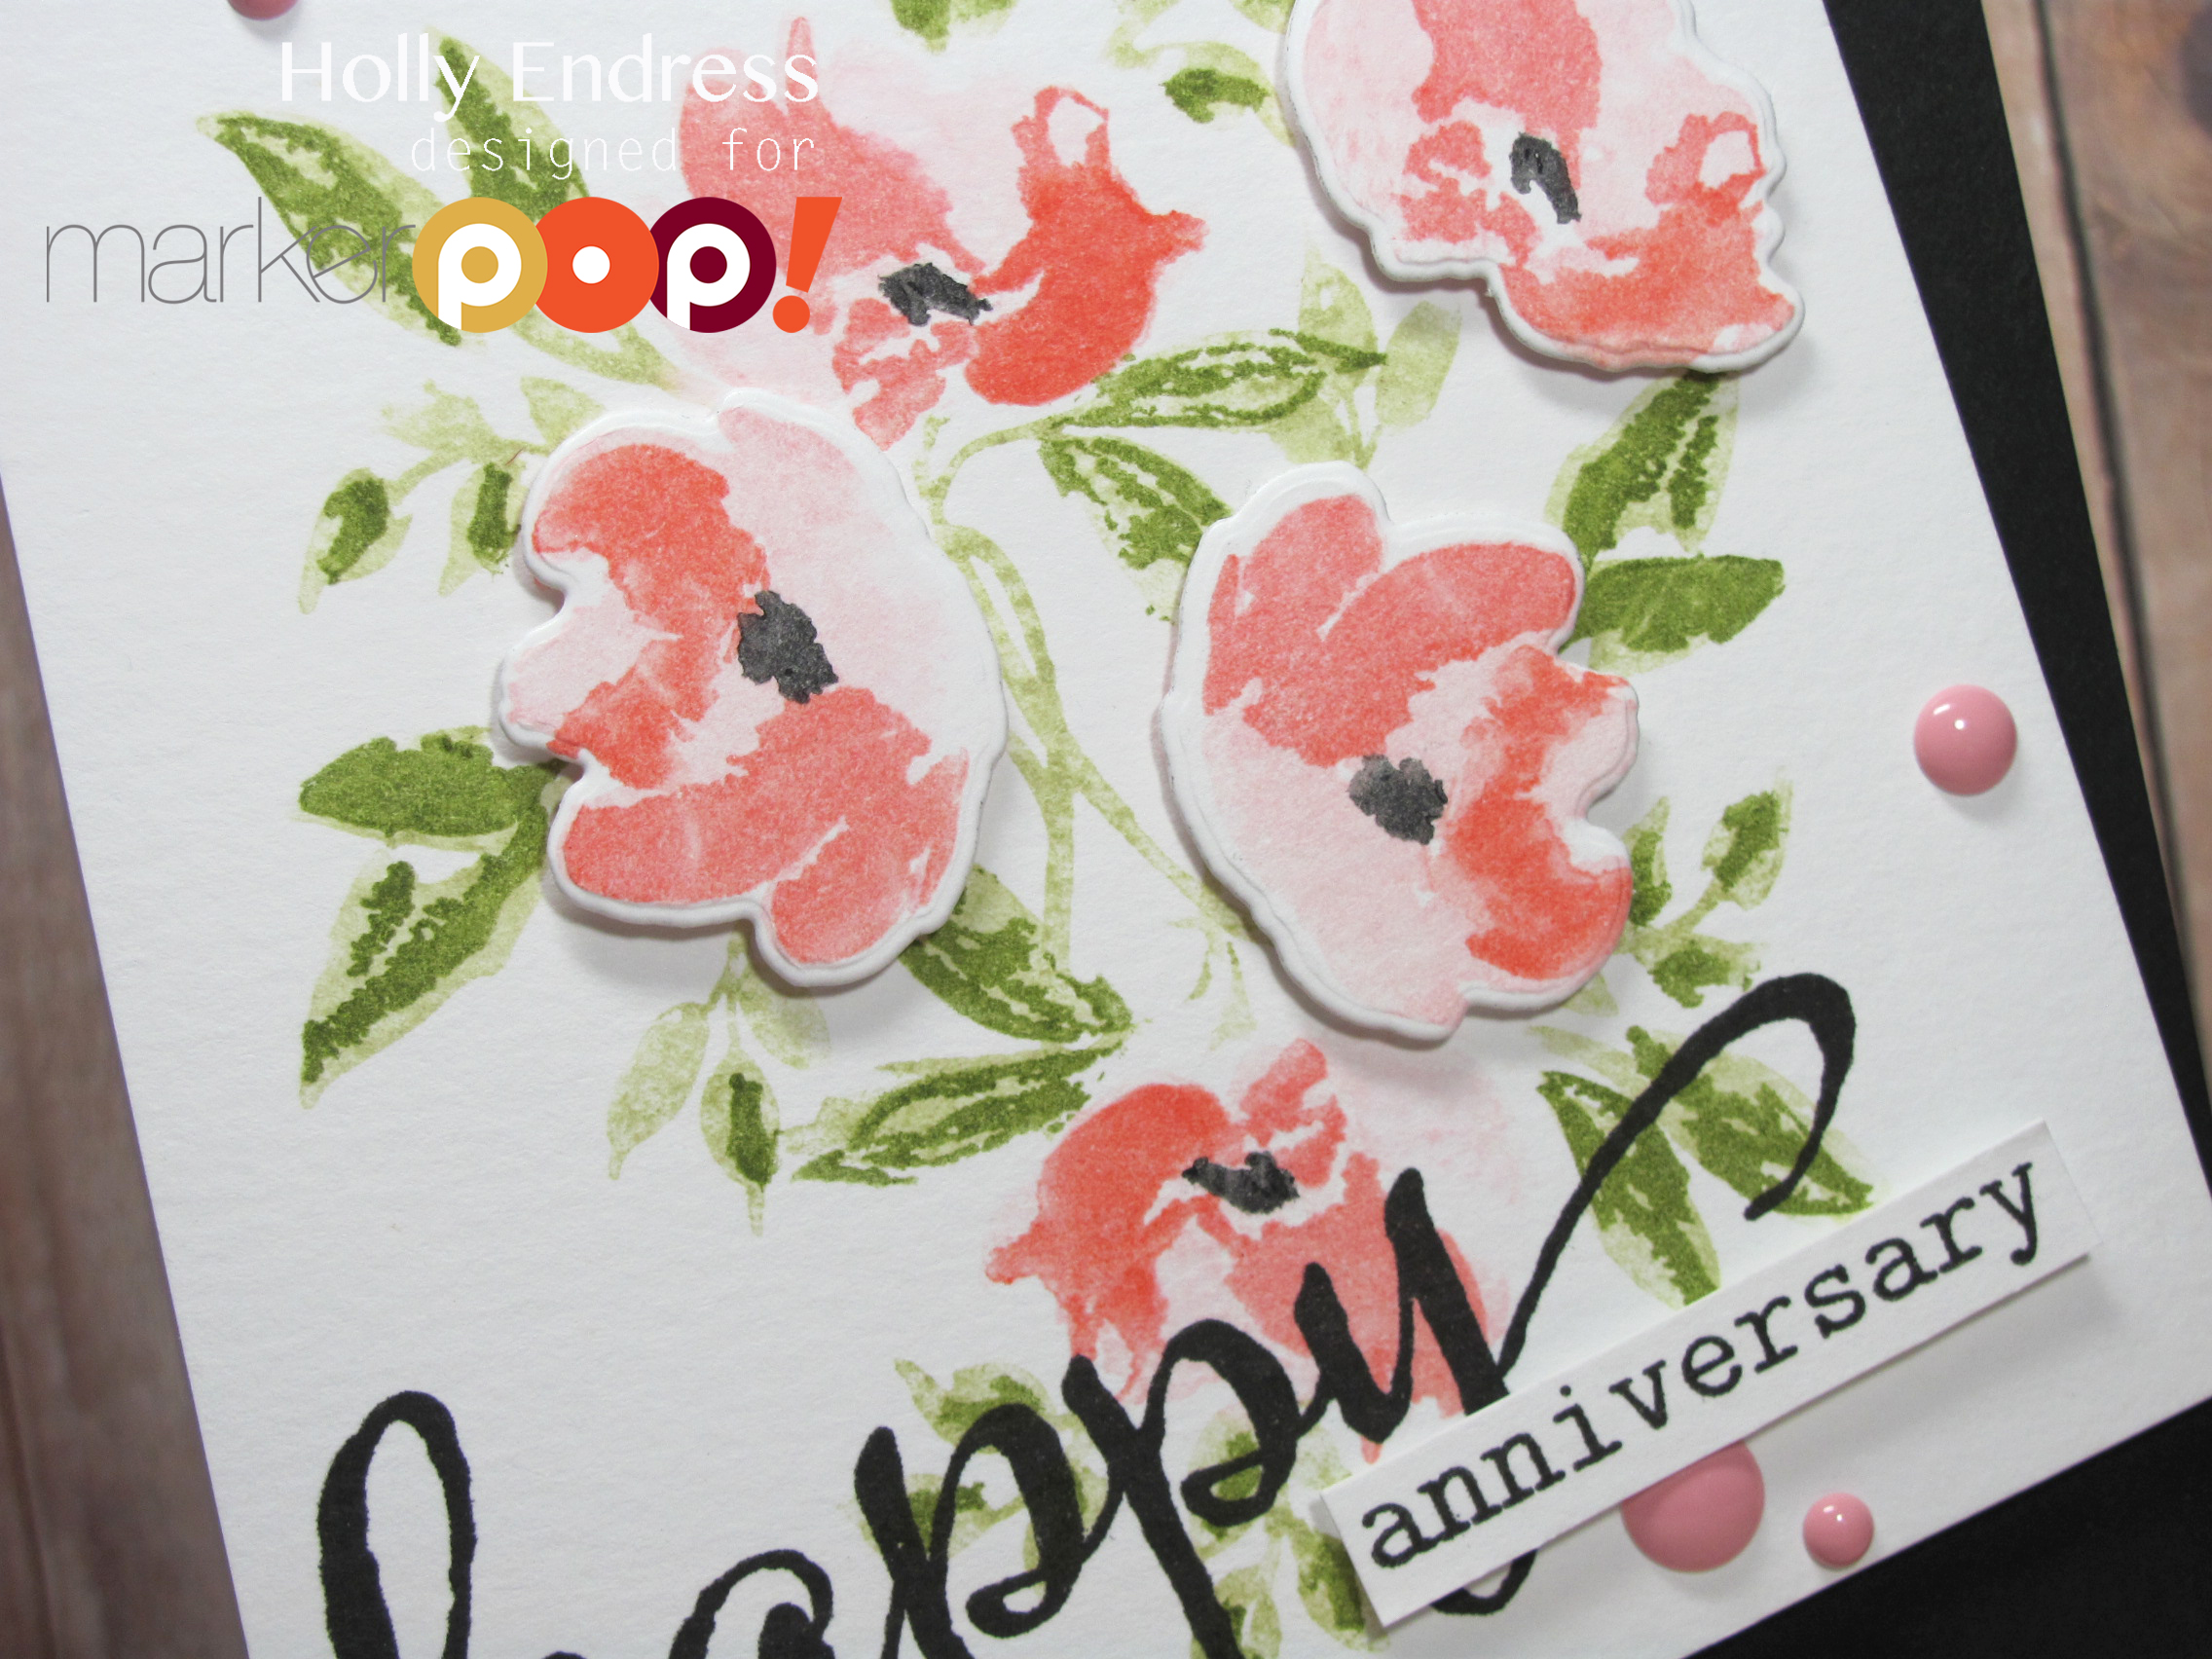
Hi everyone… Holly here! Who’s ready for a fun new Challenge? This time it’s all about Halloween… and I created a super cute and maybe a little spooky card using the super adorable Booyah set from Lawn Fawn.

mph2

I die cut a piece of watercolor paper using a stitched rectangle die and then I created a watercolored background using some Distress ink in Hickory Smoke and Black Soot. Once the background was dry I added some splatter with some Picket Fence Distress Spray Stain.

mp1

I stamped the ghost onto some white card stock using Memento Tuxedo Black ink and colored them in with Copics in the following colors : C9,C7, C5, C3, C1, C0, Y21, Y26, E23, BV04, BV08 & 0. I cut them out and outlined the edges with a Tuxedo Black marker. Then I adhered them to the background using some dimensional adhesive. The image panel was mounted to a Black card base.

mp3

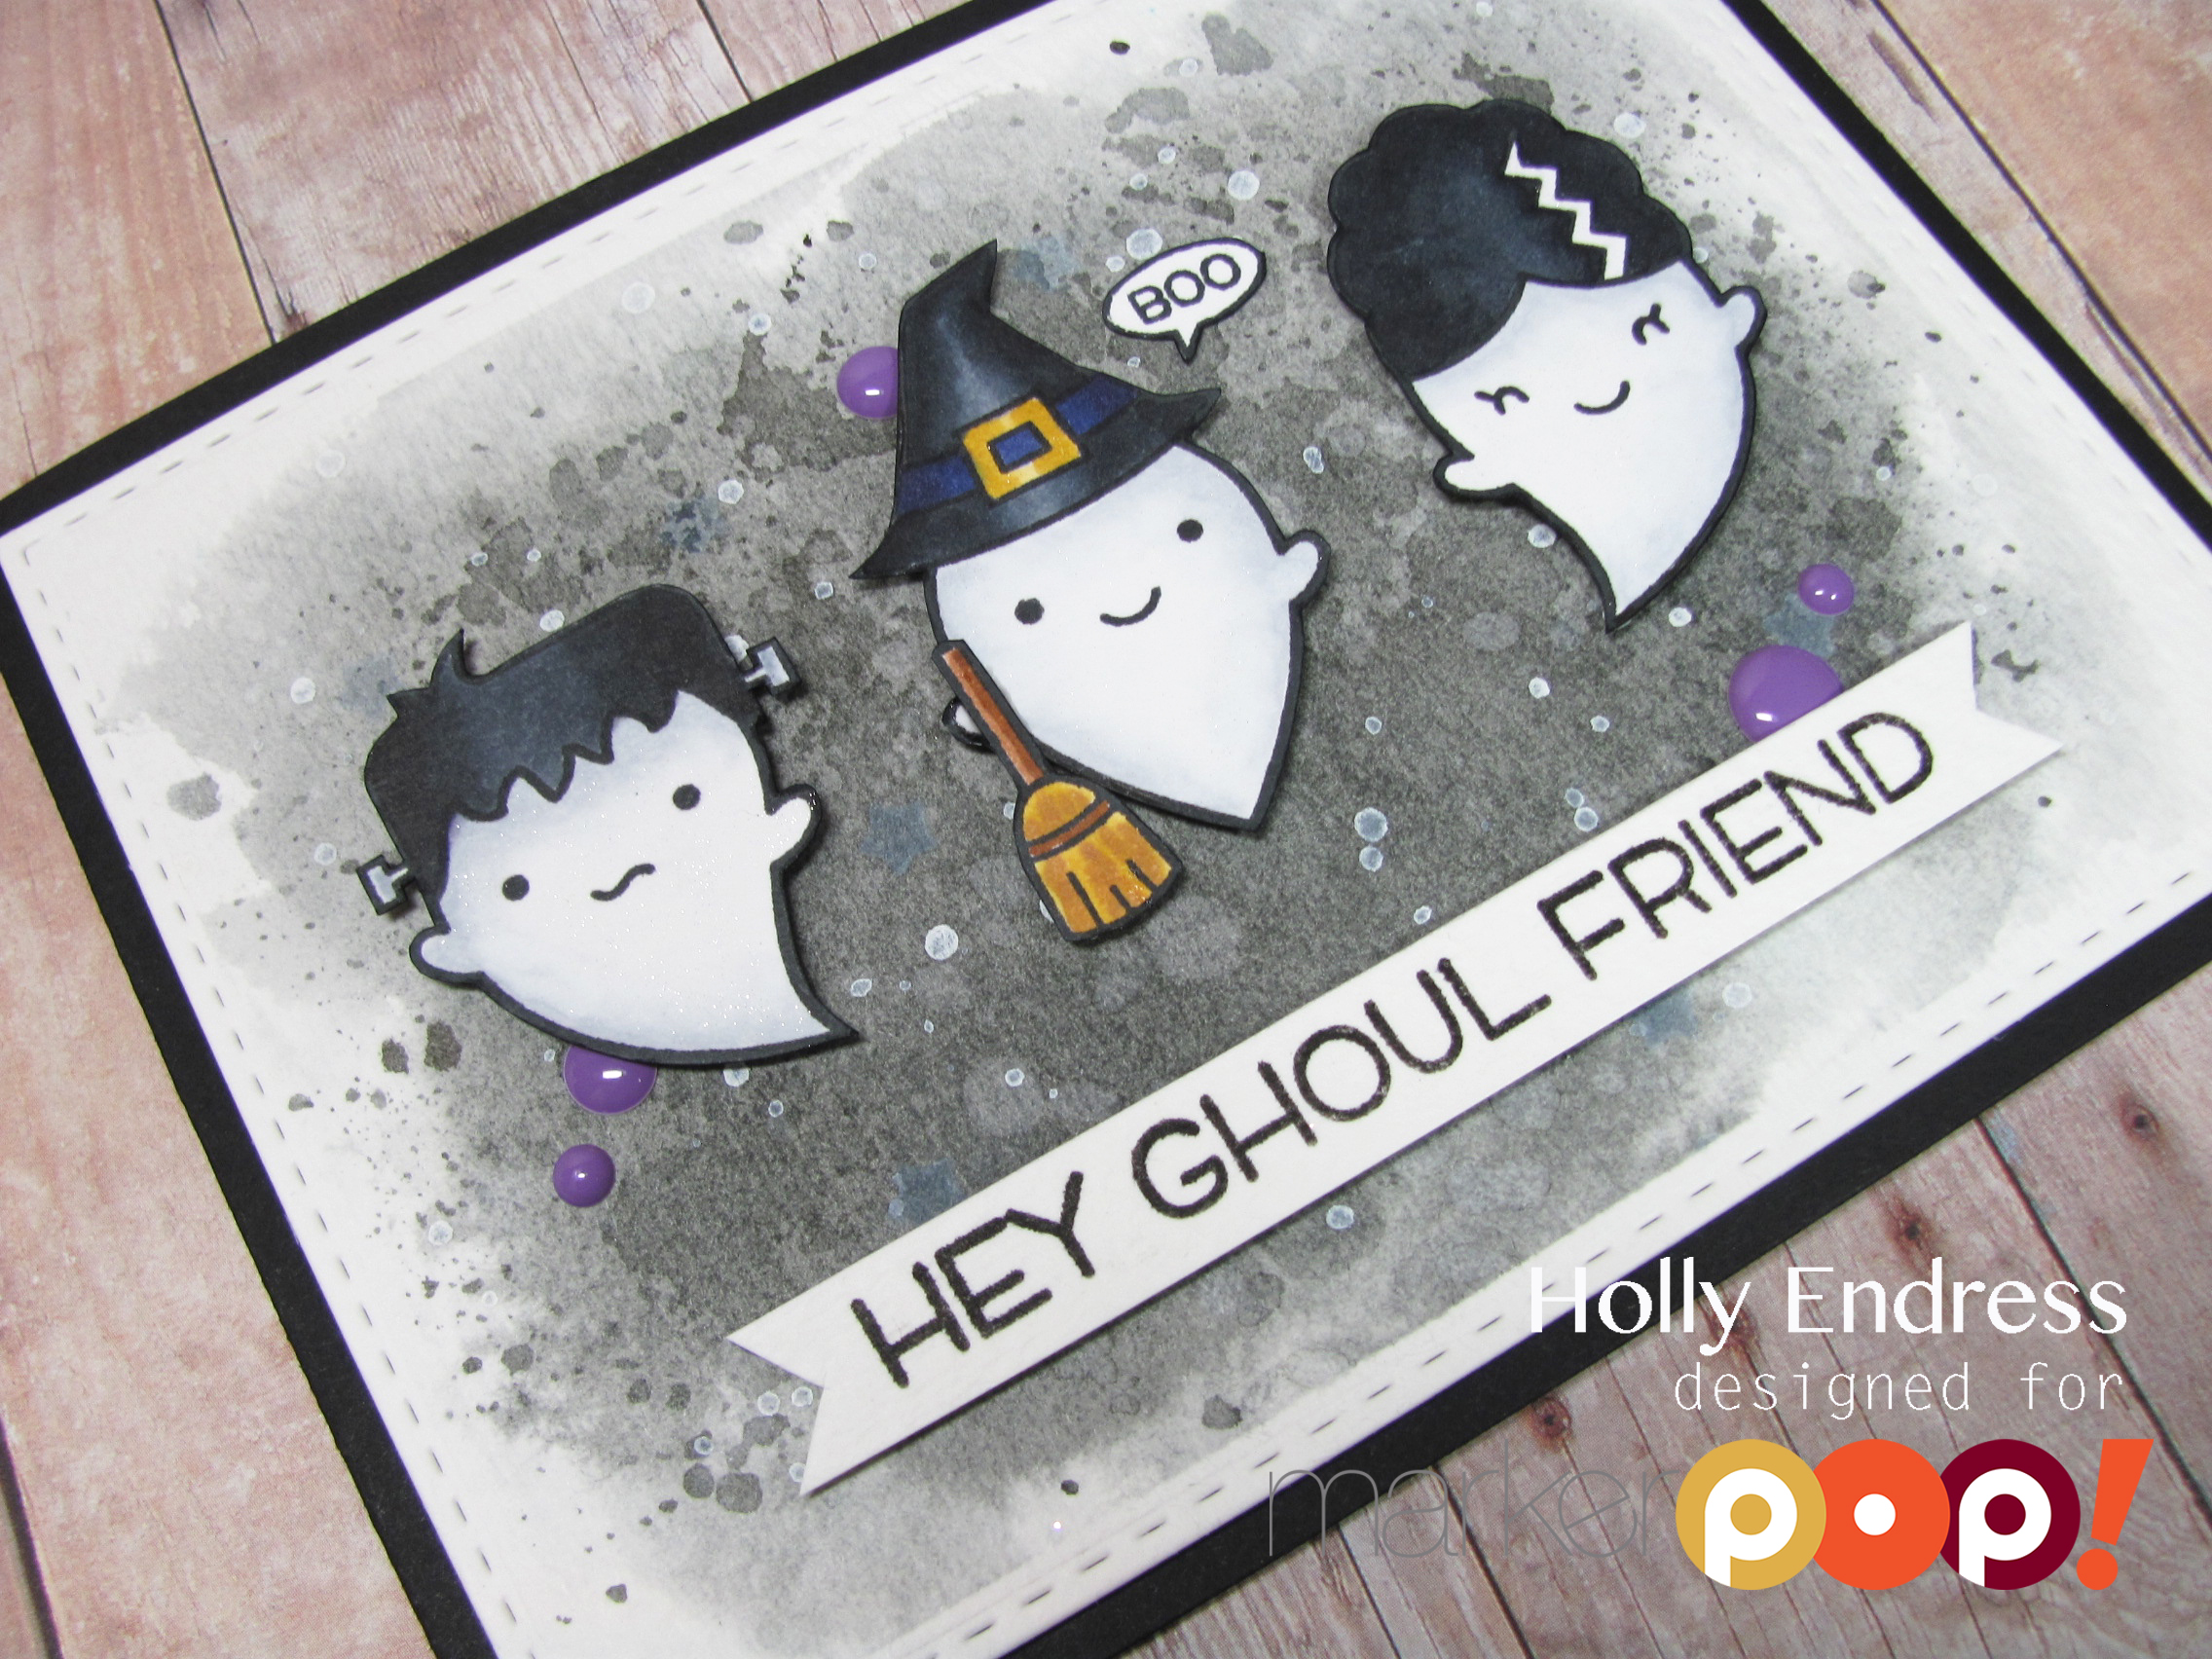
I stamped the sentiment from the same set onto a piece of watercolor card stock and added it to the front with dimensional adhesive as well. There’s some purple on the Witches hat and I wanted to bring some more of that in so I added some Lilac Sprinkles from Doodlebug for an added pop! Each Ghost image is covered with some Clear Wink of Stella as well. As I was writing this I noticed I forgot to add Frankie’s Stitches lol … so when you get this set.. don’t forget the stitches.

Check out the Video below to see how I created this fun card.

Happy Anniversary!!

Written by Holly Endress. Posted in Eye Candy (Projects), Tips & Tricks

Hi everyone it’s Holly here.. I hope you all had a great weekend. Today I have an Anniversary card for you using Distress Markers directly on the Stamps to color with. This is a great way to get another use from your Markers.

mp2

I’m using the Watercolor Anemones Set from WPlus9 and the coordinating dies. My sentiment is from the Winnie & Walter set The Big, the Bold & the Happy.  I stamped the flowers directly onto a piece of Tim Holtz Distress Watercolor card stock . I stamped onto the smoother side of the paper using the Markers directly onto the stamps and then huffing (huff moisture using your breath onto the stamp too add moisture ) the ink before stamping onto the paper.

mp1

Once the images were stamped I added the sentiment from Winnie & Walter using some VersaFine Black ink and then I stamped a few of the flowers onto a scrap of watercolor paper and die cut them using the coordinating dies and adhered them using some dimensional adhesive.

mp3

I trimmed the image panel so it would be tilted on the card front and adhered it using my ATG gun. Lately I’ve been obsessed with enamel dots so of course I had to add some..lol These are from the Cupcake assortment from Doodlebug.

The Distress Markers used were Spun Sugar, Worn Lipstick & Abandoned Coral for the Flowers. Shabby Shutters & Peeled Paint for the Leaves & Black Soot for the flower centers.

Don’t forget about the Giveaways each DT member is doing… There is just a few days left to enter for a chance to win! You can enter to win the Altenew Label Love here.

Thanks for stopping by today!

Holly

Grab Our Button

i Luv MarkerPOP
Show some MarkerPOP LUV,

add this button to your blog.

I’m a Winner!

I'm a Winner on MarkerPOP Blog
Copy and paste the code under the badge

to claim your bragging rights!

I’ve Made Top 3!

WoHooooo I made it to the Top 3 on MarkerPOP Blog
Copy and paste the code under the badge

to claim your bragging rights!

Visit Us!

MarkerPOP Free Shipping MarkerPOP Boutique
18299 Mount Baldy Cir
Fountain Valley, CA 92708
Toll Free: 1-855-312-1222
Phone: 1-714-249-1222