$10 Gift Voucher - Leave a Comment

Posts Tagged ‘Copic Markers’

We Flamin-go Together!

Written by Jessica Frost. Posted in Eye Candy (Projects)

Good morning and Happy Friday!!  Jess here with a bright and sparkly card featuring a really cute set from Lawn Fawn!

I’m still as annoyed with the hot weather as I was last week but I’m trying to channel tropical islands instead of hot, humid Virginia! 😉

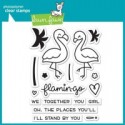
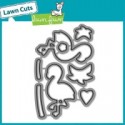
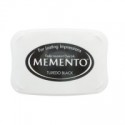
To start I stamped the flamingos from Lawn Fawn’s Flamingo Together with copic-friendly Memento Tuxedo Black ink onto Neenah Solar White cardstock.  I colored the plumage of the male flamingo with RV13, RV14, and RV25 and the female flamingo with RV21, RV23, and RV04.  I colored their beaks with N0, N3, and N6 and then die-cut them with the coordinating dies.

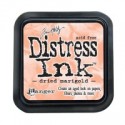
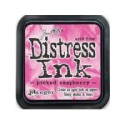
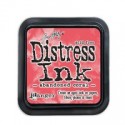
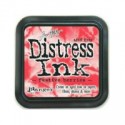
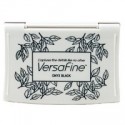
Next I blended Festive Berries, Abandoned Coral, Picked Raspberry, and Dried Marigold distress inks onto a piece of Ranger watercolor cardstock to create my sky.  I knew my flamingos were going to stand on a island so I die-cut the Stitched Hillside Borders with black cardstock and traced the edge onto my background panel.  Then  I stamped the palm trees onto the background panel with versafine to get a nice, dark impression.

I decided it needed a little more sparkle so I pressed my versamark pad ALL over the background panel and embossed it with holographic embossing powder.  Look at that sparkle!!

I stamped the sentiment from Flamingo Together onto the island with versamark and heat-embossed it with white embossing powder before adhering it to the background panel with foam mounting tape.  I added a little foam mounting tape behind the body of my flamingos and regular liquid adhesive to their legs and adhered them over the island.  Finally I stamped the heart with versamark, heat-embossed it with white embossing powder, die-cut it, and added it over their heads with foam mounting tape.

Still not a fan of summer…but I think I could hang out on this island and not complain too much! 😉 Thanks so much for stopping by and have a wonderful weekend!

jess

Supplies:

Wishing You Rainbows!

Written by Jessica Frost. Posted in Eye Candy (Projects)

Good morning!  Jess here with a sparkly card featuring the adorable unicorn from Mama Elephant!

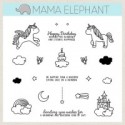
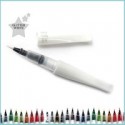
First I stamped and heat-embossed my unicorn from Mama Elephant’s Unicorns and Rainbows with silver embossing powder and then colored him with zig clean color real brush markers!  I wanted to get a rainbow look so I scribbled a tiny bit of each color along the mane, tail, and hooves and the blended it together with a wink of stella clear glitter brush for a super sparkly look.  I apologize for the darker photo…it was difficult to photograph the embossing powder up-close.

Next I die-cut the unicorn and set him aside while I worked on the rest of the card.

Next I die-cut the rainbow from Rainbow High and then colored each arch with copic markers (R22, R12, Y11, YG11, B00, BV01, V12).  I used lighter shades to create a soft pastel rainbow.  Then I covered the rainbow with my wink of stella clear glitter brush!  Again, not a great photo here but you can see all that shimmery, sparkly goodness! 😉

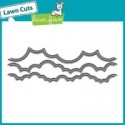
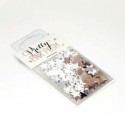
I die-cut the Lawn Fawn Puffy Cloud Borders with vellum and white cardstock and then covered the vellum with more wink of stella clear glitter.  I stamped the sentiment from Unicorns and Rainbows onto the top cloud layer and heat-embossed it with silver embossing powder.  Next I layered all the elements on the bottom half of my card panel using a combination of foam mounting tape and regular adhesive for a little dimension.  Finally to finish the card, I added a few silver sparkly stars from Pretty Pink Posh.

Thanks so much for stopping by!  I hope you have a fabulous day filled with unicorns and rainbows! 🙂

-Jess

From the Whole Herd…

Written by Annette Allen. Posted in Eye Candy (Projects)

Today I am getting crafty with:
  • Make card from card-stock
  • Stamp, color and die cut all images (if you do not own the matching dies use fine scissors)
  • Die cut grass three times and layer using foam adhesives to give dimension.
  • Stamp sentiment.
  • Add all the colored images to card using foam adhesives.
Thanks for stopping by.
Happy MarkerPop! shopping.

Lucky Charm…

Written by Annette Allen. Posted in Eye Candy (Projects)

Happy St. Patricks Day MarkerPop! friends.
Annette Allen here with you today.
Today I am getting crafty with:
  • Make card from card-stock.
  • Cut designer paper and adhere to card.
  • Stamp and color all images on separate piece of card-stock.
  • Using matching dies cut images out.
  • Cut a piece of watercolor paper and create colorful background using ZIG Clean Color Real Brushes.
  • Stamp Sentiment.
  • Adhere images to card using foam adhesives.
Thanks for stopping by.
Have a crafty day.


Grab Our Button

i Luv MarkerPOP
Show some MarkerPOP LUV,

add this button to your blog.

I’m a Winner!

I'm a Winner on MarkerPOP Blog
Copy and paste the code under the badge

to claim your bragging rights!

I’ve Made Top 3!

WoHooooo I made it to the Top 3 on MarkerPOP Blog
Copy and paste the code under the badge

to claim your bragging rights!

Visit Us!

MarkerPOP Free Shipping MarkerPOP Boutique
18299 Mount Baldy Cir
Fountain Valley, CA 92708
Toll Free: 1-855-312-1222
Phone: 1-714-249-1222