$10 Gift Voucher - Leave a Comment

Warmest Thanks

Written by Holly Endress. Posted in Eye Candy (Projects), Tutorials, Uncategorized, Videos

Happy Monday everyone.. The Design team is taking a break to enjoy the Holidays with their families so this will be the last post you see for the rest of the year. We wanted to remind you that our Current Challenge will end this Friday December 30th @ 11pm EST. The theme this week is Winter and I’ve created a card that’s perfect for all those Winter Thank You cards or you can change up the sentiment for any occasion.

mp33

For more details on how I created these cards you can check out the video at the end of the post.

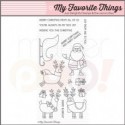
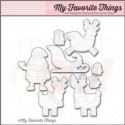
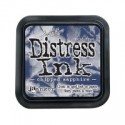
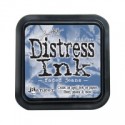
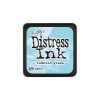
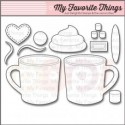
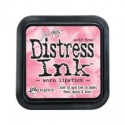
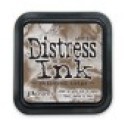
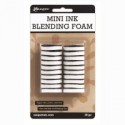
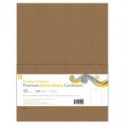
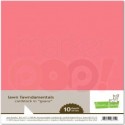
I started with the Simple Stories Winter Wonderland 6×6 pad and pulled the colors form the papers. I decided to use Neenah Solar White, Kraft, Soft Sky and Lawn Fawn’s Guava. I die cut the Mug images from the Hot Cocoa Cups die-namics from My Favorite Things. Once the images were all die cut I added some shading with Distress Inks and a Mini ink Blending tool . I used Weathered Wood, Worn Lipstick, Vintage Photo and on the Kraft Mugs I used Gathered Twigs. On the Whipped Cream and Marshmallows I added some Copic Markers in C00, C1 & 0 to create some dimension.

img_3680

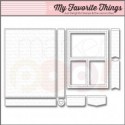
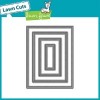
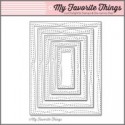
I wanted a little texture to the Whipped Cream and Marshmallows but I didn’t want any shimmer like Glitter. So I added some Clear Rock Candy Stickles and let the pieces dry. I die cut the patter papers with the Wonky Stitched Rectangle Die-namics from MFT and then I created the card on a top Folding A2 size base from some Neenah Solar White card stock. I stamped the sentiment from the MFT Hug in a Mug set onto some White card stock with Lawn Fawn’s Walnut ink and used one of the MFT Stitched Sentiment Strips to die cut the banner.

mp1

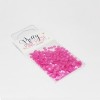
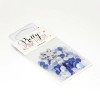
I added the banner to the center panel and then the cups. For an extra pop of color I used some of the Coordinating Enamel Dots from the Winter Wonderland collection as well. This card was so fun to make… I still have a few more to make and send out.

Have a great rest of the Holiday and We Wish you all the best in the New Year!

2


Merry Everything!!

Written by Holly Endress. Posted in Eye Candy (Projects), Tutorials, Videos

Happy Friday everyone.. Who’s ready for the Weekend? It’s Holly here today and I have a Super Cute card featuring products from My Favorite Things and a new Video for you.

mp33

I started out die cutting a piece of Neenah Solar White card stock using the Large Rectangle from the Blueprints #29 Die-namics set and then I die cut the new Starry Circle Die-namic from the center as well. I added some color to the circle panel with some Faded Jeans and Chipped Sapphire Distress Inks. Then I stamped the sentiment in the lower corner of the panel and adhered it to a card front. I inlaid the starry die cut back into the center. All of the little star die cuts from the center die I added some Spectrum Noir Sparkle Pen and inlaid them back into the center image.

mp11

I stamped the reindeer images from the Merry Everything set using some Memento Tuxedo Black ink and I colored the images in with Copics. Then I cut the images out using the coordinating die cuts. I adhered the images over the Starry Center using some Scotch foam tape. For a bit more Sparkle I added some of the Sparkle Pen to the ornaments and the Scarves on the deer.

mp22

I used the following Copics to color the images:

 E31, E34, E35, E37 & E29 / G28, G07 & Yg17 / C3, C1 & C0 / Y13 & Y15 / R24, R27 & R29 / R30 / B26, B24 & B23

You can see more on how I created this card in the Video Below:

Thanks for stopping by today!!

2


Have A Magical Season with Lawn Fawn

Written by lisascreativeniche. Posted in Tutorials

Hello!  It is Lisa here with you today and I have a super cute and fun Seasonal Shaker card with you all today using the new Frosty Fairy Friends by Lawn Fawn

img_7952

To create this card I started by stamping my branch images around the sides and top of a white panel.  I then die cut this panel with the Lawn Fawn Small Stitched Rectangle cuts to create my frame.  The sentiment was stamped along the bottom of the frame and this was set to the side.  I used the inside of the frame to draw a guideline onto another piece of white card stock with a pencil so I would know where to stamp my house and snowflakes.  The house and snowflakes were colored using various Copic® Markers: Christmas Lights (YG12, Y15, B05), Sky (B000, RV10), Snow (C0, C1,) Treehouse (E15, E 25, E27, V12, V15, RV14, RV25) Copic Multiliner Sepia for lines on the treehouse.  Since I was coloring a make believe place I wanted my colors to be whimsy and fun hence I added purple and pink trimming with some pink in the sky.

Next it was time to create the shaker aspect so I cut a piece of acetate to fit the frame, added a mix of Pretty Pink Posh’s Cupped Sequins Winter Snow, Pink Blush, Pink Peonies, as well as some beads from my own stash and adhered the tree scene to the back with foam adhesive.  I then layered my frame back into itself on the card front.  I still felt like the card was missing a little something so I decided to stamp and color one of the fairy images to adhere in the top left corner. Copic® Markers used for my fairy were: face (E00, E11, R20) Hair (YR21, YR23, Y26) Outfit (RV10, RV23, V12, V15).

img_7953

And there you have it!  A sweet wintery scene that can also provide some card shaking fun.

Thanks so much for stopping by and Happy Crafting!

designteam2016lisa

Happy Thanksgiving with Cute Critters!

Written by lisascreativeniche. Posted in Tutorials

Hello wonderful crafty friends!  It is Lisa here with you today, and while I know so many of us are getting ready for Halloween, the very next Holiday (Thanksgiving) will be upon us in America in not time at all.  So I’m just getting a little jump on things and sharing this super cute Thanksgiving card with all of you today…

img_7905

img_7906


To create this card I started by stamping the pumpkins and little pilgrim beavers from the Giving Thanks set by Pretty Pink Posh onto Neenah Solar White Cardstock and colored them in with Copic Markers (E11, E15, E37, YR04, YR15, YR18, B95, B97, Y15, Y17, RV10, RV63, RV91, RV95). I then cut all of them out and set to the side.  I then stamped the leaf and acorn images all over the front of my cardbase, colored these in with Copic Markers (YG03, YR15, R46, E15, E27).  This time I did not add any shading as this was just for the background and I wanted the main focus to be on the characters.  I then went over the background with Tumbled Glass Distress Ink.  I wanted to add a green little hill for my critters to stand on and to double as a place for my sentiment so I die cut a hill from the Lawn Fawn Let’s Polka in the Meadow Paper Pack and with the Pretty Pink Posh Stitched Borders Die Set.  I then stamped my sentiment with Versafine ink and added the critters with foam adhesive for more dimension.

img_7907

Thanks so much for stopping by today and Happy Crafting!

designteam2016lisa

Grab Our Button

i Luv MarkerPOP
Show some MarkerPOP LUV,

add this button to your blog.

I’m a Winner!

I'm a Winner on MarkerPOP Blog
Copy and paste the code under the badge

to claim your bragging rights!

I’ve Made Top 3!

WoHooooo I made it to the Top 3 on MarkerPOP Blog
Copy and paste the code under the badge

to claim your bragging rights!

Visit Us!

MarkerPOP Free Shipping MarkerPOP Boutique
18299 Mount Baldy Cir
Fountain Valley, CA 92708
Toll Free: 1-855-312-1222
Phone: 1-714-249-1222