$10 Gift Voucher - Leave a Comment

Author Archive

A little Spooky…

Written by lisascreativeniche. Posted in Eye Candy (Projects)

Hello!  It’s Lisa here today and I have a fun Halloween card to share with all of you today using the new Avery Elle Bad Kitty Set.  Since this set is smaller, it’s also lighter on the wallet which is always a good thing!  But don’t underestimate it’s size, this set can still pack a big and spooky punch…

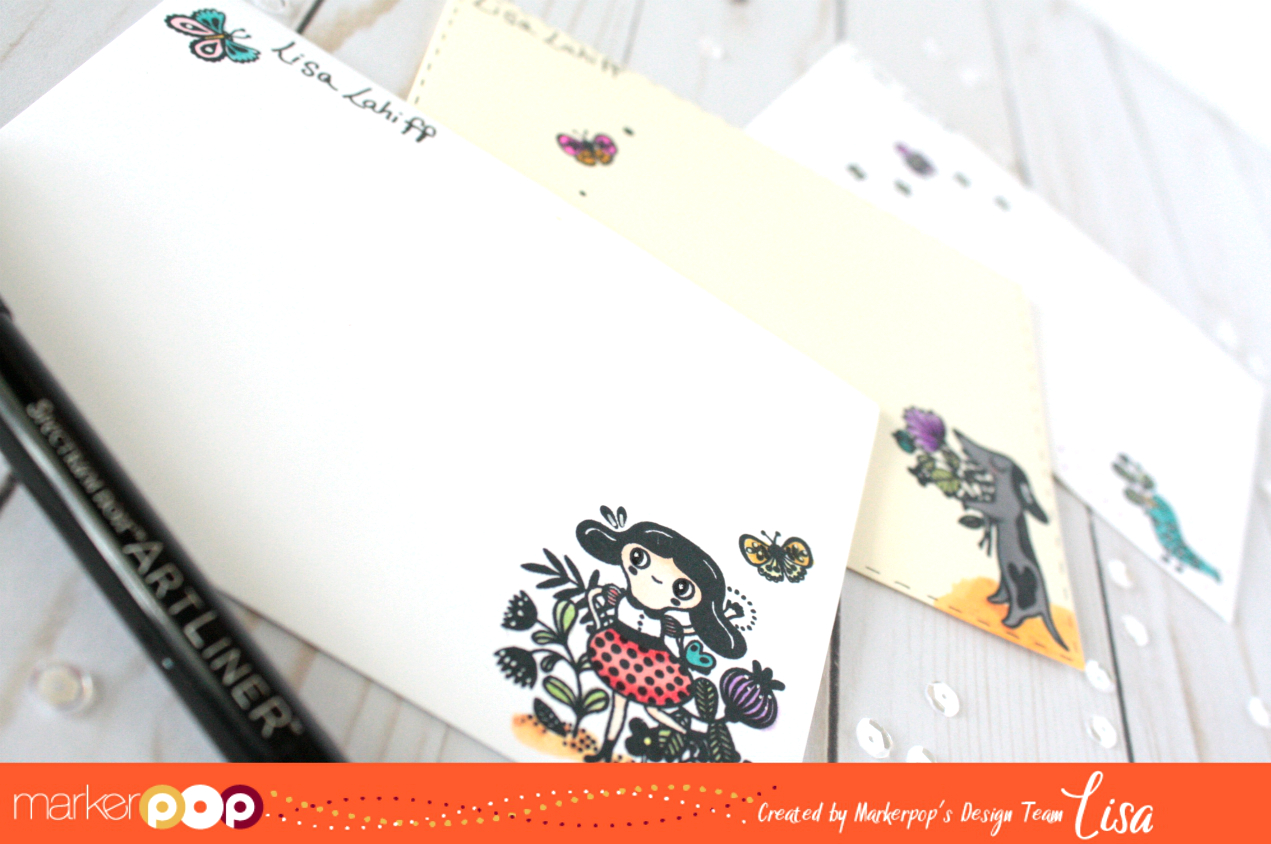
To create this card I started by stamping my pumpkin and cat onto separate cardstock.  I then used my Spectrum Noir Illustrator Markers in TN5, TN8, OR1, OR2, CT2, IG5, IG6, IG8, DR1, DR2, LG2 to color them in before cutting them out.  When I am handing cutting an image I like to go over the edges with my Memento Marker in Tuxedo Black.  This may seem a little redundant, but trust me it can make a big difference.  After these guys were are set for my card I started working on my cardbase.  First, I stamped the bats to look like they would be flying out of the pumpkin.  Next, came my spider web, spider and sentiment in the opposite corner.  To achieve a night sky I used a mix of Distress Oxide and Distress Inks.  My spider web seemed to fade more into the background than I wanted it to so I traced over the image and drew a line to my spider with a white gel pen.  I like the shadow effect it gave too.

A few mist splatters later and my cardbase was ready for my witch kitty and pumpkin.  I layered the pumpkin with foam adhesive for dimension to my scene. Everything looked cute, but I still felt like it was lacking one more thing… bling!  So I added one red rhinestone to the cats collar and called it a day.

Thanks so much for stopping by today!  Don’t forget to join in our biweekly challenge, as this time MarkerPOP is giving away a nice Nuvo Goodie Pack!

Happy Crafting!

Supplies Used:


Envelope Fun

Written by lisascreativeniche. Posted in Eye Candy (Projects)

Hi!  It’s Lisa here with you today, and instead of sharing a card I have some fun postable artwork to share!  One of my favorite things is finding happy mail in my mailbox, but I always love the extra touches that paper crafting friends add to the envelopes.  After all the envelope is the first thing a person sees when going through their mail, so I decided to give a few of my envelopes a face lift too…

I decided to do a mix of white and colored envelopes more as an experiment for my own sake to play with the difference in coloring and the overall look.  All of these were done using the Waffle Flower Enveloper From Stamp Set.  These sets are made with envelopes in mind and I adore their unique designs.  Here are a few close ups of each individual envelope…

The first two envelopes I only did my stamping on the front side.  For the last envelope I decided to add this sweet dog image toward the bottom of the flap. To color my images in I used a wide mix of Spectrum Noir Illustrator Markers (FS2, FS3, CR2, PP3, BP3, HB2, PL4, IB2, BT5, LG2, LG3, TN1, TN4, OR1, CR7, CR8, BGR2, IG5).  I also added details with a white gel pen and Spectrum Noir Artliner Pens in Black.  I will admit that the white envelopes worked better as far as having no bleeding issues with my markers as they are a thicker envelope, so if this is something that would bother you then please take the thickness into consideration.  The stamping itself did not bleed through, but my coloring did only on my colored envelope.

I hope I’ve inspired you to maybe try something different and dress up those envelopes before putting your cards in the mail.  It’s just one more way to make people smile!

Happy Crafting!

Supplies Used:


Flora An Fauna, The New Stamps on The Block

Written by lisascreativeniche. Posted in Eye Candy (Projects)

Hello, hello!  It’s Lisa here today and I’m excited to share a card I’ve created with a new to MarkerPOP stamp company called Flora And Fauna.  (They just released a new winter collection, so make sure you check those out too!)  The set I’ve chosen to work with is called Oh Hello Friend, and offers a sweet arrangement of floral images as well as two sentiments to mix and match.  Take a peek at what I’ve created…

To create this card I started by stamping my largest flower first and masking it.  Next, I stamped the rest of the flowers and leaves, as well as the sentiment.  I used a variety of Spectrum Noir Illustrator Markers to color the flowers in.  At first I wasn’t sure about stamping the leaf images in black, but I think it only helps the colors pop.  Finally, I added some background color in Tumbled Glass Distress Ink to opposing corners.  For added interest to the card front I adhered some patterned paper, before adhering the stamped panel with foam adhesive.

I hope you’ll get to stop by the store and see the rest of the stamp sets created by Flora and Fauna, and if you have any of their sets make sure to get crafty and link them up to our current challenge!

Happy Crafting!

Lisa

Supplies Used:


Wagon Beauty!

Written by lisascreativeniche. Posted in Eye Candy (Projects), Uncategorized

Hi!  It’s Lisa here today, and surprise I have a watercolor card for you today, lol!  I hope you aren’t getting tired of them, but I’m having so much fun!  The stamp set I’ve used is called Garden Wagon Mini Set by Art Impressions (AI).  This company is a new one for MarkerPOP, and if you haven’t seen their sets you def. need to check them out!  They are innovative, pretty, cute, and funny.

I started by stamping my sentiment (from Mama Elephant), wagon and floral stems with Versafine Ink.  This ink is by far my favorite to use when I’m going to be watercoloring over my stamped images.  Next, I colored directly onto my floral dots with a variety of Zig Clean Color Real Brush Markers: Lilac, Purple, and Violet.  For my grass and stamps I used Zig Clean Color Real Brush Markers: Olive Green and Deep Green and I hand drew some lines in.  Once I had all of the colors on the card I used a water brush to add some light touches to the flowers, and blended in the grass areas.  For the wagon I used Mid Gray and Green Gray.

I could have added a blue with my markers to create the sky, but I decided to take the easy way out and simply blended some Tumbled Glass Distress ink.  When everything was dry I ran the panel through my die cut machine with my Lacey Layers Waffle Flower Die.

The whole card was finished with patterned paper from the My Favorite Things Watercolor Wash Brights Paper Pack.  Thanks so much for joining me today, and I hope you’ll get a chance to play along in our recent challenge for your chance to win some goodies for yourself!

Happy Crafting!

 Supplies Used:


Grab Our Button

i Luv MarkerPOP
Show some MarkerPOP LUV,

add this button to your blog.

I’m a Winner!

I'm a Winner on MarkerPOP Blog
Copy and paste the code under the badge

to claim your bragging rights!

I’ve Made Top 3!

WoHooooo I made it to the Top 3 on MarkerPOP Blog
Copy and paste the code under the badge

to claim your bragging rights!

Visit Us!

MarkerPOP Free Shipping MarkerPOP Boutique
18299 Mount Baldy Cir
Fountain Valley, CA 92708
Toll Free: 1-855-312-1222
Phone: 1-714-249-1222